Reading view

GIMP 3.2 RC1 Released with SVG Export and New Keyboard Shortcuts

GIMP, the popular image editing software, announced the first release candidate for the next major 3.2 version yesterday.

This is the third development release for GIMP 3.2. It introduced some new keyboard shortcuts, new and improved image formats support, API changes and UI/UX improvements.

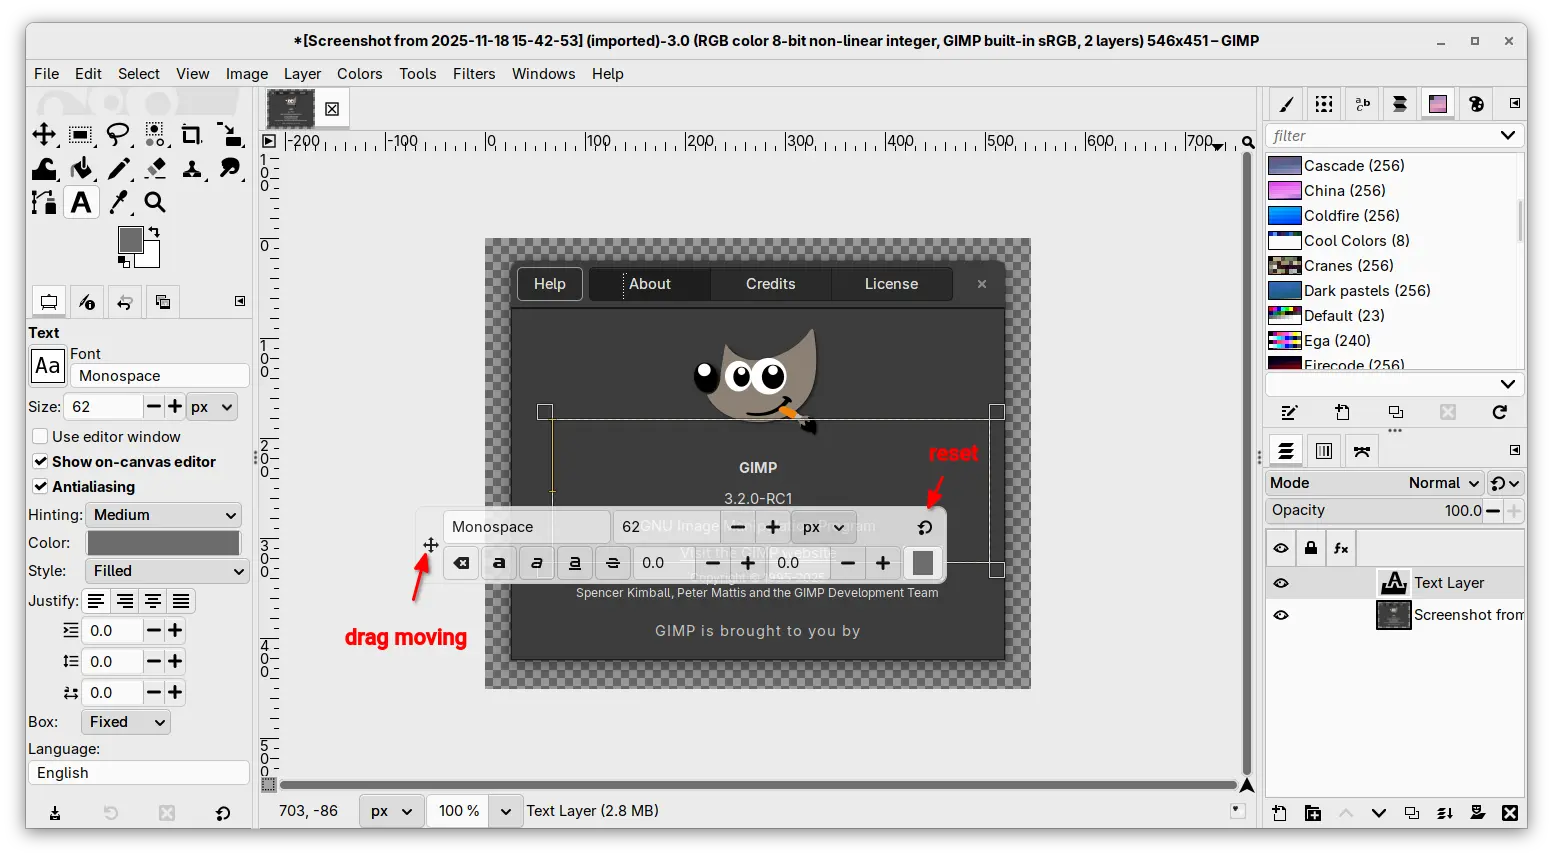
The on-canvas editor for the Text Tool now is movable. It now includes a move cursor icon in left side, allowing to drag on it to move the on-canvas editor. While, a circle arrow icon is also available to reset its position.

Besides that, this RC release added new Shift + Ctrl + V keyboard shortcut to paste unformatted text in the on-canvas editor, and new Shift+X shortcut to switch between current and last used tools, while, user has choice to change the shortcut by Edit -> Keyboard Shortcuts dialog.

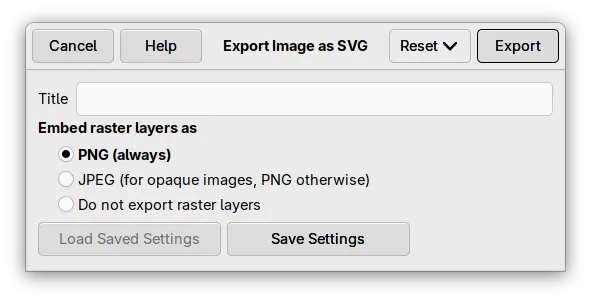
The release also added support exporting SVG as actual vectors. While, the export dialog offers options to optionally embed raster layers as either PNGs or JPEG.

The PDF plug-in now exports vector layers as actual vectors, meaning that those layers can be further edited in other vector graphics software.

As well, it supports importing PowerVR (PVR) texture files, which is most commonly used for SEGA Dreamcast games and mods, and supports loading any supported image that’s compressed by GIMP standard compression algorithms.

GIMP 3.2 RC1 also improved its UI/UX experience by allowing to drag and drop image files on-to tab bar to open multiple images, drag and drop color swatches from the Color History, and hide GIMP from macOS App Menu.

It as well updated the API with new GimpImage and GimpItem widgets added to GimpProcedureDialog, and many additional public API commands for text, vector, and link layers.

Other changes include:

  • Simulate adjustment layers with layer groups.
  • Document History dockable is now multi-selection aware.
  • Update Windows Installer with automatic Dark Mode support.
  • Update color immediately after typing hex colors without hitting Enter.
  • Fixes and improvements to the link layer and vector layer features introduced in last 3.1.4.
  • various security fixes.

For more about this RC release, see the official announcement.

How to Install GIMP 3.2 RC1

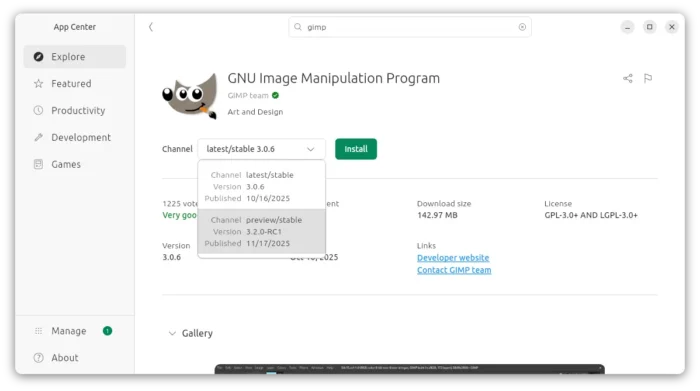
GIMP provides official installer packages for Linux, Windows, and macOS, which are available to download via the link below:

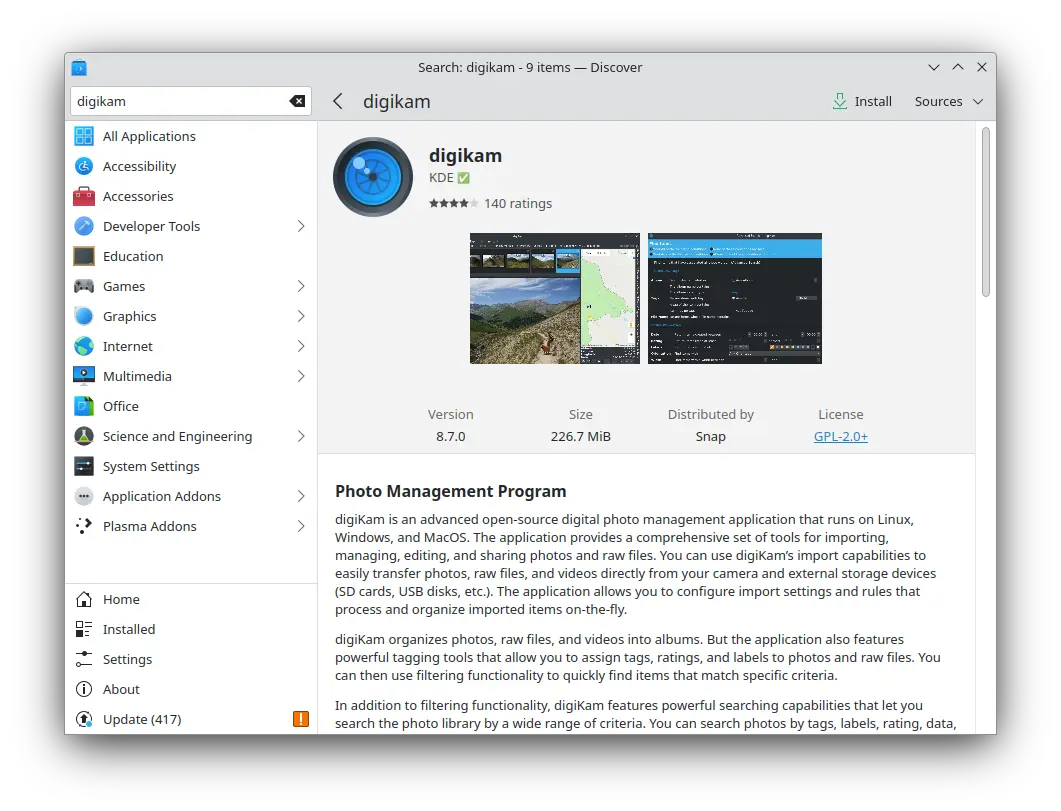
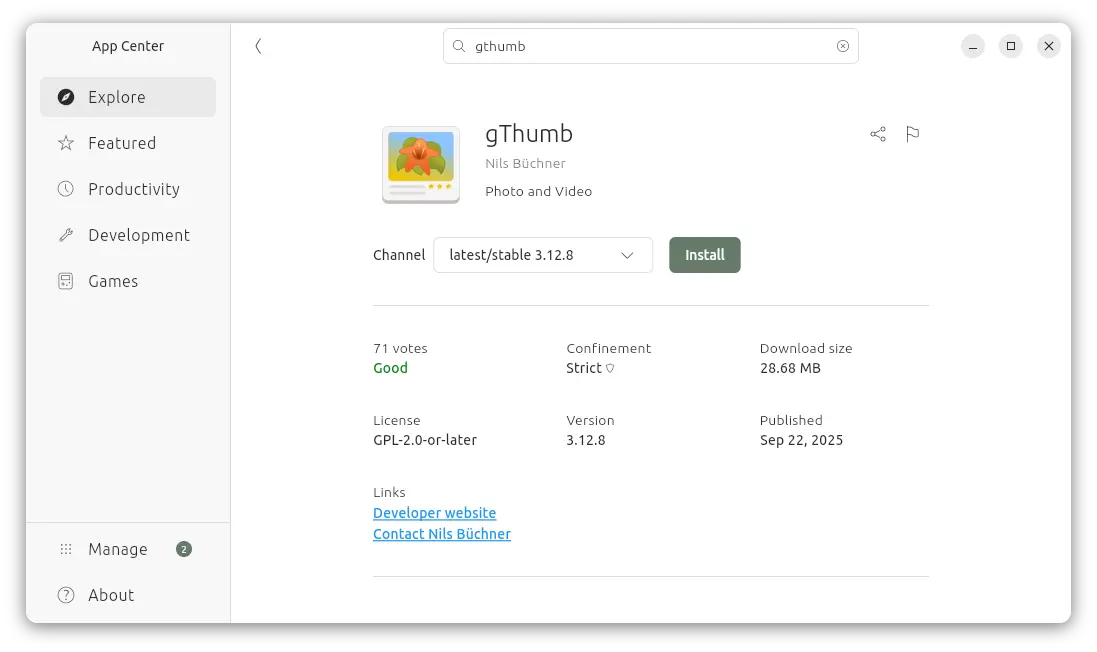
For Linux, they include Snap package which can be directly installed from Ubuntu Software or App Center.

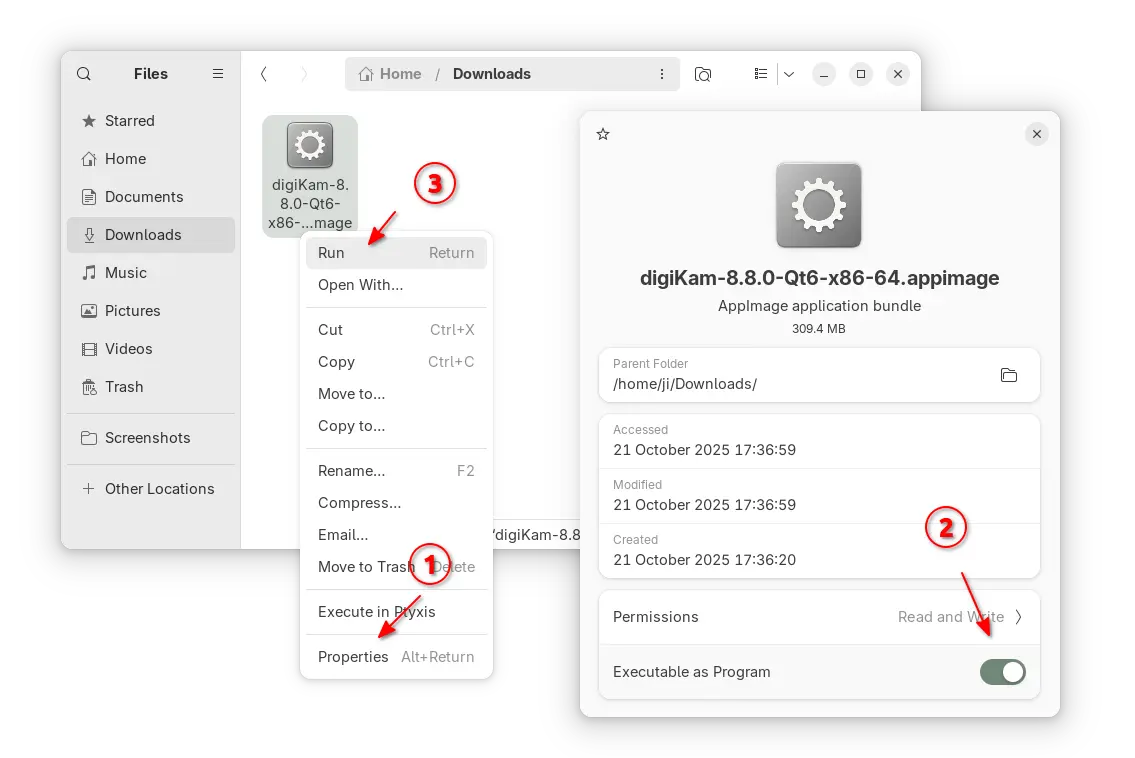
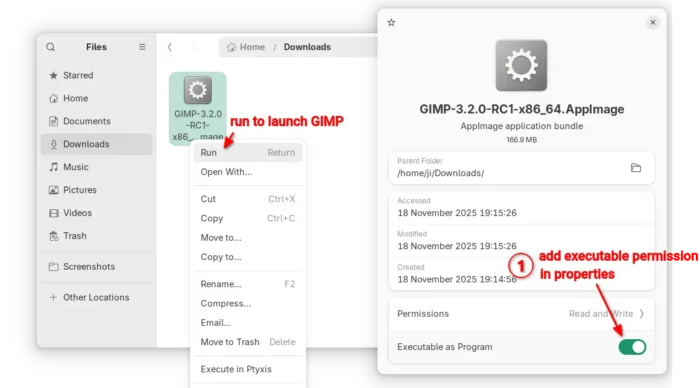
While, user may also choose non-install AppImage that can be launched directly after adding executable permission.

Or install the Flatpak package in sandbox environment for most Linux by running command after enabled flatpak support:

flatpak install --user https://flathub.org/beta-repo/appstream/org.gimp.GIMP.flatpakref

And, launch the Flatpak package via the command below in case you also has the stable version installed as Flatpak.

flatpak run org.gimp.GIMP//beta

Uninstall GIMP 3.2 Devel version

For the AppImage and Snap package, either delete the file or uninstall via App Center (or Ubuntu Software).

For the Flatpak package, use the command below to uninstall:

flatpak uninstall --delete-data org.gimp.GIMP//beta

You may then even delete the flathub-beta repository afterward by running command:

flatpak remote-delete flathub-beta

NOTE: the command will list and uninstall all apps and runtimes installed from the Beta repository. Answer NO if you want to keep any of them.

  •  

Hugin 2025.0.0 Released with New GUI Tool (Ubuntu PPA Updated)

Hugin, the free open-source panorama photo stitching and HDR merging program, release new 2025.0.0 version few days ago.

The new version of this yearly release software, introduced new GUI tool called Hugin Toolbox, which provides a graphical user interface for enfuse and simple perspective correction.

Like the “Batch Processor” and “Lens calibration”, the new GUI can be launched either from start menu (e,g., search from GNOME Overview) or by running hugin_toolbox command from terminal.

Besides new GUI tool, the release now uses vector SVG instead of PNG for the tool-bar and button icons, improving the app appearance on HiDPI displays.

And for Windows user, the app window color scheme will now change automatically when you switching between light or dark desktop appearance.

For users who would like to build Hugin 2025.0.0 from source code, the new release now requires wxWidgets >= 3.2 and c++17 compiler. Meaning Linux user needs to pass -std=gnu++17 flag when building with c++.

And, due to c++17 compiler requirement, old Ubuntu 20.04 needs to either upgrade “libvigraimpex” library or edit separableconvolution.hxx (line 1412) and stdconvolution.hxx (line 792) files under /usr/include/vigra/, by changing:

#ifndef _MSC_VER
            throw(PreconditionViolation)
#elif _MSC_VER >= 1900
            noexcept(false)
#endif

to:

#if _MSC_VER >= 1900 || __cplusplus >= 201103L
            noexcept(false)
#else
            throw(PreconditionViolation)
#endif

Or, it will output “error: ISO C++17 does not allow dynamic exception specifications” error as c++17 has removed the throw exception specification.

Other changes in Hugin 2025.0.0 according to the commit log:

  • Better handling of unknown language by automatically switching back to default language at launch.
  • Add one more variant for Hugins image types JPEG/TIFF/PNG alone.
  • Ask for overwrite when using the secure hugin_stitch_project.
  • Allow scaling with control + mouse wheel for masks and crop operations.
  • Use luminance for masking of images instead of separate red/green/blue channel comparison.
  • Ask for overwrite when using the secure hugin_stitch_project.
  • Add function to print total time at end for ExternalCmdExecDialog.
  • Add one more operator for TDiff2D and fix a const expression
  • Allow also creating line cp cover several images (cpfind).
  • Translation updates, bugfixes, and other small improvements.

Install Hugin 2025.0.0

The official packages for Windows and source tarball are available to download in this Sourceforge page.

For Linux, a community maintained Flatpak package is available for most distributions on amd64 and arm64 platforms.

Linux Mint and Fedora (with 3rd party repository enabled) may search & install the Flatpak package by using system software app. While, Debian/Ubuntu users may run the 2 commands below one by one to install it:

sudo apt install flatpak
flatpak install https://dl.flathub.org/repo/appstream/net.sourceforge.Hugin.flatpakref

For Ubuntu users who prefer classic .deb packages, I’ve built the package into this unofficial PPA for Ubuntu 20.04, Ubuntu 22.04, Ubuntu 24.04, 25.04 and 25.10.

For Ubuntu 18.04, the system libraries are outdated for Hugin 2025.0.0. I’ll no longer build it for this old LTS due to lack of time.

To add the PPA & install Hugin, run commands below one by one:

sudo add-apt-repository ppa:ubuntuhandbook1/hugin
sudo apt update
sudo apt install hugin

(Optionally) Remove the PPA and Hugin (.deb) package by running command:

sudo apt remove hugin hugin-data hugin-tools
sudo add-apt-repository --remove ppa:ubuntuhandbook1/hugin
  •  

digiKam 8.8.0 Released with UI Translation for 61 Languages

digiKam, the popular Qt-based photo management software, released new 8.8.0 version after 4 months of development.

This is probably the last release in 2025, as the developer team plans to add Qt 6.10 bundle and AI-power tools for image enhancement and management in next version for 2026.

The new release finally updated its UI with translations support. By going to Settings -> Configure Language, user can now switch the application graphical interface between 61 different languages. And, the online documentation has been updated with Brazilian Portuguese translations support.

digiKam 8.8.0 has been fully ported with Qt 6.10.0 support, though the official installers for Linux, Windows, and macOS are still have Qt 6.9.1 in bundle.

The tag manager in the release now include 2 new options, allowing to import or export tag hierarchies to and from text files, supporting the Controlled Vocabulary Keyword Catalogue (CVKC) format.

The Preview module has been updated with focus point visualization support for FujiFilm and Olympus/OM Systems cameras, providing photographers with precise information about focus accuracy and composition.

And, the Image Editor new includes a new enhancement tool, Background Blur, allowing to progressively blur the background of a subject in a photo, enabling creative depth-of-field effects.

New background blur enhance tool

Other changes include G’MIC-Qt plugin 3.6.0, long file paths (when enabled) support in Windows, as well as:

  • Use the monitor color profile set under Windows, macOS, and Linux Wayland.
  • Use native desktop notifications in Progress Manage.
  • Update QtAVPlayer video module to 20250913.
  • Update Libraw RAW decoder to 20250727.
  • Improved stability for Linux Wayland.
  • And over 100 bug-fixes.

For more about digiKam 8.8.0, see the official release note.

Install digiKam 8.8.0

The software offers official packages for Linux, Windows, and macOS, which are available to download at the link below:

For Linux, it’s an AppImage for modern Intel/AMD platforms. Just grab the package, add executable permission from its Properties dialog, finally run to launch the software.

NOTE: Ubuntu since 22.04 does NOT support AppImage out-of-the-box, you need to open terminal (Ctrl+Alt+T) and run command to install libfuse2 package first:

sudo apt install libfuse2

For choice, Ubuntu user (and its official flavors) may search & install digiKam from either App Center (Ubuntu Software) or desktop specific software app. It’s official Snap package that runs in sandbox, though not updated at the moment of writing.

digiKam snap package in KUbuntu software app

For Linux Mint, Fedora, etc Linux Distributions that prefer Flatpak, or Linux users on ARM64 platform, it’s also available to install as Flatpak package.

While Debian & Ubuntu users may run 2 commands below one by one to get it:

  • Install Flatpak daemon:
    sudo apt install flatpak
  • Install digiKam flatpak package:
    flatpak install https://dl.flathub.org/repo/appstream/org.kde.digikam.flatpakref

NOTE: If this is the first Flatpak app you installed on your system, then you may need a log out and back in to make app icon visible. Or, you may start it from terminal by running terminal:

flatpak run org.kde.digikam

And, you may replace run in last command with update to check updates, or with uninstall to remove the package.

  •  

gThumb 3.12.8 added Viewing GPS Position Support

gThumb, the Gnome image viewer, browser, and organizer application, released new 3.12.8 version in last week.

The new release of this application finally added support viewing the GPS metadata in your photo images. Meaning for photos taken by cameras or phones have location services enabled, the image viewer will show where they were taken with latitude and longitude location data.

And, by enabling the new “Open Map” extension in the Preferences dialog, it will display a “Map” section in image properties, allowing to click open the location using the OpenStreetMap free wiki world map service. So that you can see exactly where it is in world map.

Besides that, the release added an option in Preferences dialog, allowing to hide the white border (aka frame) of the image you’re viewing. Which, however does not work for thumbnails.

gThumb 3.12.8 also updated the video viewer to rotate videos respecting the orientation tag, added ability to sort images by creation time, and added support for the AdobeRGB profile.

It now applies the embedded ICC profile for TIFF, applies the color space specified in EXIF data for PNG, and saves the color profile as well for AVIF images.

Other changes include:

  • Lossless WEBP and TIFF rotation by setting EXIF orientation tag.
  • Transform the profile to sRGB before saving an image with a profile.
  • Fix broken thumbnail panic.
  • Fix thumbnails not updated after saving an image.
  • Fix date and tag selectors on Wayland.
  • Use a darker gray for the background in image viewer.
  • Translation updates and various other bug-fixes.

How to Install gThumb 3.12.8

gThumb does NOT provide official installer packages. Besides building it from the source code, you may install it through either Flatpak, Snap, or Ubuntu PPA.

1. Snap package

For modern Intel/AMD platform, there’s a snap package that can be easily from either Ubuntu Software or App Center, though it’s NOT updated to v3.12.8 at the moment of writing.

2. Flatpak package

Like Snap, The Flatpak runs in sandbox environment and works in most Linux distributions on both amd64 and arm64 platforms.

Ubuntu users may simply open terminal (Ctrl+Alt+T) and run the 2 commands one by one to install the package:

  • First enable flatpak support:
    sudo apt install flatpak
  • Then, install gThumb Flatpak package:
    flatpak install https://dl.flathub.org/repo/appstream/org.gnome.gThumb.flatpakref

If the app icon is not visible after installation, either log out and back in or run the command below to start it from terminal:

flatpak run org.gnome.gThumb

And, you may replace run with update in last command to check & install updates regularly.

3. Ubuntu PPA

For Ubuntu users who prefer the native .deb package, I’ve uploaded the package into this unofficial PPA for Ubuntu 20.04, 22.04, 24.04, 25.04, and 25.10 on amd64, arm64/armhf platforms.

To install it, open terminal (Ctrl+Alt+T) and run commands below one by one:

sudo add-apt-repository ppa:ubuntuhandbook1/apps
sudo apt update
sudo apt install gthumb

Uninstall:

To uninstall the Snap package, use Ubuntu Software or App Center.

To uninstall the Flatpak package, use command:

flatpak uninstall --delete-data org.gnome.gThumb

Optionally, you may run flatpak uninstall --unused to remove useless run-time libraries.

For the PPA package, uninstall it via command:

sudo apt remove gthumb gthumb-data

And, remove the Ubuntu PPA by using either “Software & Updates” under “Other Software” tab, or running command:

sudo add-apt-repository ppa:ubuntuhandbook1/apps

Also run sudo apt update to refresh cache afterward, though it should be done automatically.

  •