For .NET developers and users, Ubuntu is finally adding the latest .NET 10 support for Ubuntu 24.04 LTS, Ubuntu 25.04/25.10, and next Ubuntu 26.04 LTS.
.NET 10 is the Long Term Support (LTS) version that was released a month ago. It features 3 years support until November 10, 2028.
The new version features JIT enhancement with various inlining improvements, improved code generation for struct arguments, and loop inversion.
It added Advanced Vector Extensions (AVX) 10.2 support for x64-based processors. And, it updated NativeAOT’s type preinitializer with support for all variants of the conv.* and neg opcodes, further optimizing runtime performance. For more features about .NET 10, see it in MS website.
Microsoft provides official .NET packages for Linux through portable tarballs, which are available to download at this page. User may select download it, decompress, and run the executable directly from the extracted folder.
Why installing .NET package from Ubuntu Repository
As you may know, Ubuntu announced the collaboration with Microsoft more than 3 years ago, to provide enterprise-grade .NET support through native .deb packages in the universe repositories.
Canonical has packaged .NET 6/7 for Ubuntu 22.04, .NET 8 for 22.04/24.04 & higher, and .NET 9 for Ubuntu 25.04/25.10.
For .NET 10, it’s already made available for Ubuntu 25.10 and Ubuntu 26.04, while the support for Ubuntu 24.04 and 25.04 will be available soon.
The .NET packages in system repositories are well tested by Ubuntu developers, and keep receiving security updates. They provide better integration with your system, as they are built with Distro specific patches and PATH and environment variables setup out-of-the-box.
And, user may ask for community support (from e.g., AskUbuntu and Ubuntu Discourse) and report bugs for the packages in launchpad.
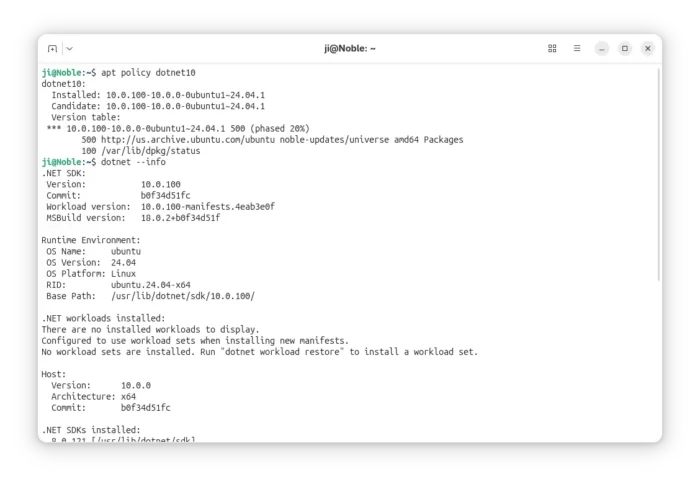
To install .NET 10 in Ubuntu from 24.04 to 26.04, open terminal (Ctrl+Alt+T) and run command:
sudo apt update && sudo apt install dotnet10
Besides installing the full SDK and run-times, you may select install only the SDK or runtime that you need:
sudo apt install dotnet-sdk-10.0
sudo apt install dotnet-runtime-10.0
sudo apt install aspnetcore-runtime-10.0
NOTE: For Ubuntu 24.04 and 25.04, .NET 10 is being rolled out gradually, so far for one-fifth of users. If you can’t get it, just wait. It will be available in next days if everything goes well.
What about Ubuntu 22.04
For Ubuntu 22.04, the maintainer team has made .NET 10 into this PPA repository.
Both the PPA and official Ubuntu packages are maintained by same team members. However, the PPA package is NOT officially supported by Ubuntu.
To add the PPA, open terminal and run commands:
sudo add-apt-repository ppa:dotnet/backports
sudo apt update
After that, you may run the apt install command above to install .NET 10 SDK and runtimes.
Microsoft Visual Studio Code announced the November release, version 1.107, yesterday for Windows, Linux, and macOS users.
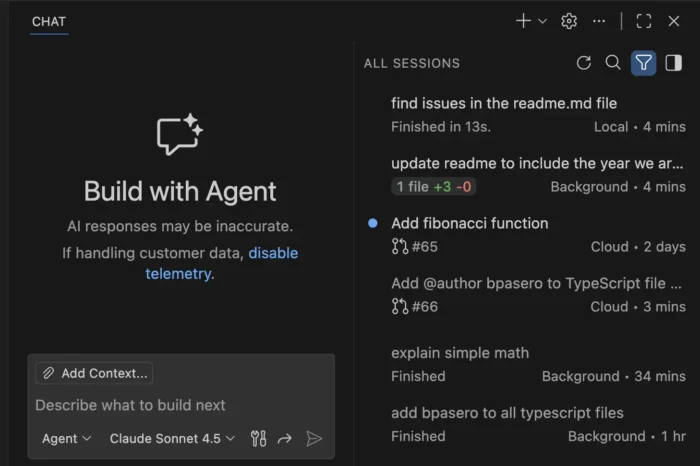
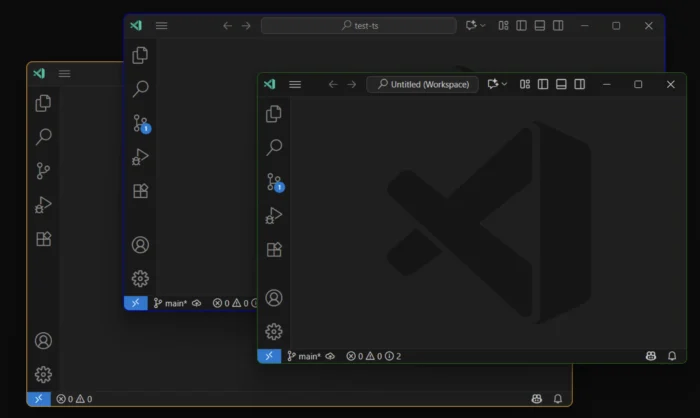
The new release of this free open-source code editor integrated the agent sessions into the Chat view. When working in a workspace, it only shows sessions related to the current workspace, while all sessions across workspaces are shown when you are in an empty window.
The agent sessions can be displayed either in “compact view” that lists 3 most recent sessions along with “Show All Sessions” button, or in “side-by-side view” when Chat View is wide enough. While, there’s an orientation setting to set to always stacked (compact view), always side-by-side, or switch automatically according to Chat View width.
The local agent now continues running in the background when you close the local chat session. And, it’s able to see the status of the running agent in the sessions list and switch back to the session at any time.
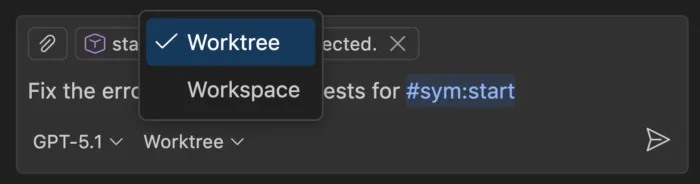
When creating a new background agent, user can now choose to run in either the current workspace or a dedicated Git worktree. And, when running a background agent in a worktree, the changes is isolated in a separate folder, thus you can run multiple background agents simultaneously without conflicts.
The background agents now support multiple context attachment types. You can attach selections, problems, symbols, search results, git commits, and more to any prompt.
Other Agent HQ changes include:
Introduce new “Continue in” option to continue a local chat with a background or cloud agent seamlessly.
Define custom agents at the organization level for your GitHub account (experimental).
Bring your own custom agents into Background Agents (experimental).
Run agents as subagents (experimental).
Reuse your existing claude skills (experimental).
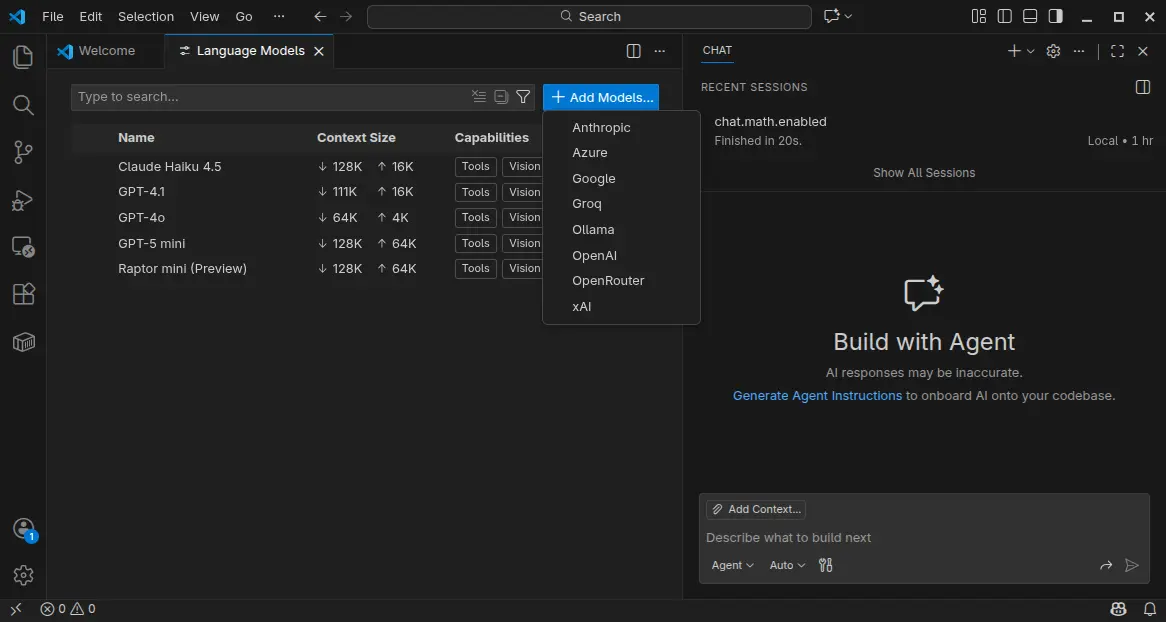
VS Code 1.107 also introduced Language Models editor which provides a centralized place to view and manage all available language models for chat in VS Code.
It can be opened either from the model picker in chat or via the Command Palette with Chat: Manage Language Models. And, it can manage model visibility and add more models.
Moreover, the textSearch tool now supports searching in ignored files/folders specified by files.exclude or search.exclude settings or .gitignore files. And, Azure model provider now uses Entra ID authentication as default.
Other AI related changes include:
Introduce collapsible chat sections for non-reasoning chat output.
Ask for confirmation when chat attempts to edit sensitive files.
New auto approve option to allow all future commands for the session.
Rich terminal output in chat.
Bind keyboard shortcuts to each custom agent individually.
And more.
Besides AI changes, VS Code 1.107 also added support the latest revision of the MCP specification, and provide GitHub remote MCP Server as a built-in MCP server (Preview).
It as well added Intel Macs and Debian-based Linux Distros support for Microsoft Authentication, enabled Terminal Suggest for stable users, introduced new model for next edit suggestions.
Other changes include:
3-finger swipe on trackpad to navigate between editors in macOS.
Preview next edit suggestions outside the viewport.
Attach variables, scopes, and expressions to chat context.
Classic Microsoft authentication no longer available.
Rename suggestions for TypeScript.
Ability to disable automatic hover popups in the editor.
Add Stashes node in the Source Control Repositories view (Experimental), allows to see the complete list of stashes, view, apply, and pop each stash.
Get Visual Studio Code 1.105
For more about the new release, as well as download links for Windows, macOS, and Linux, go to VS Code website via the link below:
For Ubuntu users, besides download & install the deb package from the link above, there’s also official Snap package available to install in App Center (or Ubuntu Software for 22.04-).
NOTE: The source code for VS Code is open-source, but the packages above are proprietary freeware.
For open-source package, there’s a community maintained flatpak package is also available for choice. See this guide for how to install them in Ubuntu.
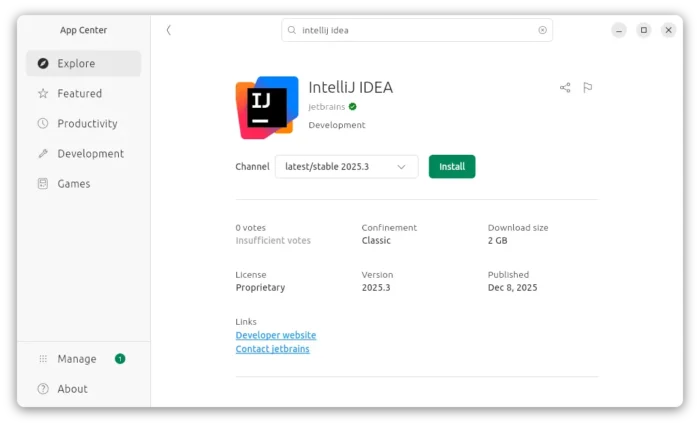
JetBrains announced the 2025.3 release of its IntelliJ IDEA JAVA IDE yesterday.
Like PyCharm 2025.3, the new version does no longer provide the Community Edition. Instead, it introduced an unified version that bring the Community and Ultimate editions together in a single product. While, Community users can continue using the IDE for free.
Also, it updated the UI with new default Islands theme for both light and dark mode.
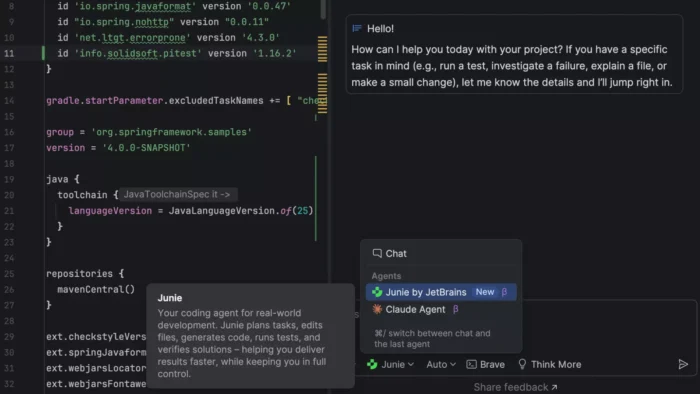
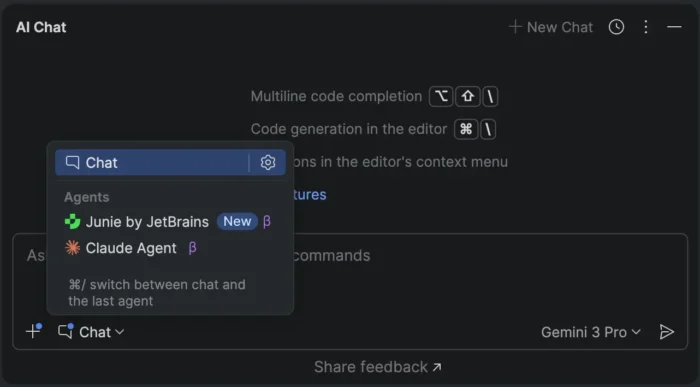
Besides JetBrains Junie AI agent, the release also added Claude Agent to the same chat interface. While, BYOK (Bring Your Own Key) feature will be coming soon, allowing to connect to OpenAI, Anthropic, or any OpenAI API-compatible local models using your own API key.
image from jetbrains.com
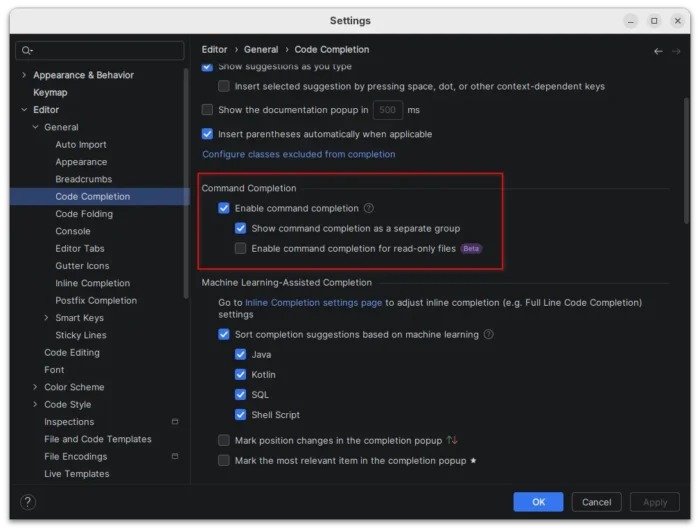
To improve your workflow, the new version introduced command completion as new way to access context-aware actions directly from code completion.
You can now type . to see code completion, postfix completion, and action suggestions, type .. to filter completion suggestions to actions only, and select the action to see the exact context and preview what the action will do if applied.
This feature was initially introduced in last 2025.2 as Beta feature, now enabled by default in this 2025.3 version. While, a new “Enable command completion for read-only files” is available as new beta option.
IntelliJ IDEA has Java 25 support from the day when it was released. Now, with the new version, all bundled tools and libraries are compatible with Java 25 runtimes. And, JDK 25 builds from all major vendors are available for download directly from IntelliJ IDEA.
Moreover, the Develocity IntelliJ plugin brings profiling into the build process, allowing to view detailed build characteristics directly in IntelliJ IDEA, identify performance bottlenecks, and observe how build changes affect speed and resource utilization.
So far, the plugin supports Gradle builds, while Maven support is coming soon.
Other changes in IntelliJ IDEA 2025.3 include:
Ability to view remaining AI Credits, renewal date, and top-up balance inside the IDE.
Replace the term query console with query file.
And Ultimate only features:
First-class support for the latest improvements in Spring Framework 7 and Spring Boot 4.
First-class Spring Data JDBC support.
Spring Debugger updates with remote applications debugging support, and auto-connect to user database on application starts.
Full Vitest 4 support, including its test discovery logic.
Kubernetes experience improvements.
Get IntelliJ 2025.3
The official release note and download link for 2025.3 are available via the link below:
For Linux, it’s a portable tarball includes executable file and most runtime libraries. Just download and decompress it, then run the executable file from extracted folder to launch the IDE.
Ubuntu users may choose install the official Snap package from App Center (or Ubuntu Software for 22.04 and earlier).
For choice, there are also community maintained Flatpak packages that runs in sandbox environment. And, I’ve written a step by step guide show how to install it in Ubuntu for beginners.
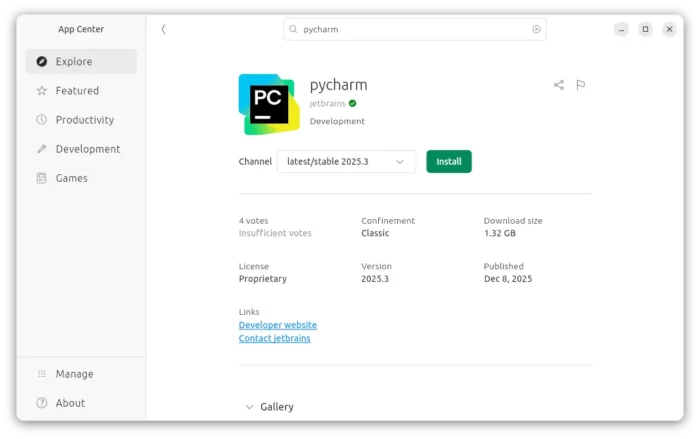
After 4 months of development, JetBrains finally announced the release of PyCharm 2025.3 today.
The new version of this Python IDE does NO longer have Community Edition, but introduced an unified version that brings everything together in a single product. While, Community users can continue using the IDE for free.
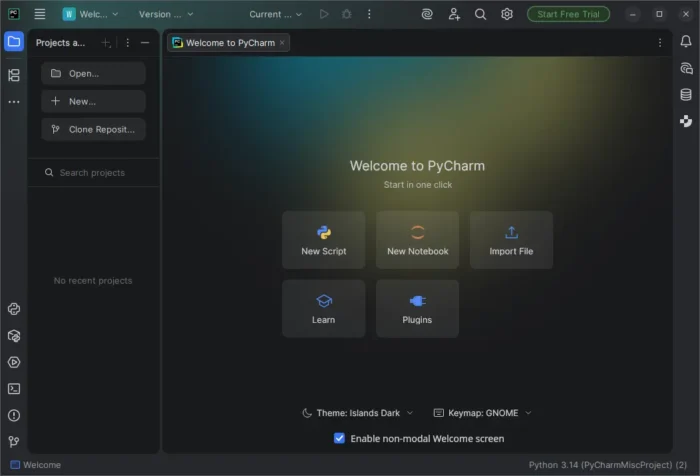
The IDE updated its UI with new default Islands theme for both light and dark mode.
It introduced new welcome screen for new users, with ability to create new script or notebook, clone a repository or connect to a remote development environment, and import files into your workspace.
For existing users who would like to try out this welcome screen, just enable “Show the Welcome screen in non-modal mode by going to Settings -> Advanced Settings -> Welcome Screen.
Besides the built-in Junie by JetBrains, the new version now supports Claude AI Agent from a single chat. And, it’s going to introduce Bring Your Own Key (BYOK) feature, that supports OpenAI API-compatible local models in next point releases.
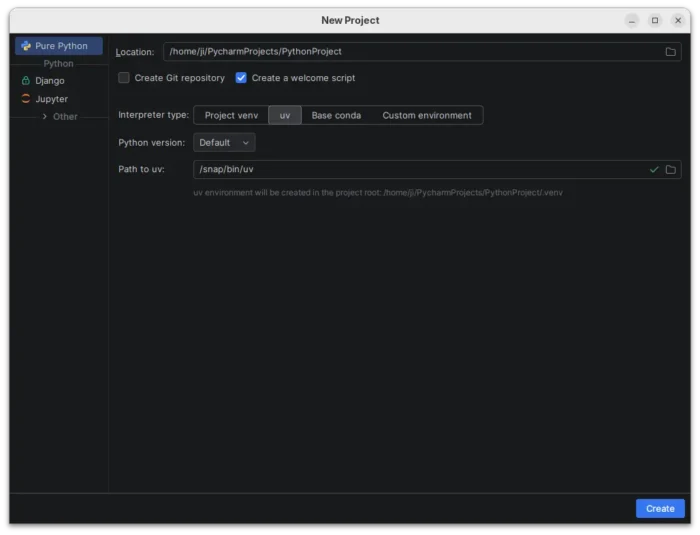
For users with uv installed, Pycharm now automatically suggests uv as the default environment manager in the New Project wizard. And, for projects managed by uv, uv run will be used as default command for run configurations.
And, uv will use user selected Python version either by selecting the corresponding system version or downloading and managing the right one for you.
If you’ve previously selected a different environment manager (e.g., venv or Conda), it will remember that preference and continue using it by default.
The release also expanded its language server protocol (LSP) integration with new tools from the Astral, Microsoft, and Meta ecosystems, including ty, Pyright, and Pyrefly.
Other changes include:
Support for PEP 765 (Python 3.14+) that disallow using return, break, or continue to exit a finally block.
Support the asdf runtime version manager.
New dedicated Python Process Output tool window that displays every command run by the IDE along with its full standard input, output, and error streams.
Package and version completion for any filename that includes “requirements”.
There are also professional only features, including:
Fully Jupyter notebooks supporte in remote development
Latest updates from the DataGrip 2025.3 engine.
Latest improvements from WebStorm 2025.3.
Automatically analyze pandas DataFrames to detect the most common data quality issues.
Get Pycharm 2025.3
The official release note for version 2025.3, as well as the download link are available in the link below:
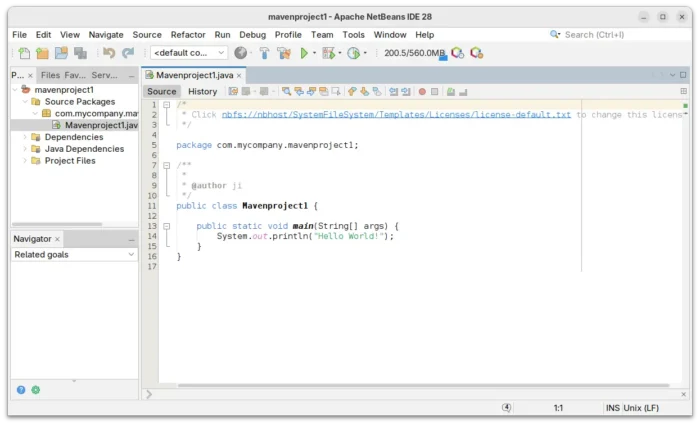
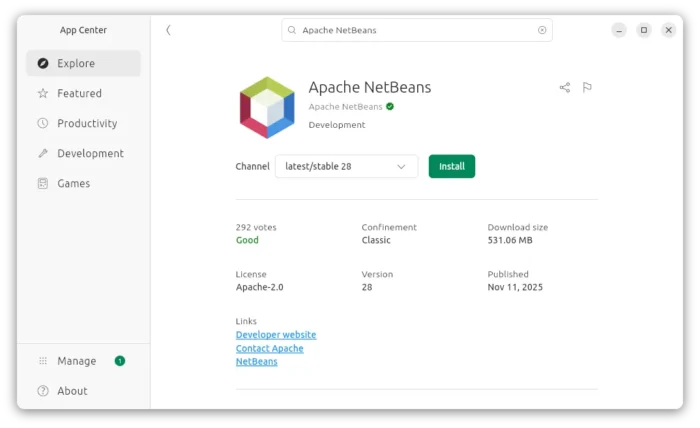
Apache NetBeans, the free open-source IDE for Java, C/C++, PHP, and HTML5, released new version 28 few days ago.
The new IDE release updated UI with a tool widget to execute common text encoding in the IDE: Base64, URL and Hex encoding/decoding.
It added delete button for the SSH Connection Dialog, updated Add Language Description panel layout to be properly resizable, and brought a couple of smaller improvements relating to keyboard shortcuts in various platform components.
NetBeans 28 added Java SE 26 support for Tomcat, TomEE, and GlassFish, though it’s still in early access development stage. It also added support for the latest stable GlassFish 7.0.25, and GlassFish 8.0.0-M12 pre-release.
The LSP client now permits multiple LSP servers for each file/mime type. And, LSP Protocol provides the language clients to send messages to the language server to shutdown and exit.
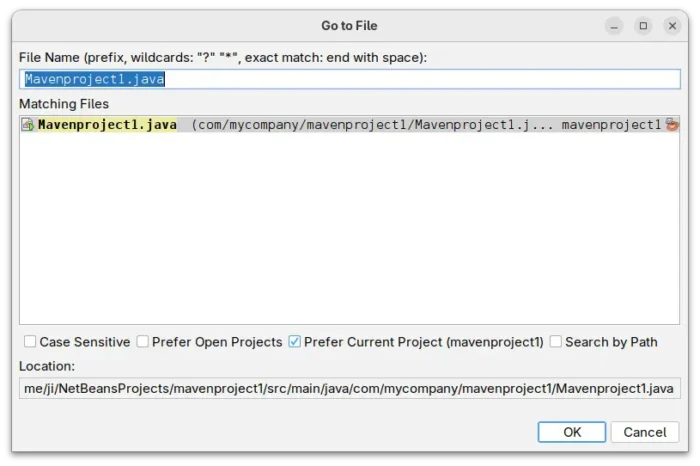
For the editor, it added markdown file template, moved CheckRegex action to IDE Tools menu, improved the goto/jumpto dialog, and added tooltips to Projects, Files and Favorites tabs.
For Java, it updated net.java.html library to version 1.8.2, added opentest4j-1.3.0.jar to JUnit5, switched CI to JDK 25 GA, and added enhanced switch support to ThrowableNotThrown.
PHP features an auto-completion for the use keyword in the body of a class, trait, and enum. And, it fixed the coloring for Twig 3.15 inline comments.
Other changes in NetBeans 28 include:
Honor the JAVA_HOME environment variable in nbexec script.
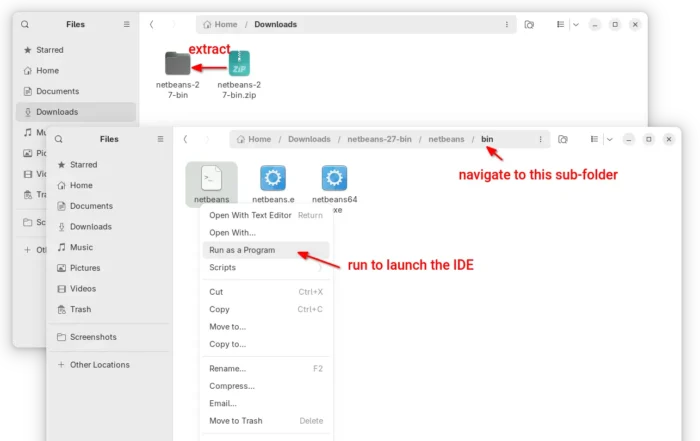
The platform independent binary package contains executable files and runtime libraries. Simply decompress it and run the executable file for your OS will launch it.
For Ubuntu on AMD/Intel or ARM64 platforms, there’s also an official Snap package that runs in sandbox environment. User may simply launch App Center (or Ubuntu Software for 22.04-) to search & install the package.
Microsoft announced .NET 10, the free open-source cross-platform developer platform, a day ago!
The new .NET 10 is a Long Term Support (LTS) release that features three years support until November 10, 2028. Users are argued to upgrade to the new version to take advantage of the extended support, performance improvements and new features!
What’s New in .NET 10
The new .NET 10 runtime enhanced JIT compiler with various inlining improvements and improved code generation for struct arguments.
It added Advanced Vector Extensions (AVX) 10.2 support for x64-based processors. Though the JIT’s support for AVX10.2 is disabled by default, as AVX10.2-enabled hardware isn’t yet available.
The NativeAOT’s type preinitializer now supports all variants of the conv.* and neg opcodes, further optimizing runtime performance. And, Arm64 gained new default write-barrier implementation that handles GC regions more precisely and reduces GC pause times by 8-20%.
For the SDK, .NET tools can now be published with support for multiple RuntimeIdentifiers (RIDs) in a single package. And, the .NET CLI will select the correct one at install or run time.
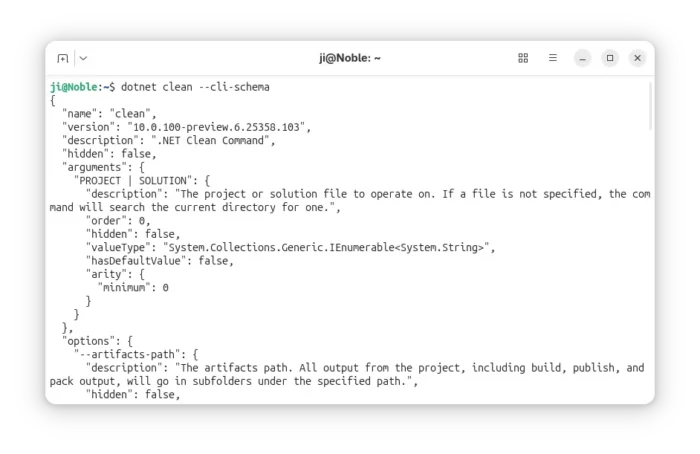
User can now use the dotnet tool exec command to execute a .NET tool without installing it globally or locally. And, a new --cli-schema option is added for all CLI commands, which outputs a JSON representation of the CLI command tree for the invoked command or subcommand.
The dotnet CLI now supports generating native tab-completion scripts for popular shells. dotnet test now natively supports Microsoft.Testing.Platform. And, the NuGet Audit feature can prune framework-provided package references that aren’t used by the project.
Other .NET 10 SDK changes include:
New dnx script provides a streamlined way to execute tools
Enhance file-based apps with publish support and native AOT
Enable --interactive flag by default for CLI commands in interactive terminals.
New property to explicitly set the format of container images.
New aliases for common commands
msbuild.exe and Visual Studio 2026 can run MSBuild tasks that are built for .NET.
For .NET libraries, it added client side TLS 1.3 support on macOS, and introduced new asynchronous APIs making easier to perform non-blocking operations when reading from or writing to ZIP files.
It also introduced new WebSocketStream API to simplify some of the most common WebSocket scenarios, and Windows Cryptography API with Next Generation (CNG) support for Post-Quantum Cryptography (PQC).
Other .NET libraries changes include HashML-DSA support, new ExportPkcs12 methods to choose what encryption and digest algorithms, as well as following features:
three new asymmetric algorithms: ML-KEM (FIPS 203), ML-DSA (FIPS 204), and SLH-DSA (FIPS 205).
Supports the AES-KWP algorithm via instance methods on the Aes class
New method overloads in ISOWeek for DateOnly type
New TimeSpan.FromMilliseconds overload with single parameter
UTF-8 support for hex-string conversion operations in the Convert class
New string normalization APIs to work with span of characters
Additional TryAdd and TryGetValue overloads for OrderedDictionary <TKey, TValue>
Option to disallow duplicate JSON properties
new JsonSerializerOptions.Strict preset
PipeReader support for JSON serializer
New AOT-safe constructor for ValidationContext
Support for telemetry schema URLs in ActivitySource and Meter
Out-of-proc trace support for Activity events and links
Rate-limit trace-sampling support.
Besides the changes in .NET runtime, libraries, and SDK, .NET 10 also includes lots of new features and improvements in Aspire, ASP.NET Core, C# 14, F#, and other components.
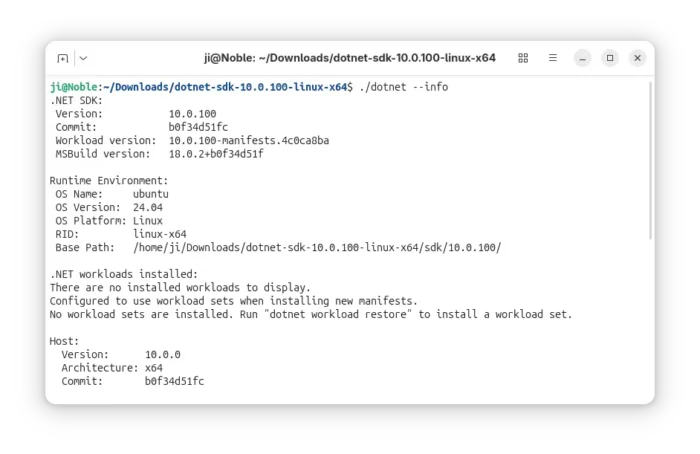
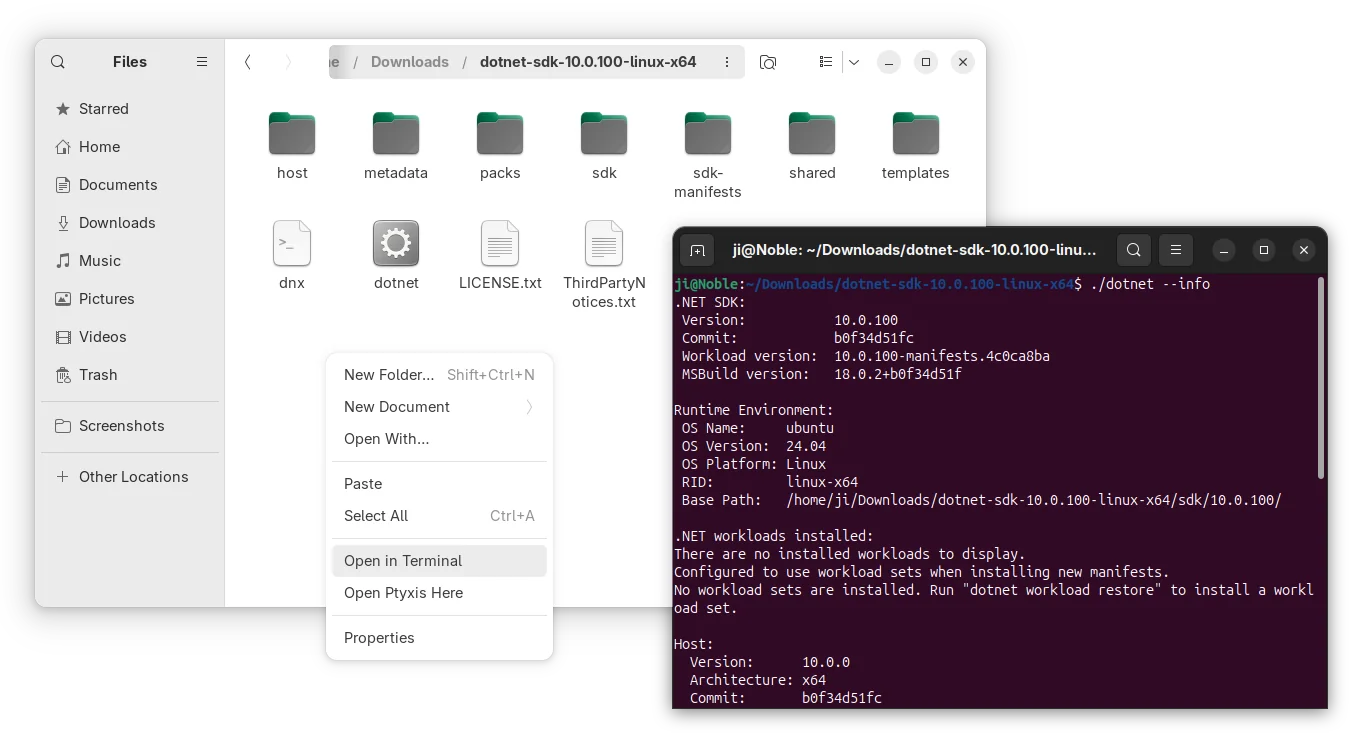
For Linux, they are non-install portable tarball. Simply download, decompress, and run the executable file to get started, though you may need to manually set environment and path variables.
As a LTS release, Ubuntu is likely to add .NET 10 into system repository. And, you may keep an eye on this page for the process.
At the moment of writing, the official Ubuntu PPA has been building .NET 10 for Ubuntu 25.10 and next Ubuntu 26.04.
A new monthly version of Microsoft’s code editor, Visual Studio Code 1.105, was released few days ago.
The release added 2 new AI chat models, GPT-5-Codex and Claude Sonnet 4.5. In addition to Google and Github account, it now allows to sign in or sign up GitHub Copilot with an Apple account, along with
The AI chat now supports fully qualified tool names for prompt files and chat modes, which can help to avoid naming conflicts between built-in tools and tools provided by MCP servers or extensions.
Support for AGENTS.md at the root of workspace is now generally available and enabled by default. There’s as well experimental support for nested AGENTS.md files in sub-folders of your workspace.
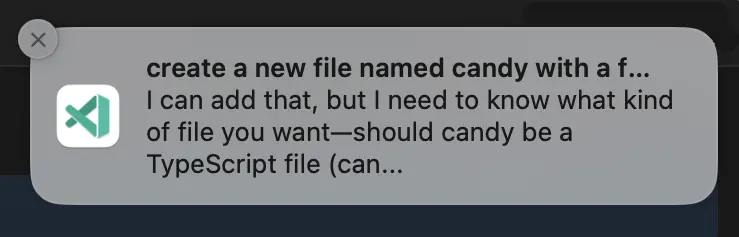
The release also improved the OS notifications for chat sessions. It now shows a notification with preview when a chat response is received, and selecting it brings focus to the chat input.
Other AI chat changes include:
Chain of thought (Experimental).
Show recent local chat conversations (Experimental).
Ability to keep or undo changes to files during an agent loop.
New Ctrl+Alt+Up/Down shortcut keys to navigate through your chat messages.
Platform-specific terminal profiles.
Add ‘learning’ mechanism to select the optimal tool set for custom models.
Auto-reply to terminal prompts (Experimental).
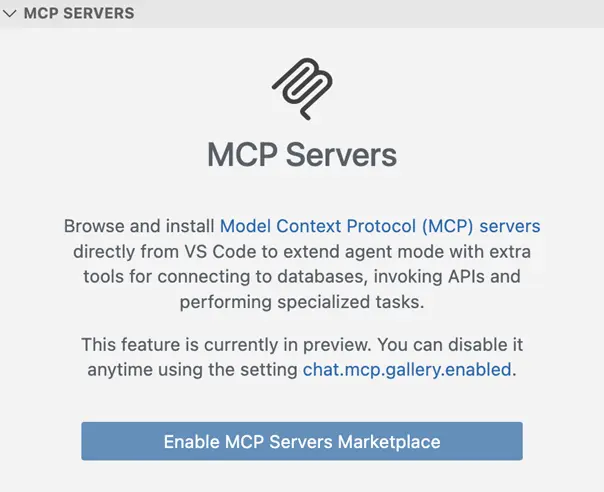
Besides that, VS Code 1.105 introduced built-in MCP marketplace, which enables users to browse and install MCP servers directly from the Extensions view, though disabled by default.
The new or outdated MCP servers are now started automatically when you send a chat message. There are as well 2 new MCP specification updates SEP-973 and SEP-1034.
The new vs code release also improved the editor experience, by adding ability to override the default keyboard shortcuts for the Quick Input controls, and possibility to disallow next edit suggestions (NES) to propose whitespace-only changes such as code formatting.
The runTests tool in Chat now also reports test code coverage to the agent, and it now shows notification when long-running task completes while the VS Code window is not focused.
Other changes in the release include:
Shell integration for pwsh on Windows support for screen readers.
Add ability to resolve merge conflicts with AI.
New “Start Dictation in Terminal” action to use voice dictation to input text into the terminal.
Native broker support for Microsoft Authentication on ARM-series macOS devices.
PKCE (Proof Key for Code Exchange) support for GitHub Authentication.
Add Copy Test Id command to run gutter icon context menu.
Get Visual Studio Code 1.105
For more about the release, as well as download links for Windows, MacOS, and Linux, go to its website via the link below:
For Ubuntu, besides download & install the deb package from the link above, there’s also Snap package available to install in App Center (or Ubuntu Software).
While, a community maintained flatpak package is also available for choice. See this guide for how to install them.
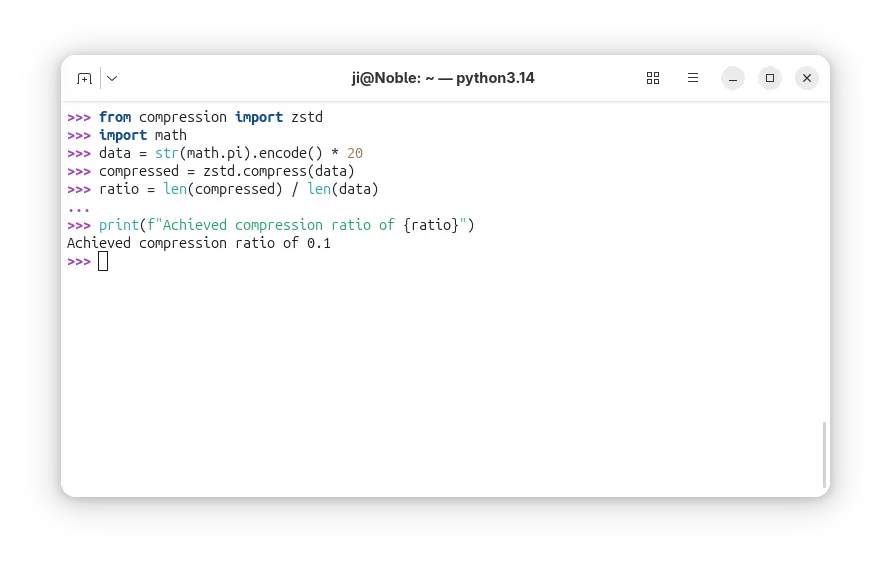
Python announced the new 3.14 version yesterday! See what’s new and how to install guide for Ubuntu users.
Python 3.14 is the latest stable release of the Python programming language, with 5 years support until 2030.
Since the release, the free-threaded build of Python is officially supported and no longer experimental. It’s so far optional, though will be make default in next phase.
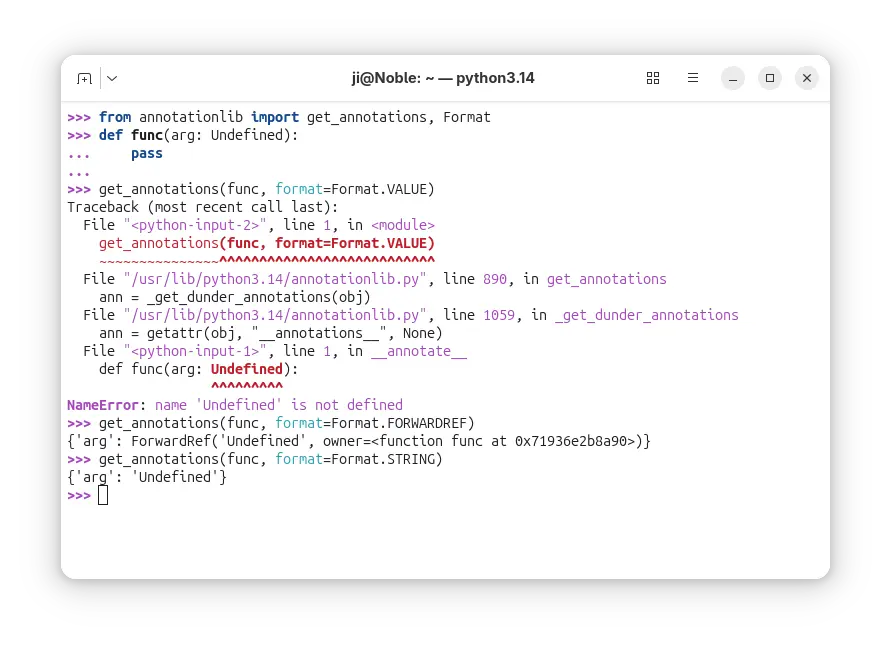
In Python 3.14, the evaluation of annotations is now deferred. It introduced the new annotationlib module, providing tools for inspecting deferred annotations. And, annotations may be evaluated in the VALUE format, the FORWARDREF format, and the STRING format. See PEP 649 for more.
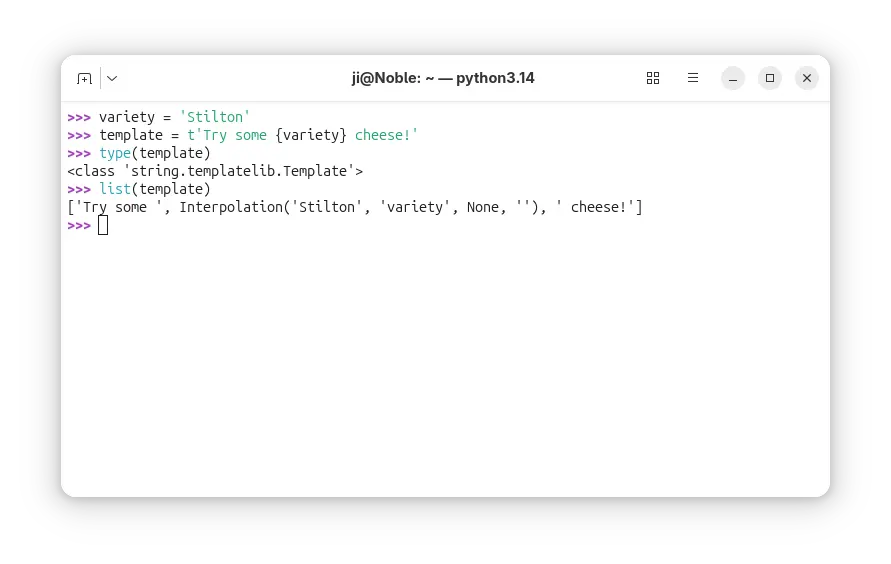
It added Template string literals (PEP 750), new mechanism for custom string processing. The new t-strings use the familiar syntax of f-strings, but return an object representing the static and interpolated parts of the string.
Python 3.14 finally added multiple interpreters in the standard library (PEP 734). With the new concurrent.interpreters module, it now supports running multiple copies of Python in the same process simultaneously without C-API.
It as well introduced new compression package contains compression.lzma, compression.bz2, compression.gzip, compression.zlib, as well as compression.zstd modules.
Besides compression and decompression for the Zstandard format (PEP 784), the support for reading and writing Zstandard compressed archives has been added to the tarfile, zipfile, and shutil modules.
The release also introduced a zero-overhead debugging interface for CPython, that allows debuggers and profilers to safely attach to running Python processes without stopping or restarting them.
A new command-line interface is added to inspect running Python processes using asynchronous tasks, available via python -m asyncio ps PID or python -m asyncio pstree PID.
And the pdb module now supports remote attaching to a running Python process using a new -p PID command-line option. For example, run python -m pdb -p 1234 will connect to the Python process with the given PID and allow you to debug it interactively.
Other changes include:
PEP 758: Allow except and except* expressions without brackets.
PEP 765: Disallow return/break/continue that exit a finally block.
PEP 741: Add a C API to configure the Python initialization without relying on C structures and the ability to make ABI-compatible changes in the future.
Syntax highlighting in PyREPL, and support for color in unittest, argparse, json and calendar CLIs.
UUID versions 6-8 are now supported by the uuid module, and generation of versions 3-5 are up to 40% faster.
Add a new type of interpreter to CPython, which provides significantly better performance for certain newer compilers.
Add a built-in implementation for HMAC (RFC 2104) using formally verified code from the HACL* project.
Improve error messages, and more.
For more details about Python 3.14, see the official docs.
Install Python 3.14
The source tarball for Python 3.14 is available to download via the link below:
Ubuntu has made Python 3.14 in system repository in 25.10. For Ubuntu 22.04 and Ubuntu 24.04, the popular Deadsnakes PPA has been updated with the package for the 2 LTS releases.
To add the PPA and install the package, run commands below one by one:
The upcoming GCC 16 release will introduce a significant overhaul of the compiler’s diagnostic systems, aimed at providing developers with more powerful and readable code analysis. The enhancements, detailed by Red Hat’s David Malcolm at the GNU Tools Cauldron 2025 in Porto, Portugal, include a new experimental HTML output format, major usability improvements to the […]
Visual Studio Code 1.104, the August release of Microsoft’s code editor, was released few days ago.
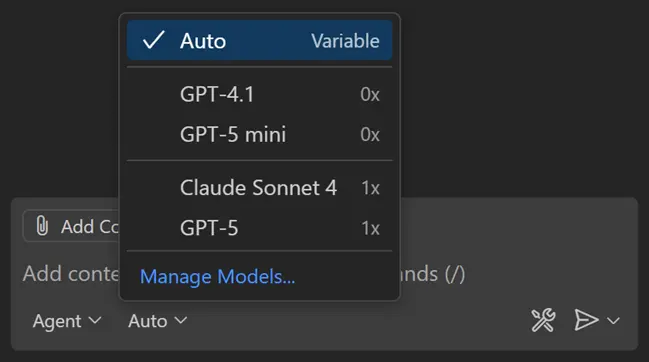
The new release introduced Auto AI model selection support (Preview feature), allowing to automatically choose between Claude Sonnet 4, GPT-5, GPT-5 mini, and GPT-4.1 models, to get the optimal performance and reduce rate limits.
And, user can view the selected model and the model multiplier by hovering over the response in the Chat view.
In agent mode, the agent now explicitly asks for user confirmation before making edits to certain files. And you can configure file patterns to indicate which files require confirmation with chat.tools.edits.autoApprove setting.
The release also improved GitHub coding agent integration with chat editor actions, seamless transitions, better session rendering, and performance boosts. And, it enhanced chat sessions view with status bar tracking, multi-session support, rich descriptions, and expanded context menus.
The #codebase tool has been updated to use a new embeddings model for semantic searching for code in workspace, providing better results, while using less storage space (only 6% compare to previous model).
Other AI changes in VS Code 1.104 include:
Support for AGENTS.md files (Experimental).
Use custom chat mode in prompt file.
Support changing font family and font size of chat messages.
Sign in or sign up to GitHub Copilot with Google account is GA.
Add warning first time to enable global auto approve.
New setting for disabling and hiding GitHub Copilot AI features.
Add more terminal tools to core.
Math rendering in chat responses is GA and enabled by default.
Enhance terminal auto-approve usability and security.
Enable or disable each tool individually.
Besides AI changes, the release also added support configuring the color of window borders in Windows. User can choose to respect color theme settings, Windows settings, disable border colors, and a specific color in Hex, RGB, RGBA, HSL, HSLA format.
It added Accounts: Manage Extension Account Preferences command to the Command Palette, new setting to show tab index, ability to toggle editor tab bar scoll-bar visibility, as well as new “Ceate on GitHub” and “Preview on Github” buttons in built-in issue reporter.
The code editor can now reads and includes MCP server instructions in base prompt. It includes new setting options to allow all MCP servers or disable MCP entirely. And, it now disables MCP auto discovery by default.
As well, it improved NES suggestion by adding new setting to allow the language model to access the entire notebook, thus it will generate more accurate and higher-quality next edit suggestions.
Other changes include:
add Focus Chat Confirmation action.
new setting to configure how quickly inline suggesstions appear after you type.
add “Compare with Workspace” context menu option for worktree file, and Migrate Worktree Changes… command
remove the built-in bower.json IntelliSense
add Python Environments extension support for Pipenv
new experimental AI hover summaries for Python with latest Pylance.
Pylance IntelliSense enabled in all Python documents
finalized Language Model Chat Provider API
And much more!
Get VS Code 1.104
The official release note, and download links for Windows, MacOS, and Linux are available via the link below:
Ubuntu users may either search & install the Snap package from App Center (or Ubuntu Software for 22.04), or download the deb package from the link above.
While, a community maintained flatpak available is available for choice. See this guide for how to install them.
Red Hat launched the Ansible Lightspeed Code Assistant Generative AI with IBM Watson Code Assistant in May 2023. This preview is now available to all Ansible users, allowing them to explore the technology, provide feedback to Red Hat, and further train the AI model. In this brief blog post, I will share my personal experience with installing and utilizing Ansible Lightspeed AI to create playbooks in VSCode using Ubuntu Linux 20.04 LTS desktop.
MySQL Database Recovery Tool by Stellar is designed to assist in resolving various issues that may occasionally arise while managing MySQL and MariaDB databases.
It can efficiently repair all inaccessible or corrupted database objects (tables, primary keys, views, triggers, etc.) created in the InnoDB and MyISAM MySQL database engines without altering or deleting the original databases.
MySQL versions 8.x, 6.x, 5.x, 4.x, and 3.x are compatible as of writing, and since it’s available for Windows, Ubuntu, and Red Hat-based distributions, you can easily recover your MySQL database on these systems. Otherwise, you can copy the MySQL data folder from an unsupported OS to either Windows or Linux, repair it, and move it back to the original OS.
After saving the repaired database in MySQL or MariaDB formats, this tool allows us to save it in various other file formats, such as SQL Script, CSV, HTML, and XLS, which can be crucial when repairing MySQL on a system without MySQL or MariaDB installed.
Pros & Cons
Pros
Cons
Available for Windows, Ubuntu, and Red Hat-based distributions.
Not available for macOS.
Efficiently can repair the latest version of MySQL and MariaDB databases.
It’s proprietary software.
Export the database file in SQL script, CSV, HTML, and XLS file formats.
It’s premium software with a free trial given, which can only perform repairs and display the repaired database but does not apply the changes.
The “Save log report” option allows viewing and analyzing the log content later for forensic analysis.
The software’s license key is quite expensive compared to alternatives.
A user-friendly interface that allows navigation and selection of the MySQL data directory for repairing corruption and applying necessary patches.
It’s not completely ready for Linux systems. You might need to move your MySQL data folder to Windows for repair, as the Windows version of this tool works perfectly.
How to Install MySQL Database Recovery Tool on Linux
Since it’s available for both Windows and Linux (especially Ubuntu and Red Hat-based distributions), I’ll show you the steps to install it on a Linux distribution.
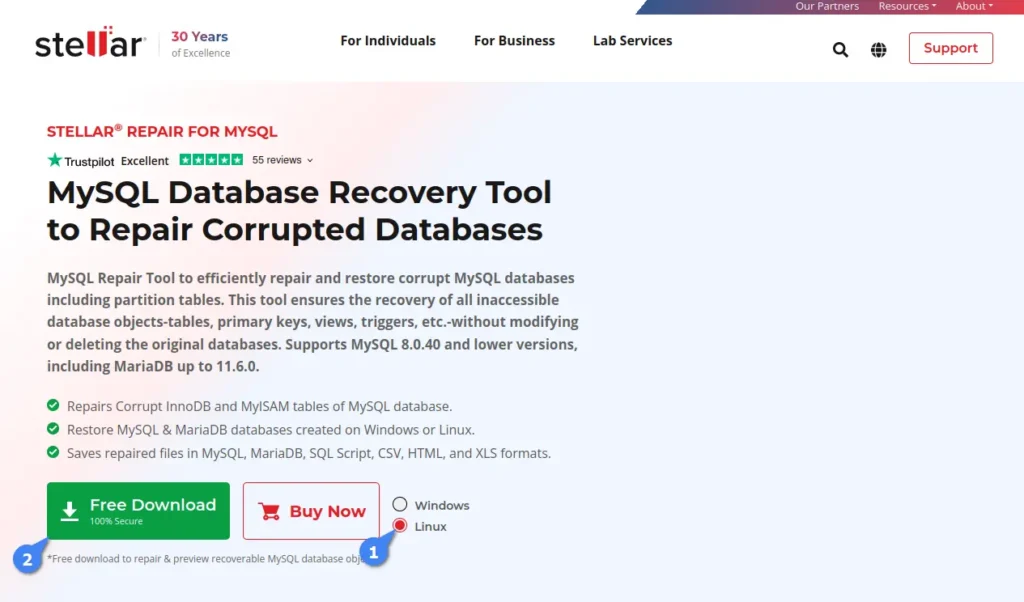
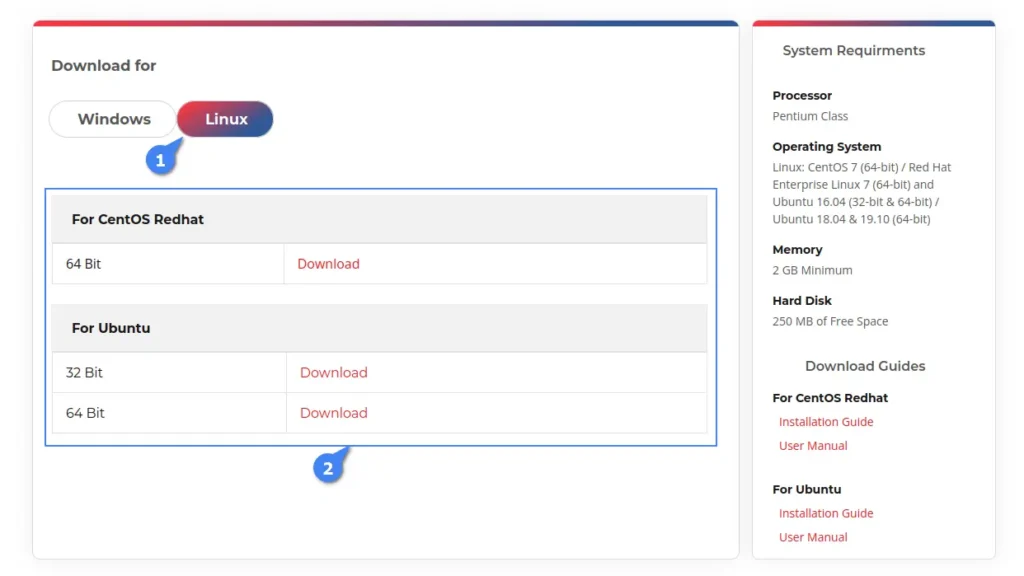
So, start by navigating to its product page to download Stellar Repair for MySQL, select “Linux“, and then click on “Free Download” (you can begin with the free version and activate it with a license key later).
You’ll be redirected to the Linux download page, where you can download the package file based on your Linux distribution type. For example, clicking the download button under “For CentOS Redhat” will download the “.rpm” file, while “For Ubuntu” will download the “.deb” file.
Once the file is downloaded, open your terminal, navigate to the “~/Downloads/” directory, and execute one of the following commands according to your Linux distribution.
# Navigating to Downloads directory
$ cd ~/Downloads/

# Installation Command for Ubuntu-based distributions
$ sudo dpkg -i ./StellarRepairforMySQL-U.deb

# Installation Command for Red Hat-based distributions
$ sudo rpm -i ./StellarRepairforMySQL.rpm
When the installation is finished, you can launch the program by searching “Repair for MySQL” in the Activity Overview.
Usage
When launched for the first time, it prompts you to provide the current logged-in username (auto-detected) and password. Before entering the credentials, make sure the logged-in user has sudo privileges to allow the program to perform repairs without interruption.
Once logged in, you will be presented with the dashboard where you can activate the program using a license key (which is only needed when you want to apply the changes), but for demonstration purposes, you can test it without a license key.
To achieve this, stop your MySQL services and copy the MySQL data folder, typically located at “/var/lib/mysql” in Linux, to a safe location like your home directory for use as a backup.
$ sudo systemctl stop mysql
$ cp /var/lib/mysql $HOME/
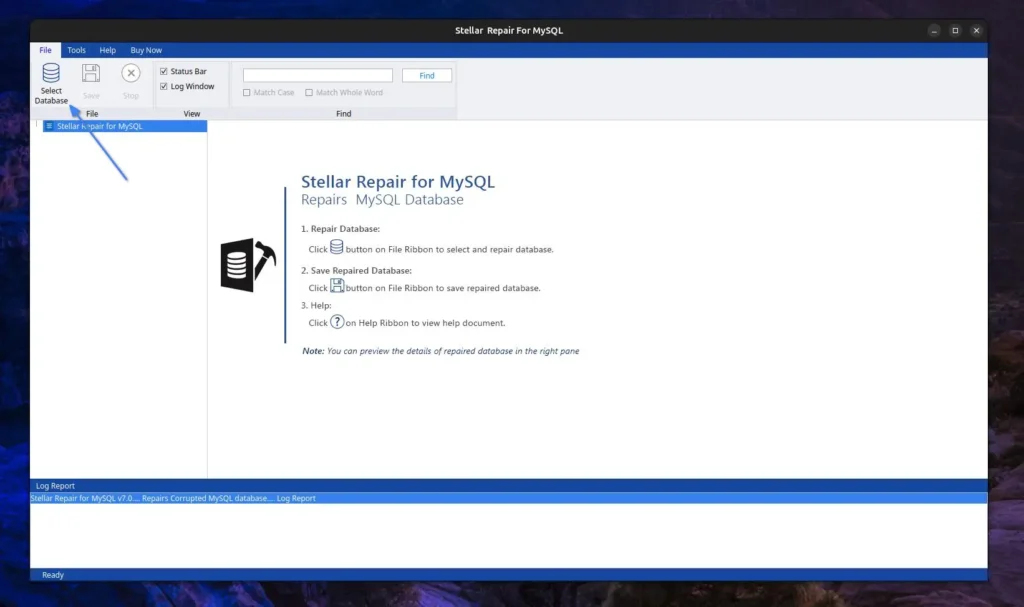
Afterward, open the “MySQL Database Recovery Tool” and click the “Select Database” option.
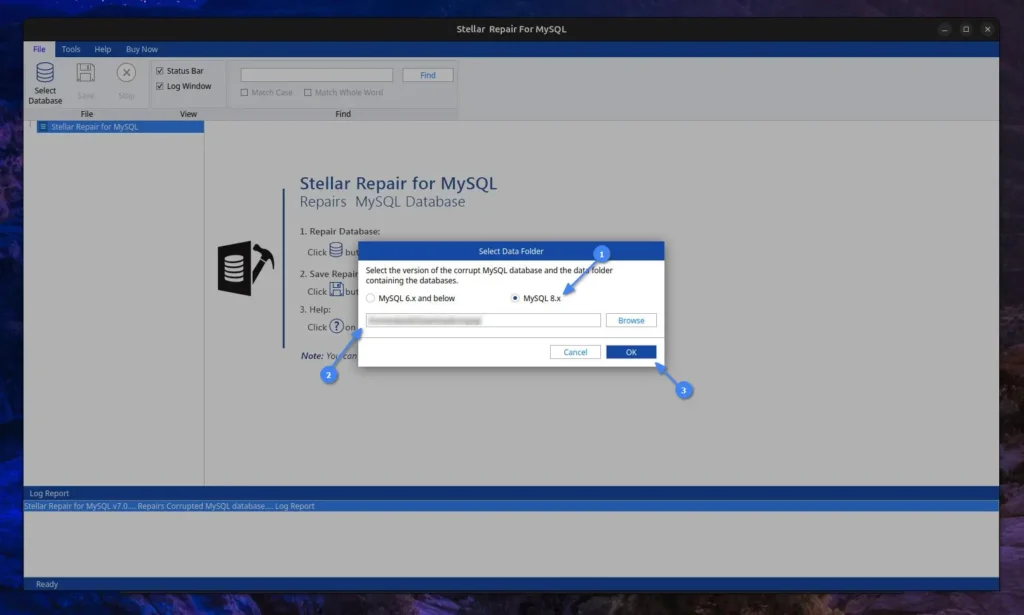
A prompt will pop up asking to select the relevant MySQL version and data folder. Since I use the latest MySQL version, I will select the “MySQL 8.x” option and “provide the path to the MySQL data folder” that needs repair.
Next, you will see a list of databases detected by the program from the provided MySQL data folder path. Simply “Select the database that needs repair” and proceed by clicking the “Repair” button.
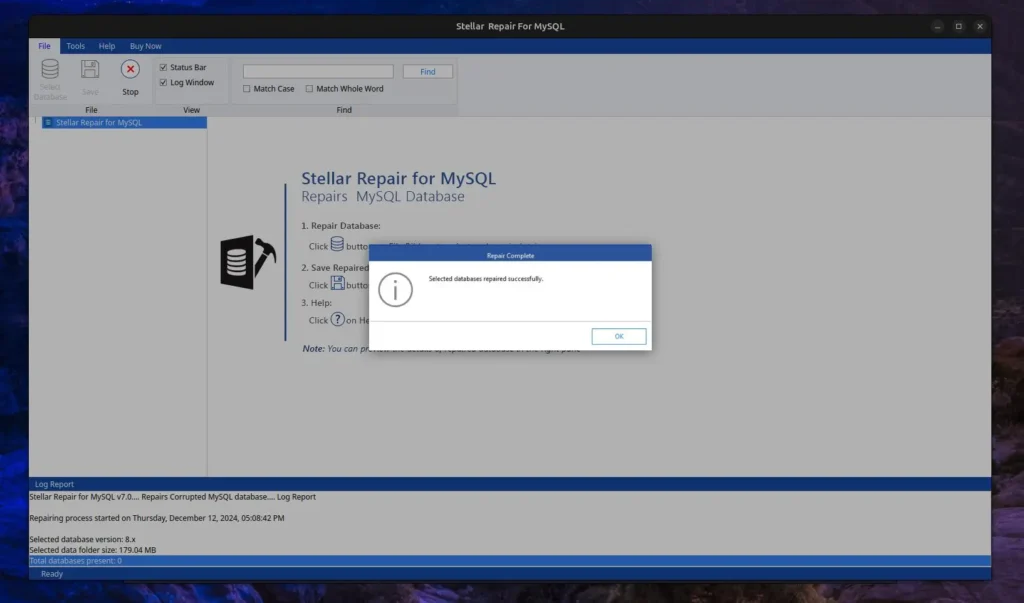
Now, it will look for errors or corruption in the selected database, perform the necessary steps to recover it, and display a success message once completed.
Since the MySQL data folder that I’ve provided does not have any issues or corruption, it did not detect any errors, as shown in the log report below. However, in your case, it might be different.
When you’re done repairing, make sure to start the MySQL service.
$ sudo systemctl start mysql
How to Remove MySQL Database Recovery Tool from Linux
This article wouldn’t be complete without including the removal steps, so in the future, if you no longer need this tool, you can easily uninstall it from your system using the default package manager via the terminal.
# Removal Command for Ubuntu-based distributions
$ sudo apt remove stellarrepairformysql

# Removal Command for Red Hat-based distributions
$ sudo dnf remove stellarrepairformysql
Wrap Up
The Stellar MySQL Database Recovery Tool works perfectly on Windows, but I encountered difficulties using it on Linux. For instance, providing the MySQL data folder path and selecting the target database for repair resulted in an “Either incorrect path or no tables in the database” error message.
At first glance, I thought it might be a database issue, but after some trial and error, I moved the data folder in Windows and repeated the same steps, which worked without issues. This suggests that the Linux version of this tool is not fully ready and requires a workaround to function properly.
I’m still exploring this tool myself and will continue updating this article with new updates. If you have any questions or queries regarding the tool, feel free to ask them in the comment section.
WordPress is a popular CMS for bloggers and journalists, offering a range of features, including multi-user management, allowing admins to create separate accounts for different users with varying privileges.
The rule of thumb is to hand over the username and password to the user after account creation, but if the user or admin itself forgets the own password, the only option is to reset the user or admin password from the MySQL console or by using external tools.
In this article, I’ll show you how to reset (or change) the WordPress logins using the MySQL command-line client or the “wp-cli” command.
Method 1: Reset the WordPress Password via MySQL Command
The first step is to log in to your server running WordPress via SSH. Then, make sure to take a backup of your WordPress database. You can either create a snapshot of your server or use the backup option if you are using a hosting provider.
Alternatively, you can use the following command to export a specific MySQL database to an SQL file format by providing the MySQL username, password, and database name.
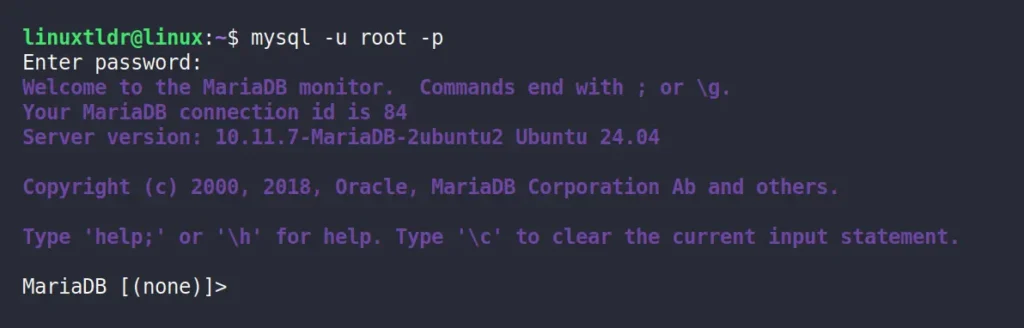
Once you have taken the backup, you can reset the WordPress password by first connecting to the MySQL or MariaDB server.
$ mysql -u [user] -p
Output:
Then you need to select the WordPress database; if you forget the database name, you can use the “SHOW DATABASES;” SQL query to list all MySQL databases. Once you locate the correct database, use the following command to select it:
MySQL> use [wordpress_db]
Output:
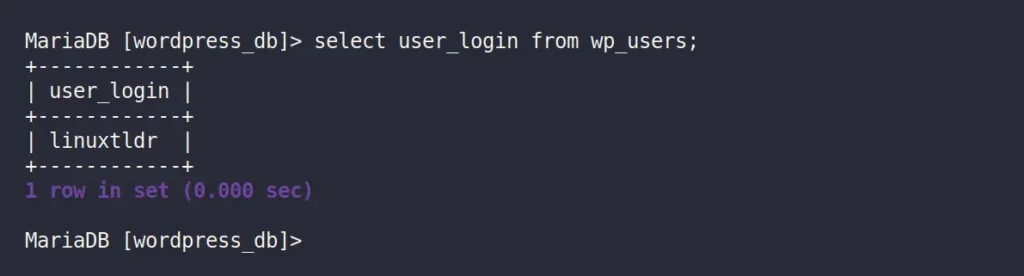
Then, for confirmation, you can run the following command to list all WordPress users:
MySQL> select user_login from wp_users;
Output:
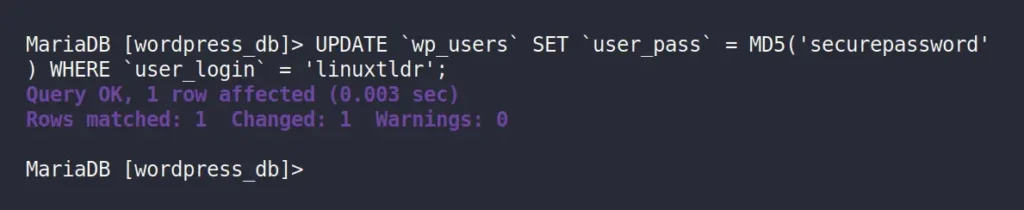
I have only one user account named “linuxtldr“, whose password I want to change. However, in your case, there could be one or more users, so note down the username and execute the following SQL query to update that user password (using the MD5 hashing algorithm):
📝
Make sure all highlighted green fields are replaced with accurate information.
MySQL> UPDATE `wp_users` SET `user_pass` = MD5('changeme') WHERE `user_login` = 'wordpress-user';
Output:
When you are done, quit the MySQL console using the “exit” SQL query and return to WordPress to log in with the updated password.
Method 2: Reset the WordPress Password via WP-CLI Command
WP-CLI is a fantastic command-line tool for managing WordPress that you should definitely give a try. We’ve already covered its installation and command-line usage in a separate article, so we’ll skip those parts and focus on resetting the WordPress administrator password.
First, ensure you are connected to the system running WordPress, then open your terminal and navigate to the directory where the WordPress files are stored (typically, it’s “/var/www/html“).
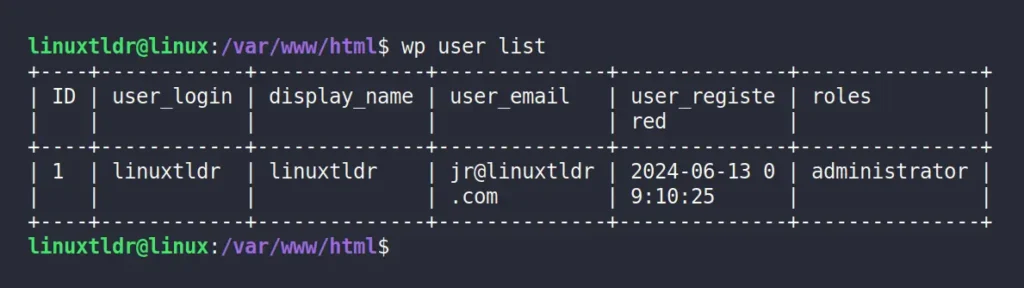
Then run the following command to list all the WordPress user accounts:
$ wp user list
Output:
Finally, select the username whose password you want to change, and pass it to the command below, along with the new password for resetting.
📝
Make sure the green highlighted fields are replaced with the correct information.
$ wp user update wordpress-user --user_pass=changeme
Output:
That’s it; you have successfully changed the WordPress password using the “wp-cli” tool.
Final Word
All the methods mentioned would work for resetting the WordPress password; you can choose one according to your preference. If you have any questions, feel free to ask them in the comments.
Python is one of the most widely used programming languages that powers many popular web applications, AI/ML technologies, IoT devices, task automation, and many more.
Right now, Python 3 is the latest version, but if you are using an outdated system, you might be using an older version of Python, possibly Python 2, which is now deprecated.
Knowing the correct Python version is crucial, whether you are running a program that only works with a specific version or planning to start a Python project with the latest version.
In this quick guide, I’ll show you how to check the Python version in Ubuntu and other Linux distros from the command line.
How to Check Python Version in Linux (via 3 Methods)
There are multiple ways to find out the Python version from the command line; here I’ve provided you with the first two ways to identify if Python 2 or 3 is running on your Linux system, and the third method works for any Python version.
Method 1: Check Python 2 Version via Python Command
If you are running the older Python 2 version (which is now deprecated) on your Linux system, you can try running the “python” command with the “-V” or “–version” option to check its version information.
$ python -V

# OR

$ python --version
Output:
This method only works for Python 2, as Python 3 requires a different command, which you can find in the next section.
Method 3: Check Python Version via Python Interpreter
The previous two methods will help you find the Python version installed on your Linux system, but if you want to check the Python version in the interpreter (also known as the Python console) or within a Python script, you can do that too.
The “sys” and “platform” modules can help you check the installed Python version; the “sys” module provides detailed information, including the build number and date, while the “platform” module only prints the version.
You can use any one of them according to your needs, so when you’re ready, open your Python console or script and copy-paste any of the following Python snippets:
# Checking Python Version Using Sys Module
import sys
print(sys.version)

# Checking Python Version Using Platform Module
import platform
print(platform.python_version())
Output:
This method would work on any Linux distribution (such as Debian, Ubuntu, Red Hat, Fedora, Arch, Manjaro, etc.), as well as on Windows, macOS, or Raspberry Pi.
Knowing the correct Python version is crucial to ensuring compatibility among the program, libraries, framework, and applications. This article shows you various methods to check the installed Python version on your Linux system, whether from the command line, the Python interpreter, or programmatically.
If you have any questions, feel free to ask them in the comments.
PHP is a popular scripting language used in the backend during web development to take the client request, process the request and respond to it, or execute MySQL queries.
Many popular CMS (content management systems), such as WordPress, Joomla, Drupal, Laravel, Magento, Symfony, and many more, are based on PHP.
As the popularity of PHP grows, each PHP version undergoes multiple changes, such as performance improvements, functionality updates, and security enhancements.
With this release, knowing the PHP version installed on your system is crucial, especially if you plan to develop a new web app based on PHP; ensure you check the PHP version on your system and strategize your development accordingly.
In this article, I’ll show you how to check the PHP (or PHP-FPM) version on Ubuntu and other Linux distros using the command line.
How to Check PHP Version in Linux (via 4 Methods)
There are multiple ways to find out the PHP version installed on your system: I’ll show you four methods— the first three work for any Linux distribution such as Debian, Ubuntu, Red Hat, Fedora, Arch, Manjaro, etc., while the fourth method only works for Ubuntu-based distributions such as Debian, Pop!_OS, Linux Mint, etc.
Method 1: Check PHP Version via PHP Command
The simplest way to find out the PHP version is by using the “-h” or “–help” flag with the “php” command in your command line.
$ php -v
Output:
This method will work for the majority of Linux distributions with PHP installed through a package manager.
Method 2: Check PHP Version via PHP Script
When PHP is installed using a different method, such as source code, the previous method might not work as it relies on passing the help flag to the PHP binary file that resides in the bin folder.
If you’re using the absolute path of the PHP binary file to run your PHP script, you can create a new PHP file named “phpversion.php” and include the following content:
<?php
	phpinfo();
?>
Then, you have two options: either run the PHP server and access the PHP file in your web browser to check the PHP version, or pass the PHP file to the absolute path of the PHP binary file and use the grep command to find the PHP version.
This method would work for all Linux distributions, as well as Windows and macOS.
Method 3: Check PHP Version via System Path
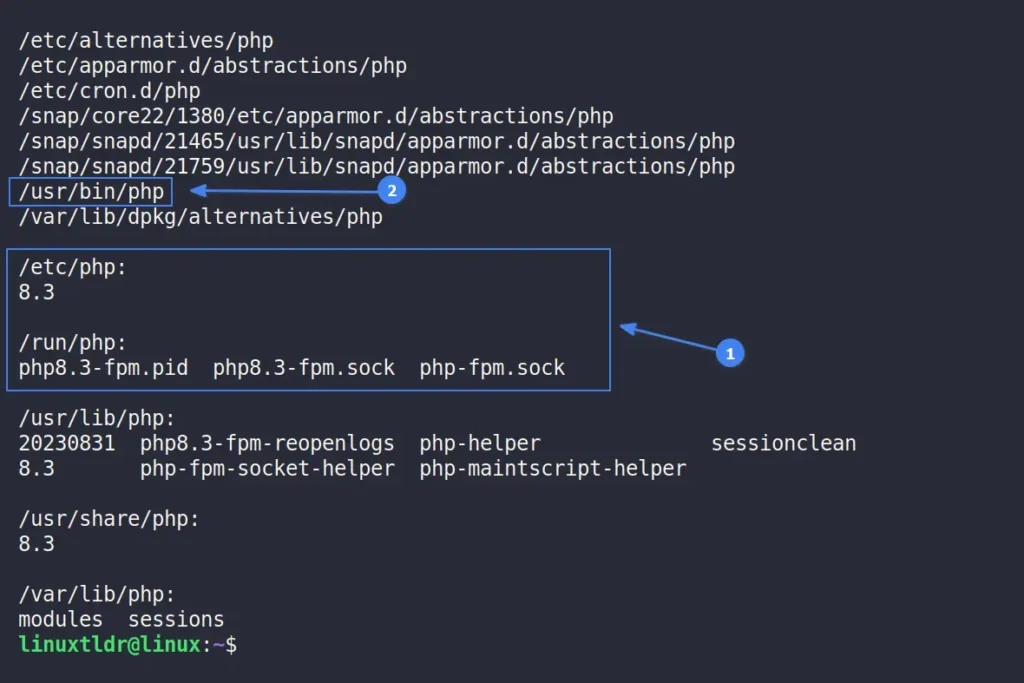
If you’ve relocated the PHP directory and can’t locate it, neither of the previous methods will work. In such cases, you can use a few command-line tools to find the PHP directory.
For example, in the given command, “locate” will search for a file or directory named PHP, “grep” will filter the results for files ending with the name PHP, and the final command is “xargs” and “ls“, which are used to follow symbolic links, taking stdin data from the previous piped command.
$ locate php | grep -P "/php$" | xargs ls -L
When you run the above command, it will return all PHP files, sometimes including the PHP version in the output, as shown.
If the PHP version isn’t displayed, you can look for a PHP file in a bin directory or use tools like the file command to identify a binary file. Then, use the absolute path to the PHP binary file along with the help option to determine the PHP version.
This method is quite effective but might be a bit trickier for beginners, so if you’re using a Debian or Ubuntu-based distribution, you can follow the next method to verify the PHP version.
Method 4: Check PHP Version via APT Command
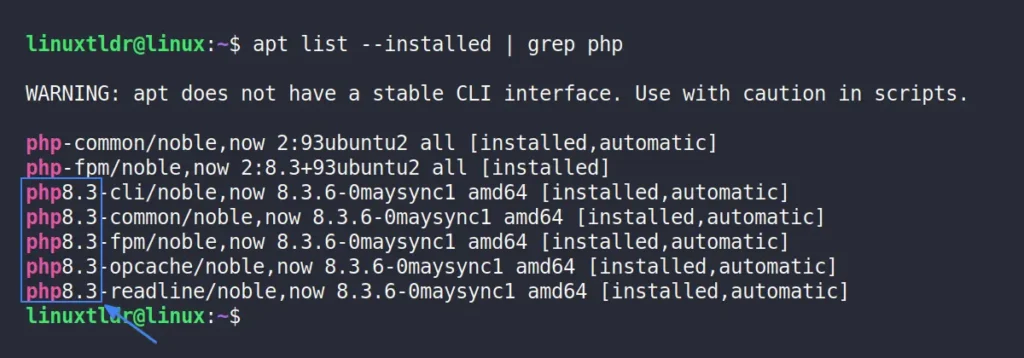
When you install a program on a Debian or Ubuntu-based distribution, it adds an entry in the APT list that you can use to check the PHP version installed on your system.
$ apt list --installed | grep php
Output:
This method would only work for Debian or Ubuntu-based distributions; if you’re uncertain about the Linux distribution you’re running, use the command “cat /etc/os-release” to identify it.
Final Word
In this article, you’ve learned various methods to check the PHP version running on your Linux system. If you have any questions, feel free to ask them in the comment section.
Are you also facing the “pkg-config script could not be found” or “configure: error: pkg-config is required” error while compiling your favorite program? Then just run one of the following commands based on your Linux distribution, and the problem will be resolved.
# On Debian, Ubuntu, Kali Linux, Linux Mint, Zorin OS, Pop!_OS, etc.
$ sudo apt install pkg-config

# On Red Hat, Fedora, CentOS, Rocky Linux, AlmaLinux, etc.
$ sudo dnf install pkgconfig

# On Arch Linux, Manjaro, BlackArch, Garuda, etc.
$ sudo pacman -S pkgconf

# For macOS
$ brew install pkg-config
Interested in knowing more about this package? Then, let’s start.
What is pkg-config in Linux?
pkg-config is a helper tool that is used to provide the correct path of header files or libraries to the compiler option during the compilation of an application or program.
It often happens that the path of header files or libraries varies for different systems; instead of hard-coding them, pkg-config helps determine the proper paths to header files and code to link them to your software project.
It’s free, open-source, and originally released for Linux and other UNIX-like systems, but later ported to Windows and macOS. The program code has been rewritten multiple times, with the first implementation by James Henstridge and the current one maintained by Tollef Fog Heen.
Let’s now see how pkg-config can help us find the correct path to pass to the compiler.
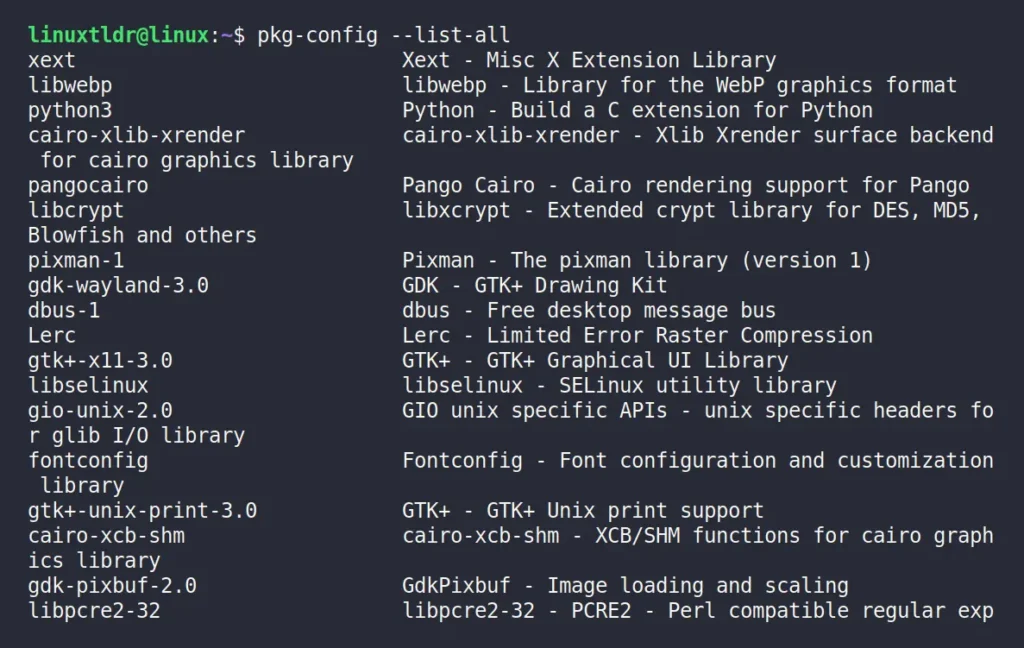
pkg-config helps during the compilation of applications by providing paths to the installed header files and libraries. To learn its usage, you must first find out the list of available packages on your system using this command:
$ pkg-config --list-all
Output:
Once you have selected the package name, you mainly use the following two options:
“–cflags“: It will provide the path for the “-I” (include) compiler option, typically for header files.
“–libs“: It will return the path for the “-L” (libs) compiler option, which is often used to link compiled libraries to new code.
Let’s say you want to find the compiler option for the “python3” package, you can run:
$ pkg-config --libs --cflags python3
Output:
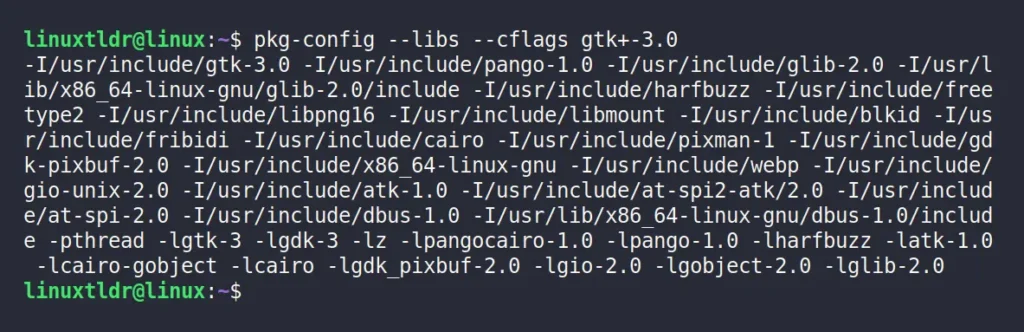
In this scenario, there is only one path for each “include” and “libs” compiler option. However, certain packages, like “gtk+-3.0” may offer multiple paths.
$ pkg-config --libs --cflags gtk+-3.0
Output:
These outputs can be used for program compilation. You can either copy-paste it or assign it to a custom environment variable. For example, exporting the output of the pkg-config command to the compiler via environment variables would look like this:
Afterward, you can use this environment variable to compile your program, like below:
$ COMPILER -c MYPROGRAM ${COMPILER_PATHS}
If you’re not a programmer and aren’t involved in compilation, you might wonder why this matters. However, if you do end up involved in compiling other programs via source code, the “configure” file you use to set up the environment might include pkg-config for providing paths. In that case, pkg-config must be installed on your system, or you might encounter the error mentioned in the article introduction.
I hope you understood the concept of pkg-config—what it is, when to use it, and why you should care. If you have further questions, feel free to ask them in the comments.