Looking for application monitoring and observability solutions? On this page, I’ve listed the top application performance monitoring (APM), infrastructure monitoring, and observability solutions to date.
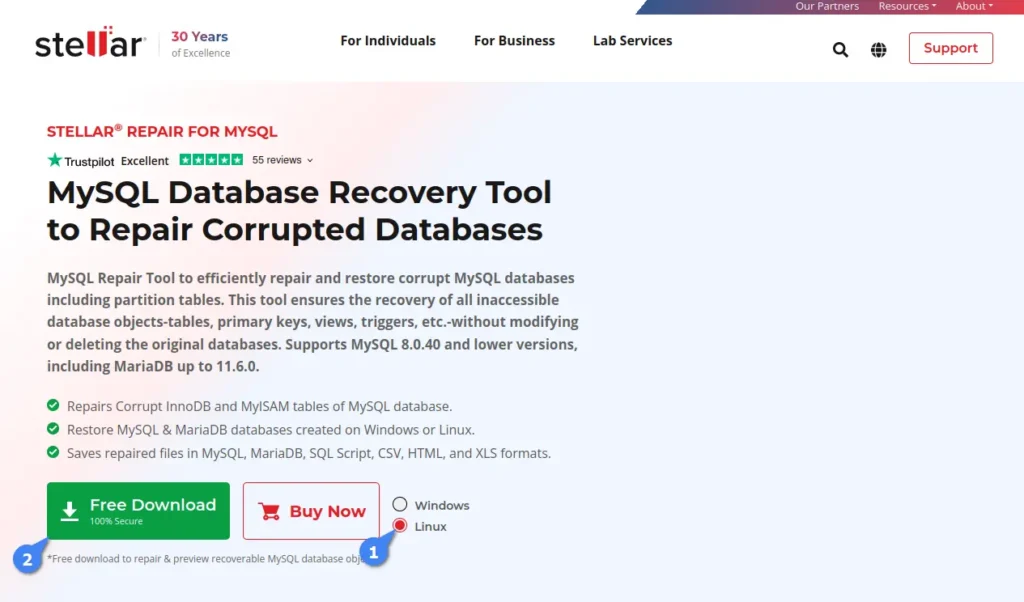
MySQL Database Recovery Tool by Stellar is designed to assist in resolving various issues that may occasionally arise while managing MySQL and MariaDB databases.
It can efficiently repair all inaccessible or corrupted database objects (tables, primary keys, views, triggers, etc.) created in the InnoDB and MyISAM MySQL database engines without altering or deleting the original databases.
MySQL versions 8.x, 6.x, 5.x, 4.x, and 3.x are compatible as of writing, and since it’s available for Windows, Ubuntu, and Red Hat-based distributions, you can easily recover your MySQL database on these systems. Otherwise, you can copy the MySQL data folder from an unsupported OS to either Windows or Linux, repair it, and move it back to the original OS.
After saving the repaired database in MySQL or MariaDB formats, this tool allows us to save it in various other file formats, such as SQL Script, CSV, HTML, and XLS, which can be crucial when repairing MySQL on a system without MySQL or MariaDB installed.
Pros & Cons
Pros
Cons
Available for Windows, Ubuntu, and Red Hat-based distributions.
Not available for macOS.
Efficiently can repair the latest version of MySQL and MariaDB databases.
It’s proprietary software.
Export the database file in SQL script, CSV, HTML, and XLS file formats.
It’s premium software with a free trial given, which can only perform repairs and display the repaired database but does not apply the changes.
The “Save log report” option allows viewing and analyzing the log content later for forensic analysis.
The software’s license key is quite expensive compared to alternatives.
A user-friendly interface that allows navigation and selection of the MySQL data directory for repairing corruption and applying necessary patches.
It’s not completely ready for Linux systems. You might need to move your MySQL data folder to Windows for repair, as the Windows version of this tool works perfectly.
How to Install MySQL Database Recovery Tool on Linux
Since it’s available for both Windows and Linux (especially Ubuntu and Red Hat-based distributions), I’ll show you the steps to install it on a Linux distribution.
So, start by navigating to its product page to download Stellar Repair for MySQL, select “Linux“, and then click on “Free Download” (you can begin with the free version and activate it with a license key later).
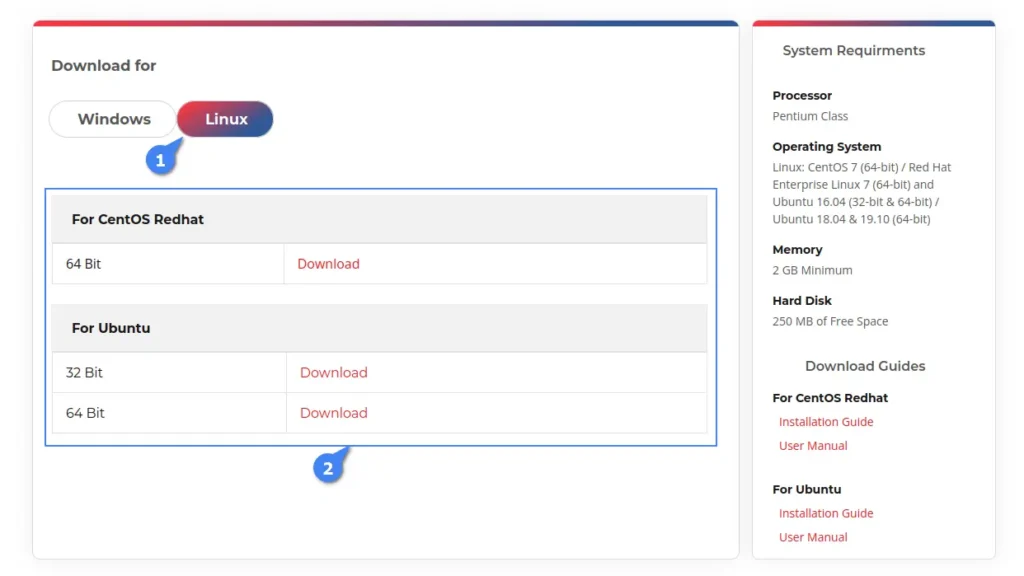
You’ll be redirected to the Linux download page, where you can download the package file based on your Linux distribution type. For example, clicking the download button under “For CentOS Redhat” will download the “.rpm” file, while “For Ubuntu” will download the “.deb” file.
Once the file is downloaded, open your terminal, navigate to the “~/Downloads/” directory, and execute one of the following commands according to your Linux distribution.
# Navigating to Downloads directory
$ cd ~/Downloads/

# Installation Command for Ubuntu-based distributions
$ sudo dpkg -i ./StellarRepairforMySQL-U.deb

# Installation Command for Red Hat-based distributions
$ sudo rpm -i ./StellarRepairforMySQL.rpm
When the installation is finished, you can launch the program by searching “Repair for MySQL” in the Activity Overview.
Usage
When launched for the first time, it prompts you to provide the current logged-in username (auto-detected) and password. Before entering the credentials, make sure the logged-in user has sudo privileges to allow the program to perform repairs without interruption.
Once logged in, you will be presented with the dashboard where you can activate the program using a license key (which is only needed when you want to apply the changes), but for demonstration purposes, you can test it without a license key.
To achieve this, stop your MySQL services and copy the MySQL data folder, typically located at “/var/lib/mysql” in Linux, to a safe location like your home directory for use as a backup.
$ sudo systemctl stop mysql
$ cp /var/lib/mysql $HOME/
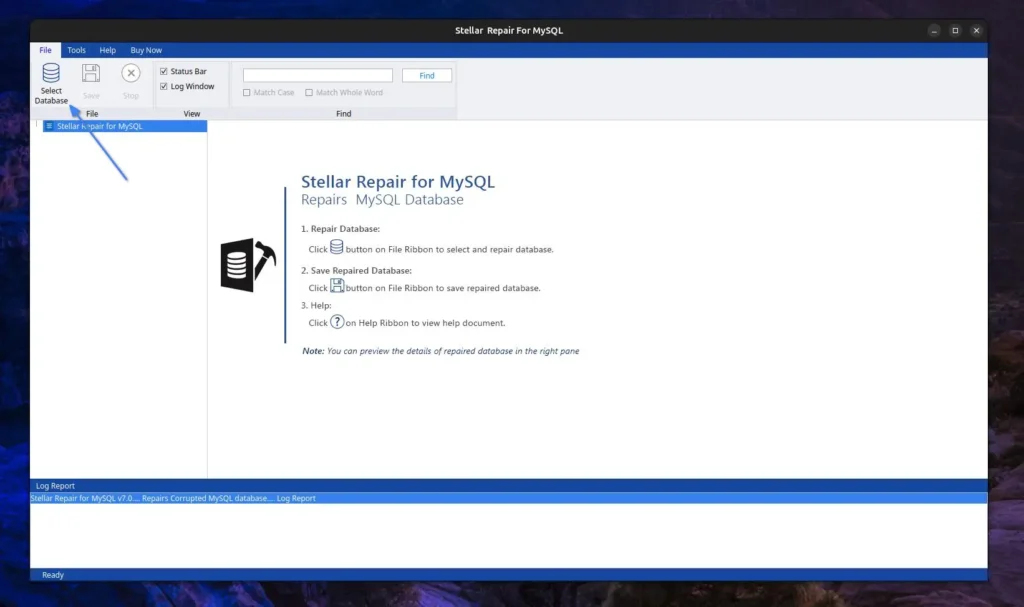
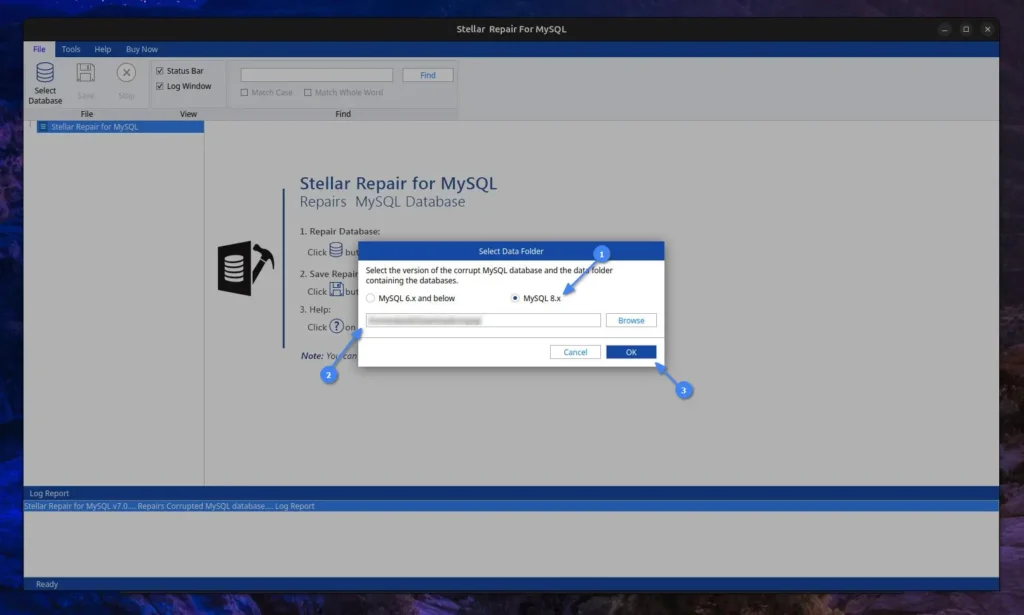
Afterward, open the “MySQL Database Recovery Tool” and click the “Select Database” option.
A prompt will pop up asking to select the relevant MySQL version and data folder. Since I use the latest MySQL version, I will select the “MySQL 8.x” option and “provide the path to the MySQL data folder” that needs repair.
Next, you will see a list of databases detected by the program from the provided MySQL data folder path. Simply “Select the database that needs repair” and proceed by clicking the “Repair” button.
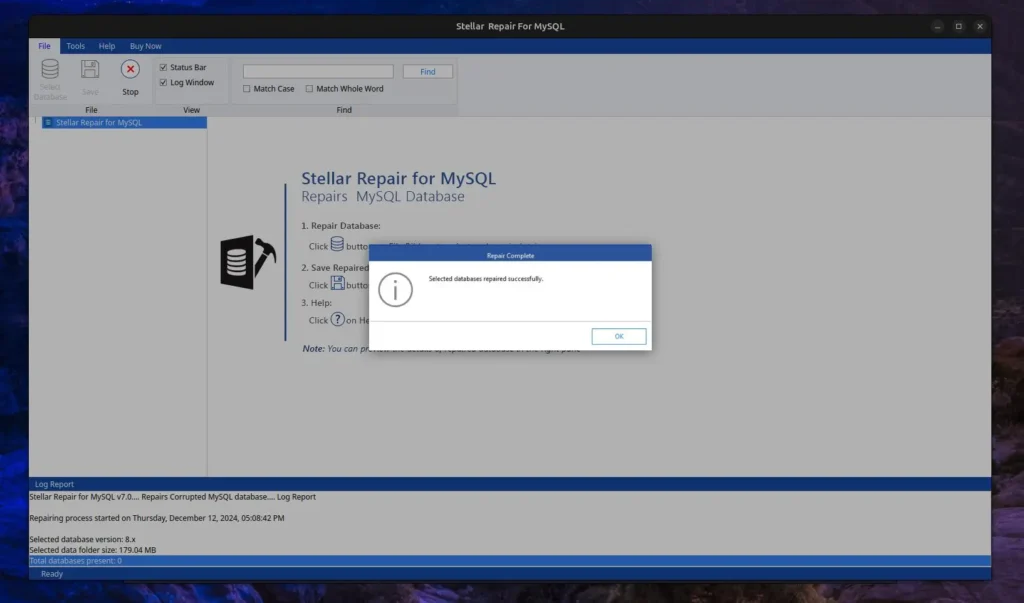
Now, it will look for errors or corruption in the selected database, perform the necessary steps to recover it, and display a success message once completed.
Since the MySQL data folder that I’ve provided does not have any issues or corruption, it did not detect any errors, as shown in the log report below. However, in your case, it might be different.
When you’re done repairing, make sure to start the MySQL service.
$ sudo systemctl start mysql
How to Remove MySQL Database Recovery Tool from Linux
This article wouldn’t be complete without including the removal steps, so in the future, if you no longer need this tool, you can easily uninstall it from your system using the default package manager via the terminal.
# Removal Command for Ubuntu-based distributions
$ sudo apt remove stellarrepairformysql

# Removal Command for Red Hat-based distributions
$ sudo dnf remove stellarrepairformysql
Wrap Up
The Stellar MySQL Database Recovery Tool works perfectly on Windows, but I encountered difficulties using it on Linux. For instance, providing the MySQL data folder path and selecting the target database for repair resulted in an “Either incorrect path or no tables in the database” error message.
At first glance, I thought it might be a database issue, but after some trial and error, I moved the data folder in Windows and repeated the same steps, which worked without issues. This suggests that the Linux version of this tool is not fully ready and requires a workaround to function properly.
I’m still exploring this tool myself and will continue updating this article with new updates. If you have any questions or queries regarding the tool, feel free to ask them in the comment section.
WordPress is a popular CMS for bloggers and journalists, offering a range of features, including multi-user management, allowing admins to create separate accounts for different users with varying privileges.
The rule of thumb is to hand over the username and password to the user after account creation, but if the user or admin itself forgets the own password, the only option is to reset the user or admin password from the MySQL console or by using external tools.
In this article, I’ll show you how to reset (or change) the WordPress logins using the MySQL command-line client or the “wp-cli” command.
Method 1: Reset the WordPress Password via MySQL Command
The first step is to log in to your server running WordPress via SSH. Then, make sure to take a backup of your WordPress database. You can either create a snapshot of your server or use the backup option if you are using a hosting provider.
Alternatively, you can use the following command to export a specific MySQL database to an SQL file format by providing the MySQL username, password, and database name.
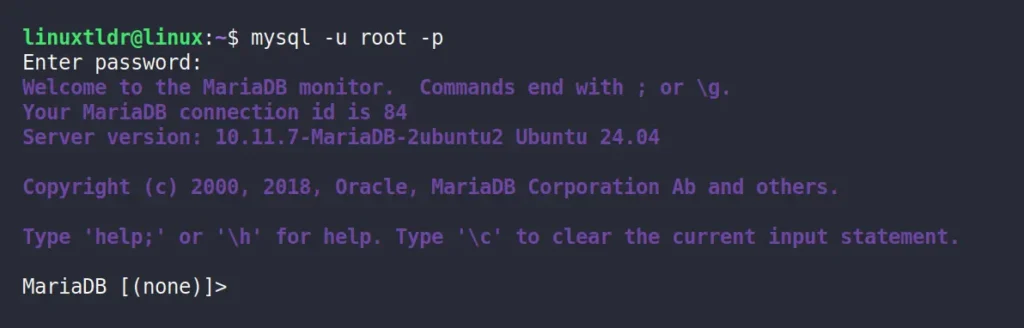
Once you have taken the backup, you can reset the WordPress password by first connecting to the MySQL or MariaDB server.
$ mysql -u [user] -p
Output:
Then you need to select the WordPress database; if you forget the database name, you can use the “SHOW DATABASES;” SQL query to list all MySQL databases. Once you locate the correct database, use the following command to select it:
MySQL> use [wordpress_db]
Output:
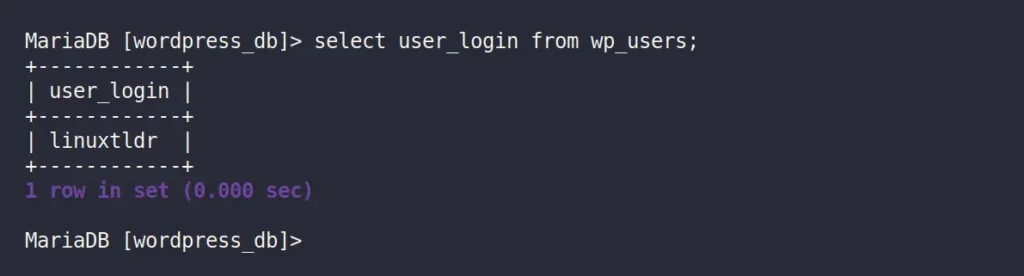
Then, for confirmation, you can run the following command to list all WordPress users:
MySQL> select user_login from wp_users;
Output:
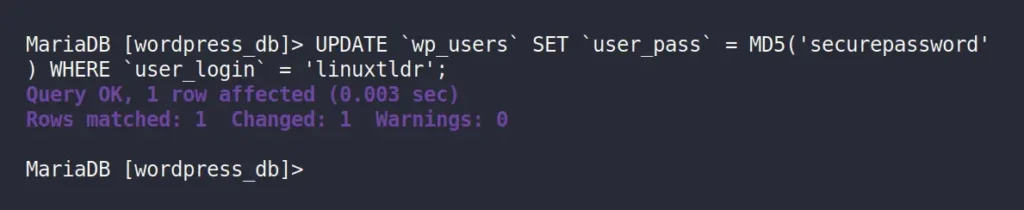
I have only one user account named “linuxtldr“, whose password I want to change. However, in your case, there could be one or more users, so note down the username and execute the following SQL query to update that user password (using the MD5 hashing algorithm):
📝
Make sure all highlighted green fields are replaced with accurate information.
MySQL> UPDATE `wp_users` SET `user_pass` = MD5('changeme') WHERE `user_login` = 'wordpress-user';
Output:
When you are done, quit the MySQL console using the “exit” SQL query and return to WordPress to log in with the updated password.
Method 2: Reset the WordPress Password via WP-CLI Command
WP-CLI is a fantastic command-line tool for managing WordPress that you should definitely give a try. We’ve already covered its installation and command-line usage in a separate article, so we’ll skip those parts and focus on resetting the WordPress administrator password.
First, ensure you are connected to the system running WordPress, then open your terminal and navigate to the directory where the WordPress files are stored (typically, it’s “/var/www/html“).
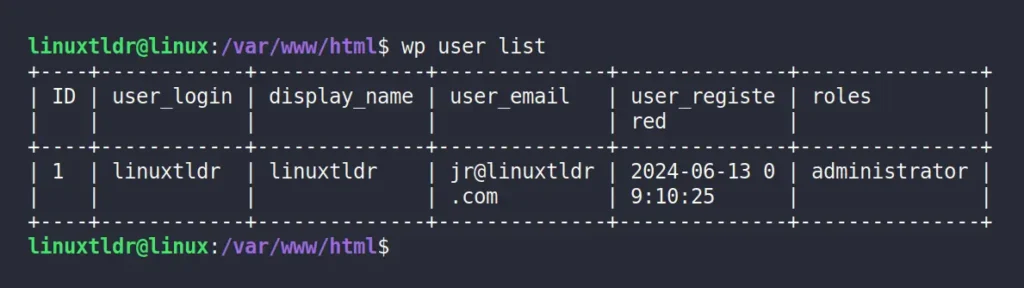
Then run the following command to list all the WordPress user accounts:
$ wp user list
Output:
Finally, select the username whose password you want to change, and pass it to the command below, along with the new password for resetting.
📝
Make sure the green highlighted fields are replaced with the correct information.
$ wp user update wordpress-user --user_pass=changeme
Output:
That’s it; you have successfully changed the WordPress password using the “wp-cli” tool.
Final Word
All the methods mentioned would work for resetting the WordPress password; you can choose one according to your preference. If you have any questions, feel free to ask them in the comments.