Run Custom Command or Script in Ubuntu 25.10 Automatically at Login
![]()
Ubuntu 25.10 no longer includes the “Startup Applications” utility! Here’s a beginner guide shows how to run apps, custom scripts or commands automatically at login through alternative methods.
Ubuntu has a “Startup Applications” tool, allowing to easily add, remove, and edit items that run at user login. Due to upstream (meaning GNOME) changes, it has finally been dropped in 25.10.
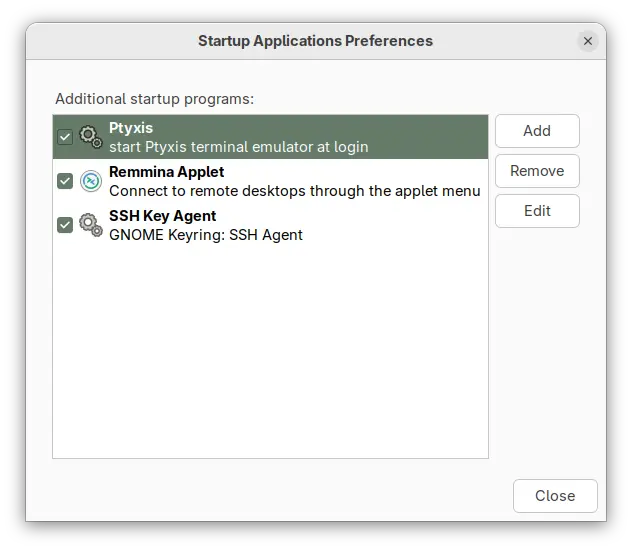
Startup Applications tool no longer available in 25.10
The new way to auto start apps, is using GNOME Control Center (aka Settings) by navigating to ‘Apps’ setting page, choose an app, and turn on the “Autostart” toggle switch. While, Gnome Tweaks also provides similar function to do the job.
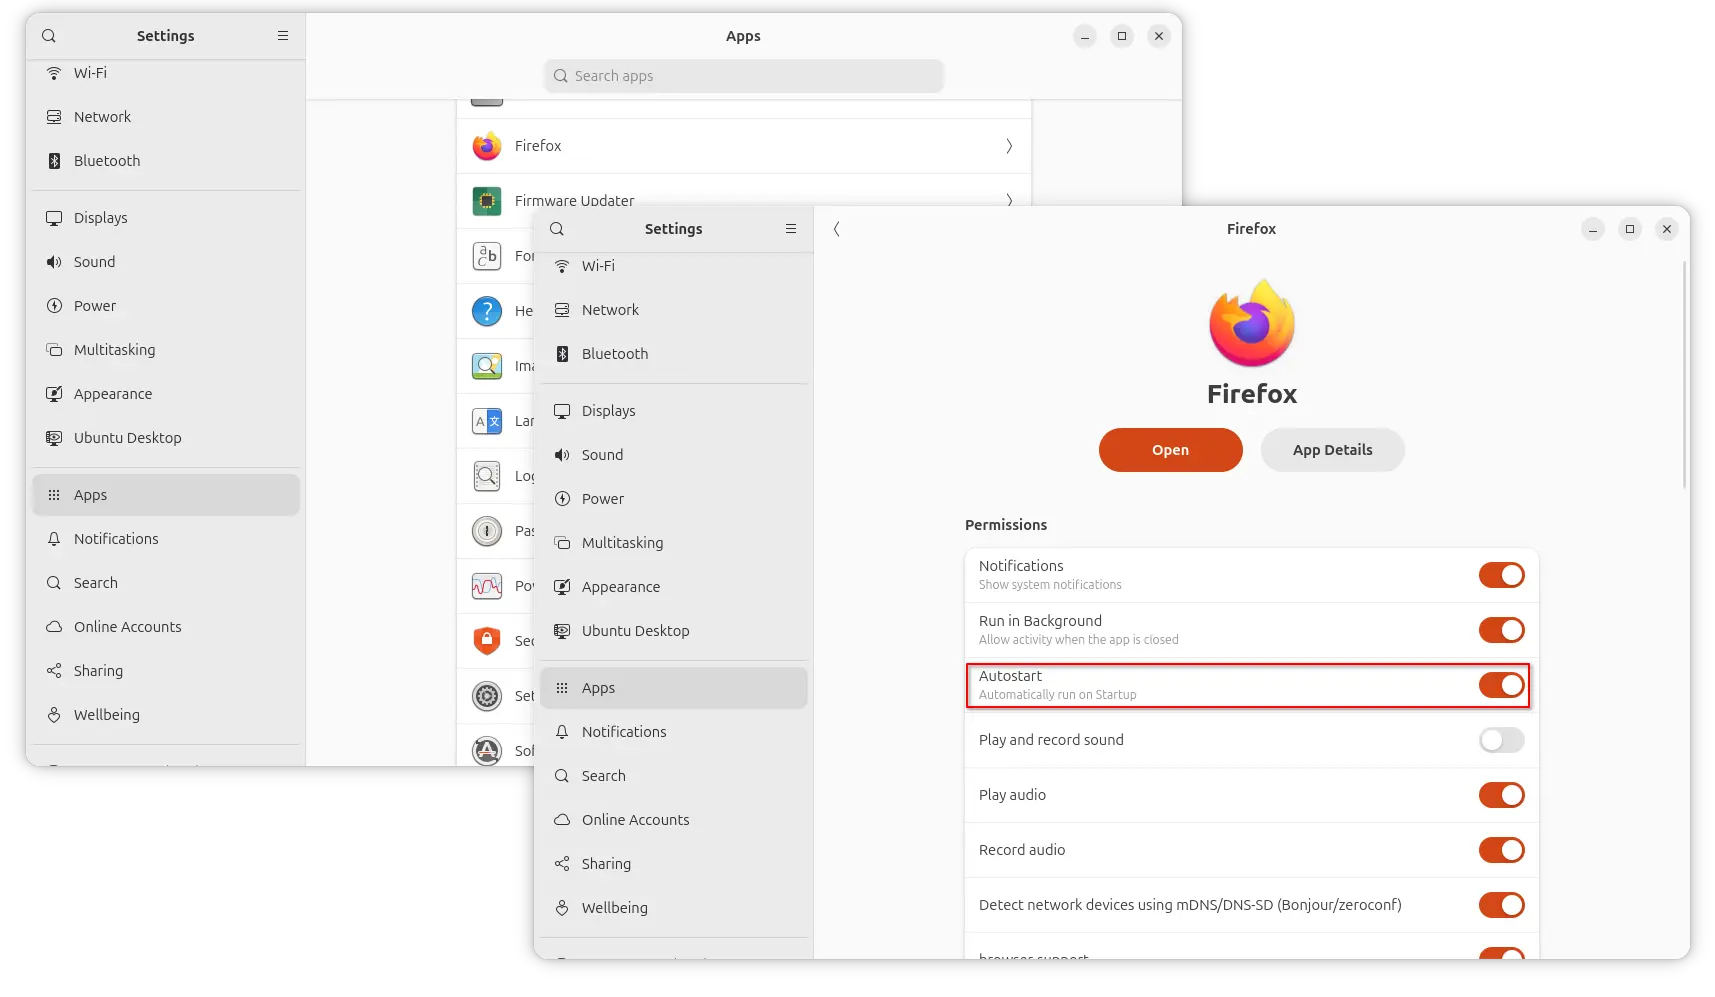
Autostart apps in Ubuntu 25.10 (GNOME 49)
But, what if you want to auto-start app with custom options, or auto-run custom commands/scripts at login?
Here are 2 alternatives to do the job:
- Add startup app manually using
.desktopconfiguration file. - Use a third-party graphical configuration tool.
Option 1: Use .desktop configuration file
As you may know, all the app icons you see in Gnome app grid, dock, or other app launchers in most popular Linux distributions are handled by .desktop files under /usr/share/applications, .local/share/applications, etc directories.
Similarly, auto-start apps are handled by the .desktop files under either /etc/xdg/autostart or .config/autostart directories.
And, when you turn on “Autostart” toggle switch for an application in Settings (Gnome Control Center), it will automatically create a file under .config/autostart linked to the .desktop file for that app icon.
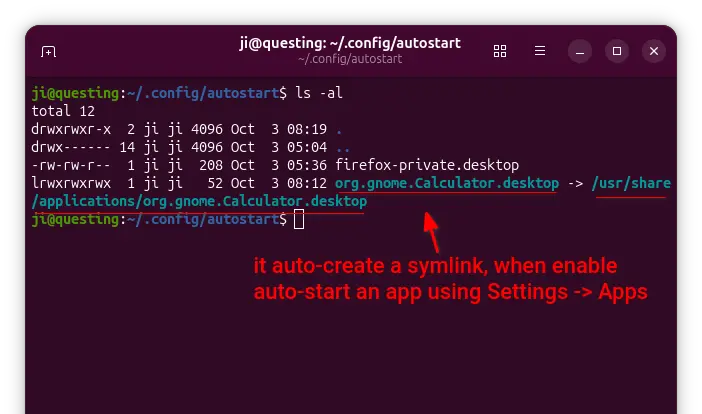
If you want to auto-run custom commands or scripts at login, then just create .desktop files in that directory with following steps.
NOTE: for those hate Linux commands, open file manager and press Ctrl+H to show hidden files/folders, then do following steps accordingly.
1. Create the directory. The ~/.config/autostart directory does not exist out-of-the-box. You may either enable an auto-start app via Settings to auto-create it, or open terminal (Ctrl+Alt+T) and run command below to create:
mkdir -p ~/.config/autostart
2. Create & edit custom .desktop file. Next, run command to create a .desktop file, “firefox-private.desktop” for example, and edit via nano command line text editor:
nano ~/.config/autostart/firefox-private.desktop
When file opens, write following content and edit accordingly:
[Desktop Entry]
Type=Application
Exec=sh -c "sleep 30; firefox --private-window https://www.google.com"
Hidden=false
Name=Firefox Private Mode
Comment=Open google.com automatically in Firefox private window.
In the case, it will auto-launch Firefox in private mode and open Google.com automatically, with 30 seconds delay after login.
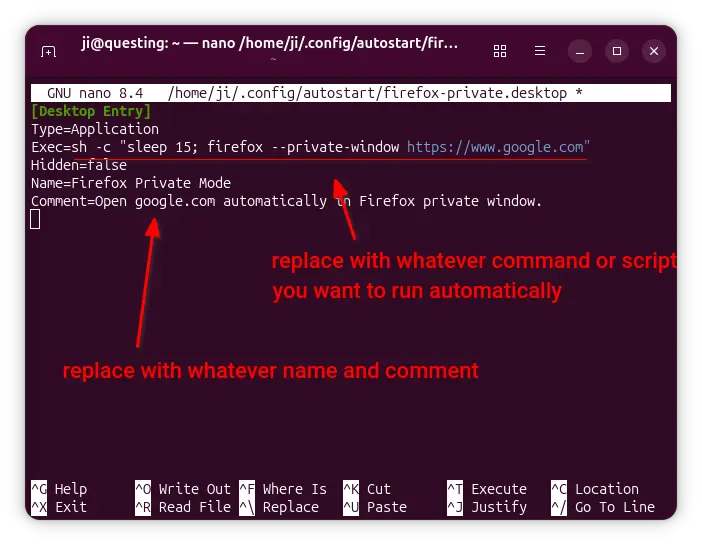
According what you want to run, you need to replace the command for “Exec“, and edit the ‘Name’ and ‘Comment’ as you want. For example, use:
Exec=/home/ji/Documents/myscriptto run my script under user Documents directory.Exec=sh -c "$HOME/Documents/myscript"to run the same script, but here “sh -c” command interpreter is required so it knows what is$HOME.Exec=update-manager --install-allto auto-launch Software Updater and install all available updates.
Tips:
- It’s better to first run the custom command or script in terminal to make sure it works.
- The X-GNOME-Autostart-Delay parameter does not work in Wayland, use
sleepin command to add time delay in seconds. - You may change Hidden=false to Hidden=true to disable that
.desktopfile, just like it’s deleted. - Add
Terminal=trueif the command need to run in a terminal. - For more about the desktop entry keys, see the doc in freedesktop.org.
After created and edited the file, press Ctrl+S to save and Ctrl+X to exit, and verify if it works by logging out and back in.
Option 2: Use a third-party graphical application
To make things simple, there are few third-party graphical tools can do the job managing startup apps and scripts.
As far as I know, the free open-source Ignition tool is a good choice which provides a simple and modern user interface to add, remove, and modify startup entries.
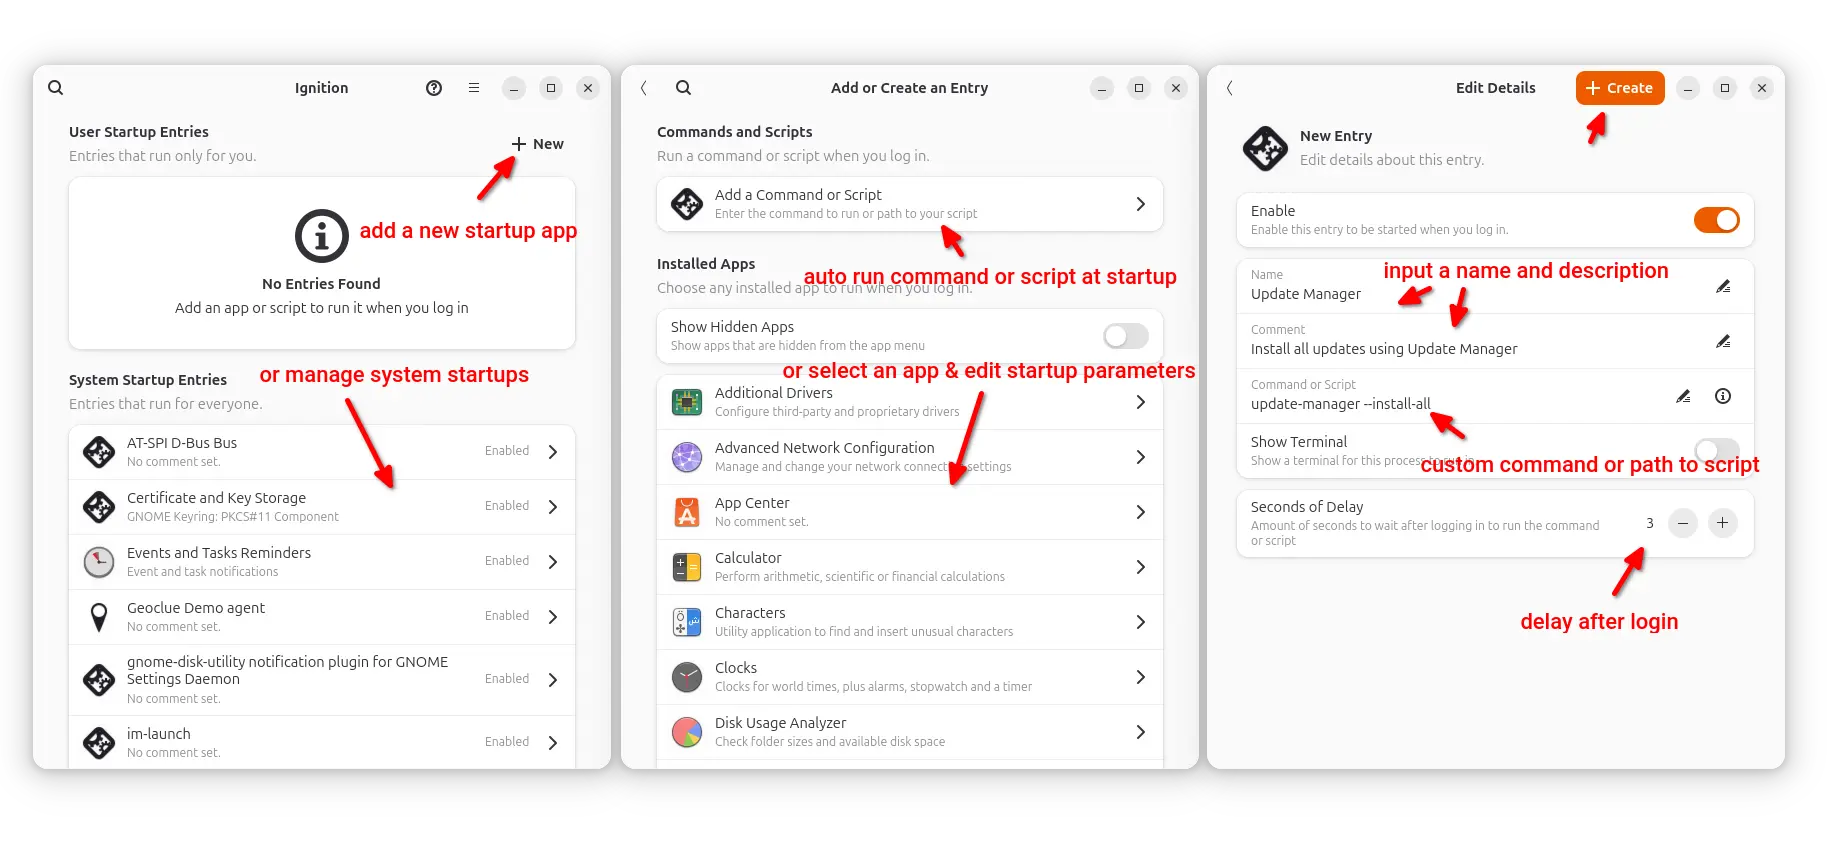
As you see in the screenshot, it provides a GTK4 and LibAdwaita interface, with ability to manage system startup entries (usually the .desktop files in /etc/xdg/autostart) that works for all users.
As well, it allows to add any installed apps (with custom options and time delay), custom command or script as auto-start items, by automatically creating .desktop files in user’s .config/autostart directory. Meaning they work for current user only.
Install Ignition
Besides building from the source, the app is available to install in most Linux through Flatpak package, which runs in sandbox environment.
For Debian, Ubuntu, and their based systems, run 2 commands below one by one to install the package:
-
First, open terminal (Ctrl+Alt+T) and enable Flatpak support by installing the daemon package:
sudo apt install flatpak
- Next, install the app package by running command:
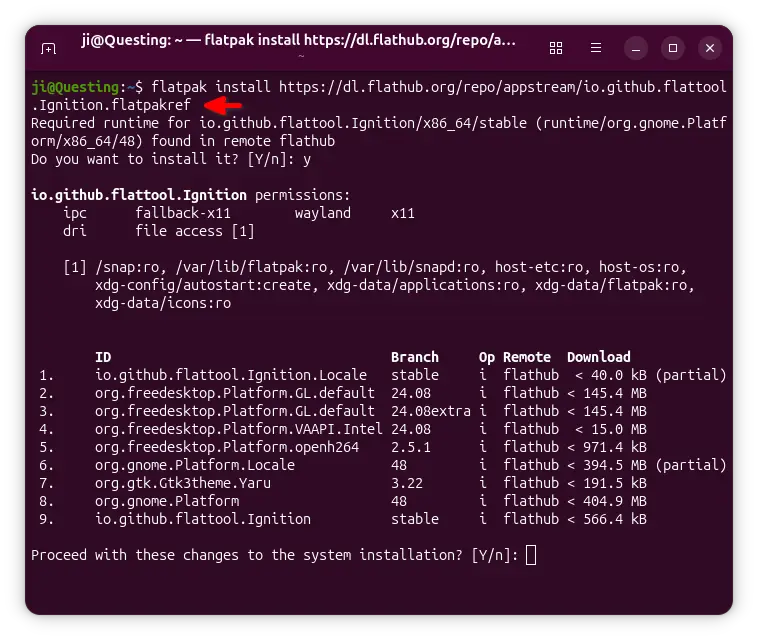
flatpak install https://dl.flathub.org/repo/appstream/io.github.flattool.Ignition.flatpakref
Tips: You may run command as sudo (add
sudoat beginning) to fix installing issue in Ubuntu 25.10.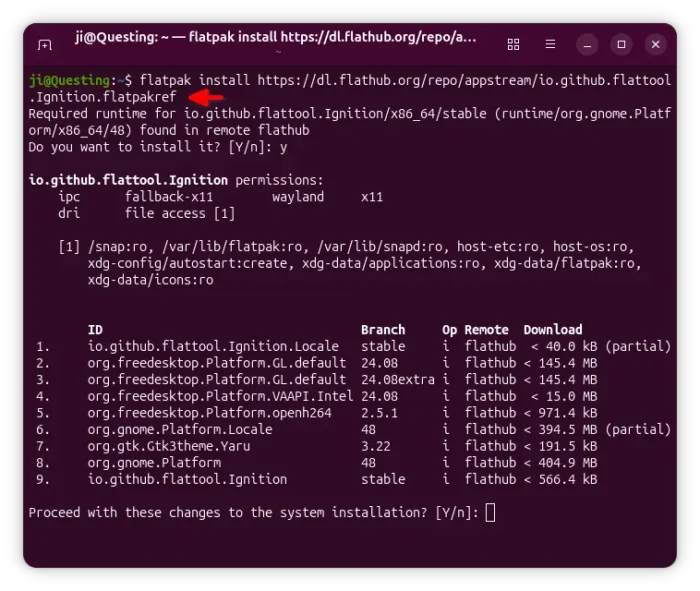
After installed the package, either search for and launch it from Gnome Overview (log out and back in if app icon is not visible), or run command below to start from terminal:
flatpak run io.github.flattool.Ignition
Uninstall Ignition
If the app does not work good for you, run the command below to uninstall it:
flatpak uninstall --delete-data io.github.flattool.Ignition
Also run flatpak uninstall --unused to remove useless runtime libraries.
NOTE that uninstall the app won’t delete the auto-start entries created by it.