Reading view

Canonical Extended Ubuntu LTS Support to 15 Years

For Ubuntu LTS releases, starting from Ubuntu 14.04 Trusty Tahr, the official support has been extended to 15 years.

Canonical, the company behind Ubuntu, announced the expansion of the Legacy add-on for Ubuntu Pro few days ago. Along with the Standard and Expanded Security Maintenance (ESM) support, the total coverage is expanded to 15 years.

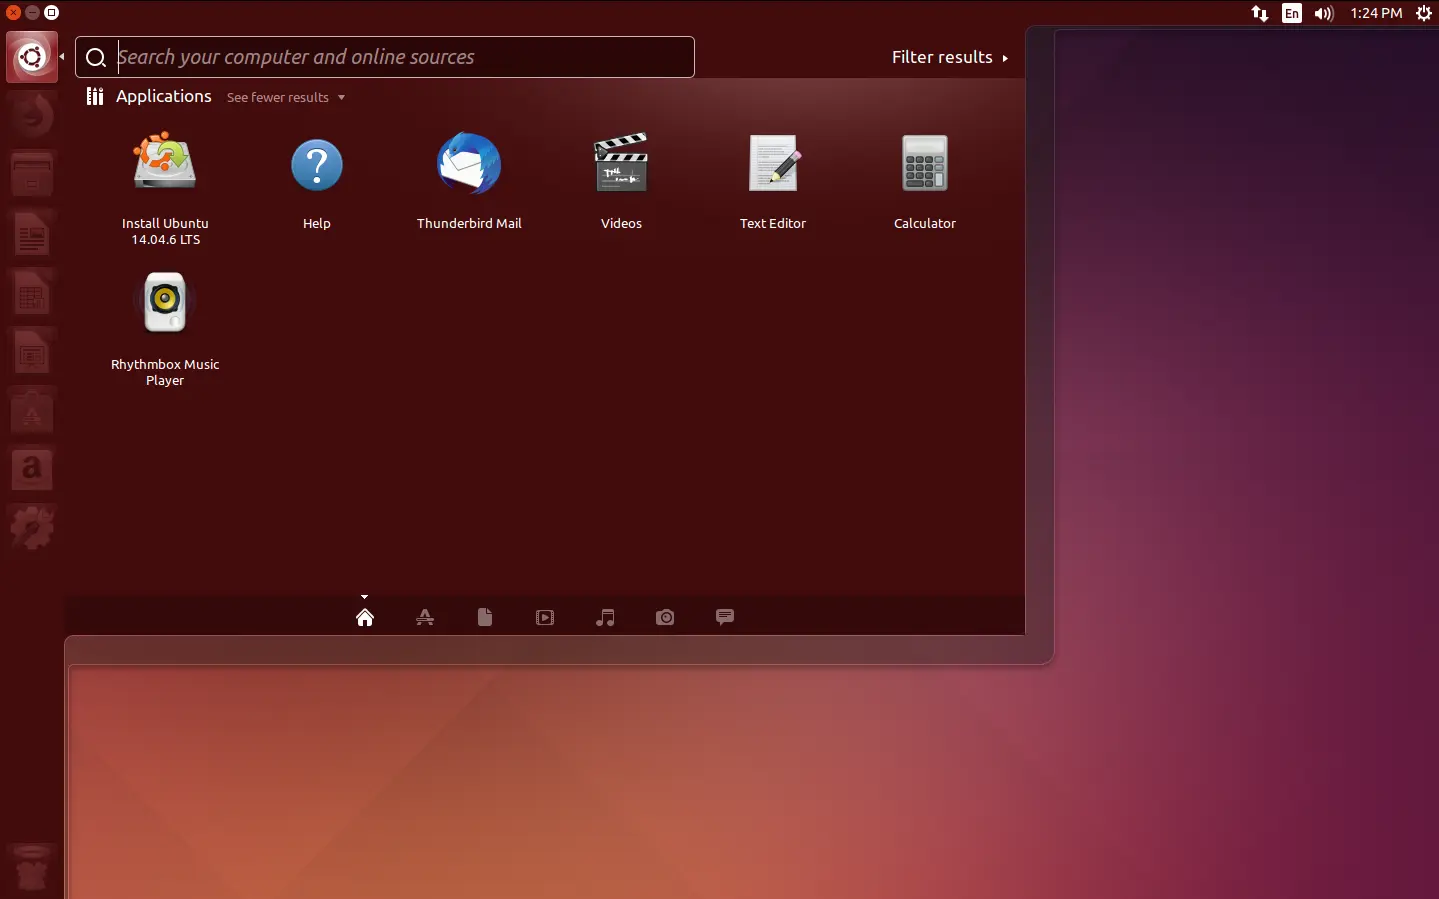
Ubuntu 14.04 Desktop

Ubuntu LTS Support History

Ubuntu LTS, the releases published every even-numbered years in April (e.g., Ubuntu 14.04, 16.04, 18.04, 20.04, 22.04 and 24.04), initially has 5 years of standard support.

Start in January 2023, Canonical announced the general availability of Ubuntu Pro, expanded Ubuntu LTS support circle with additional 5 years for subscribed users through Expanded Security Maintenance.

Then, the Legacy add-on for Ubuntu Pro was announced in last year expanded the security and support with 2 more years.

Due to the positive reception and growing interest in longer life-cycle coverage (according to the announcement), the legacy add-on was extended to 5 years, thus the total support Ubuntu LTS releases has updated to 15 years.

Current Ubuntu Releases Support Circle

Ubuntu website has updated the life-circle page for all releases that are still in coverage. And, here’s a table for them.

Ubuntu Releases Release Date End of Standard Support End of Ubuntu Pro Support End of Legacy Addon Coverage
25.10 (Questing Quokka) Oct 2025 Jul 2026
25.04 (Plucky Puffin) Apr 2025 Jan 2026
24.04 LTS (Noble Numbat) Apr 2024 Apr 2029 Apr 2034 Apr 2039
22.04 LTS (Jammy Jellyfish) Apr 2022 Apr 2027 Apr 2032 Apr 2037
20.04 LTS (Focal Fossa) Apr 2020 Apr 2025 Apr 2030 Apr 2035
18.04 LTS (Bionic Beaver) Apr 2018 Apr 2023 Apr 2028 Apr 2033
16.04 LTS (Xenial Xerus) Apr 2016 Apr 2021 Apr 2026 Apr 2031
14.04 LTS (Trusty Tahr) Apr 2014 Apr 2019 Apr 2024 Apr 2029

As you see in the table, the support for LTS releases include 5 years of standard support for free, including security updates for packages in Canonical-supported Main repository, Hardware enablement (HWE) with major Kernel version updates and graphics stacks, some popular app updates (e.g., Firefox), and bug fixes and maintenance updates to ensure stability.

For user with Ubuntu Pro subscription (see how to enable Ubuntu Pro), there’ll be another 5 years of security updates for packages in Main and Universe repositories, and bug-fixes to ensure stability.

Ubuntu Pro is free for personal users on up to 5 machines, and on up to 50 machines for active Ubuntu Community members, while, enterprise customers and others need to pay for support. See Ubuntu Pro pricing.

The Legacy add-on for Ubuntu Pro provides 5 years more security coverage and support. However, it’s only available for Ubuntu Pro paying customers who pay extra.

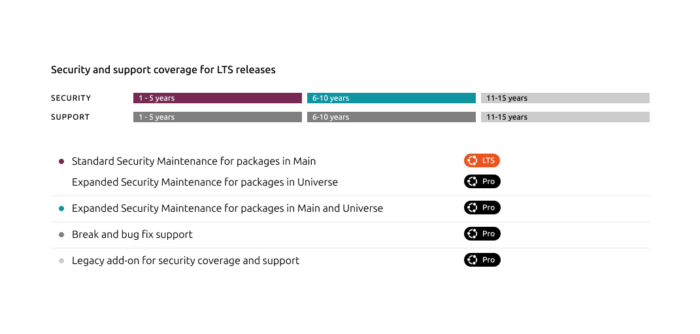
image from Ubuntu website

In short, Ubuntu LTS now has 5 years of standard support for free, another 5 years of support through Ubuntu Pro that’s free for personal users, and 5 years more security coverage for paying customers pay extra.

  •  

How to Disable All the AI Features in Firefox Web Browser

Firefox introduced AI chatbot, AI powered link preview, and search images with Google Lens etc AI powered features in the past releases.

According to the Firefox Privacy Notice, it does NOT have access to the AI conversations or what user input, but do collect technical and interaction data, such as how often a chatbot provider or suggested prompts are used, and the length of selected text.

AI chatbot in Firefox sidebar

If you don’t like the AI chatbot feature, you can hide them from side-bar settings page, or remove the shortcut from the context menu of a text selection.

Hide AI chatbot

While, in this tutorial I’m going to show you how to disable them so that they will disappear along with the settings option, link preview, and image search with Google Lens.

No AI chatbot, no configure options, and no Google Lens image search

NOTE: This tutorial is tested in Ubuntu 24.04 with Firefox 145. As time go on, Firefox will release new versions and may add, remove, or change the AI related preference keys.

Option 1: Disable AI LLM through about:config

For current profile only, type about:config in address bar and hit Enter, then click the blue “Accept the Risk and Continue” button to access the advanced configuration page.

Next, search following preference names and set them to “false” one by one:

  • browser.ml.enable
  • browser.ml.chat.enabled
  • browser.ml.chat.menu
  • browser.ml.chat.page
  • browser.ml.chat.page.footerBadge
  • browser.ml.chat.page.menuBadge
  • browser.ml.linkPreview.enabled
  • browser.ml.pageAssist.enabled
  • browser.tabs.groups.smart.enabled
  • browser.tabs.groups.smart.userEnabled
  • extensions.ml.enabled
  • browser.search.visualSearch.featureGate

And, it should apply the changes immediately after you set them all to false.

Option 2: Add configuration file to disable AI features

If you have multiple user profiles for Firefox, and you want to disable AI for them all, then it’s better to add user.js config file instead of configuring the preference keys one by one.

First, type about:profiles in address bar and hit Enter to access the profile management page.

Then, click “Open Directory” button to open the Root Directory of the target user profile.

In the opened folder, create user.js file if it does not exist. Finally, edit the file and write following content into it.

user_pref("browser.ml.enable", false);
user_pref("browser.ml.chat.enabled", false);
user_pref("browser.ml.chat.menu", false);
user_pref("browser.ml.chat.page", false);
user_pref("browser.ml.chat.page.footerBadge", false);
user_pref("browser.ml.chat.page.menuBadge", false);
user_pref("browser.ml.linkPreview.enabled", false);
user_pref("browser.ml.pageAssist.enabled", false);
user_pref("browser.tabs.groups.smart.enabled", false);
user_pref("browser.tabs.groups.smart.userEnabled", false);
user_pref("extensions.ml.enabled", false);
user_pref("browser.search.visualSearch.featureGate", false);

After that, you may click “Launch profile in new browser” button to open Firefox window with that profile and see if it works. And, copy the user.js file to root directories for other profiles if need.

  •  

NetBeans 28 added Java SE 26 and Multiple LSP Servers Support

Apache NetBeans, the free open-source IDE for Java, C/C++, PHP, and HTML5, released new version 28 few days ago.

The new IDE release updated UI with a tool widget to execute common text encoding in the IDE: Base64, URL and Hex encoding/decoding.

It added delete button for the SSH Connection Dialog, updated Add Language Description panel layout to be properly resizable, and brought a couple of smaller improvements relating to keyboard shortcuts in various platform components.

NetBeans 28 added Java SE 26 support for Tomcat, TomEE, and GlassFish, though it’s still in early access development stage. It also added support for the latest stable GlassFish 7.0.25, and GlassFish 8.0.0-M12 pre-release.

The LSP client now permits multiple LSP servers for each file/mime type. And, LSP Protocol provides the language clients to send messages to the language server to shutdown and exit.

For the editor, it added markdown file template, moved CheckRegex action to IDE Tools menu, improved the goto/jumpto dialog, and added tooltips to Projects, Files and Favorites tabs.

For Java, it updated net.java.html library to version 1.8.2, added opentest4j-1.3.0.jar to JUnit5, switched CI to JDK 25 GA, and added enhanced switch support to ThrowableNotThrown.

PHP features an auto-completion for the use keyword in the body of a class, trait, and enum. And, it fixed the coloring for Twig 3.15 inline comments.

Other changes in NetBeans 28 include:

  • Honor the JAVA_HOME environment variable in nbexec script.
  • Add missing CSS properties : margin-block, pading-block, scroll-behavior, conic-gradient, filter-effects.
  • Add extra file extensions support for Groovy.
  • More defensive guards against invalid code points in Ant Preferences.
  • Add copy button to Maven action customizer.
  • Add java/gradle.test to Gradle CI.
  • Support jakarta.persistence in the JPQL query executor.
  • Support nested and toplevel non-public tests and stabiize result extraction for Gradle.
  • Indicate support for Gradle’s incremental annotation processing.
  • Improve maven goal re-run property handling and UI.
  • Add context menu entries in Git Repository Browser for Add a remote and remove a remote.

For more details and source tarball, go to this Github release page.

Get NetBeans 28

Apache provides official binary package for NetBeans 28, which is available to download at the link below:

The platform independent binary package contains executable files and runtime libraries. Simply decompress it and run the executable file for your OS will launch it.

For Ubuntu on AMD/Intel or ARM64 platforms, there’s also an official Snap package that runs in sandbox environment. User may simply launch App Center (or Ubuntu Software for 22.04-) to search & install the package.

  •  

Easy Effects 8.0.0 Switched from GTK4 to Qt & KDE Framework

Easy Effects, the free open-source audio equalizer and effects application for Pipewire, released new major 8.0.0 version few days ago.

The new app release switched its UI backend from GTK4 plus LibAdwaita to Qt6, QML and Kirigami. The Flatpak package is now based on KDE runtime platform instead of GNOME.

Easy Effects now based on Qt and KDE framework

Due to moving to Qt from GTK, the dependencies changed. Distribution or third-party package maintainers are suggested to look at the Arch Linux PKGBUILD page to see everything required to build it from source.

The global shortcuts are working well on KDE, but not so much on GNOME. And, the presets, impulse response, rnnoise and autoload profile files are now saved in ~/.local/share/easyeffects while only database files kept inside ~/.config/easyeffects.

The 8.0.0 release also introduced new system tray indicator applet, which, provides menu options to show input/output presets, turn on/off audio effects, open shortcuts dialog and manual, and quit app.

Instead of presets menu, it now has a new presets dialog that contains three tabs, allowing to load local presets, get presets from community (it’s empty somehow in my case), and set auto-load presets.

And, it supports renaming and exporting presets, and setting fallback preset, that is applied automatically for any soundcard or microphone that does not have an autoloading preset.

New Presets dialog

The app window is now more friendly to small screens and tiling window managers. It added new global shortcuts (experimental) for the global effects on/off and the microphone monitor, and new configuration allows the microphone monitor output to be sent to the output effects pipeline input.

Other changes include:

  • Remembers last used plugin or tab.
  • Add “Pink noise” to test signal.
  • Replace global bypass button with a tradition on/off button.
  • Add dry and wet controls for the convolver and pitch plugins.
  • Add ‘reset history’ button for pitch plugin.
  • Draw spectrum by Qt Graphs, and only Qt color presets are allowed so far.
  • Add adaptive intensity mode to crystalizer plugin.
  • Echo Canceller plugin is now based on the webrtc library.
  • New Autogain parameter to force output level to zero.
  • Improve compatibility with the latest Linux Studio Plugins.
  • Add ability to show Calf Studio Plugins native window.

For more about Easy Effects 8.0.0, either see the CHANGELOG in source tarball or go to Flatpak package page via the link below.

How to Install Easy Effects 8.0.0

The app provides official installer packages through Flatpak, which runs in sandbox environment for most Linux on either amd64 or arm64 platforms.

Linux Mint and Fedora Workstation (with third-party repository enabled) can search & install the package from either Software Manager or GNOME Software.

While Debian/Ubuntu and other Linux may do the steps below one by one to get it:

  • First, open terminal (Ctrl+Alt+T) and run command to install the Flatpak daemon:
    sudo apt install flatpak

    For other Linux, follow the official setup guide to enable Flatpak support.

  • Next, run the command below to install the flatpak package, as well as the dependency runtimes.
    flatpak install https://dl.flathub.org/repo/appstream/com.github.wwmm.easyeffects.flatpakref

If you already have the package installed, then you may run the command below instead to check & install updates:

flatpak update com.github.wwmm.easyeffects

And, you may replace update with run in last command to start the app from terminal, which is useful for debugging purpose.

Uninstall Easy Effects

To uninstall the Flatpak app package, run command in terminal:

flatpak uninstall --delete-data com.github.wwmm.easyeffects

Skip --delete-data option if you want to keep the personal app data, and run flatpak uninstall --unused to remove the useless runtime libraries.

  •  

.NET 10 Released as New Long Term Support (LTS)

Microsoft announced .NET 10, the free open-source cross-platform developer platform, a day ago!

The new .NET 10 is a Long Term Support (LTS) release that features three years support until November 10, 2028. Users are argued to upgrade to the new version to take advantage of the extended support, performance improvements and new features!

What’s New in .NET 10

The new .NET 10 runtime enhanced JIT compiler with various inlining improvements and improved code generation for struct arguments.

It added Advanced Vector Extensions (AVX) 10.2 support for x64-based processors. Though the JIT’s support for AVX10.2 is disabled by default, as AVX10.2-enabled hardware isn’t yet available.

The NativeAOT’s type preinitializer now supports all variants of the conv.* and neg opcodes, further optimizing runtime performance. And, Arm64 gained new default write-barrier implementation that handles GC regions more precisely and reduces GC pause times by 8-20%.

For the SDK, .NET tools can now be published with support for multiple RuntimeIdentifiers (RIDs) in a single package. And, the .NET CLI will select the correct one at install or run time.

User can now use the dotnet tool exec command to execute a .NET tool without installing it globally or locally. And, a new --cli-schema option is added for all CLI commands, which outputs a JSON representation of the CLI command tree for the invoked command or subcommand.

The dotnet CLI now supports generating native tab-completion scripts for popular shells. dotnet test now natively supports Microsoft.Testing.Platform. And, the NuGet Audit feature can prune framework-provided package references that aren’t used by the project.

Other .NET 10 SDK changes include:

  • New dnx script provides a streamlined way to execute tools
  • Enhance file-based apps with publish support and native AOT
  • Enable --interactive flag by default for CLI commands in interactive terminals.
  • New property to explicitly set the format of container images.
  • New aliases for common commands
  • msbuild.exe and Visual Studio 2026 can run MSBuild tasks that are built for .NET.

For .NET libraries, it added client side TLS 1.3 support on macOS, and introduced new asynchronous APIs making easier to perform non-blocking operations when reading from or writing to ZIP files.

It also introduced new WebSocketStream API to simplify some of the most common WebSocket scenarios, and Windows Cryptography API with Next Generation (CNG) support for Post-Quantum Cryptography (PQC).

Other .NET libraries changes include HashML-DSA support, new ExportPkcs12 methods to choose what encryption and digest algorithms, as well as following features:

  • three new asymmetric algorithms: ML-KEM (FIPS 203), ML-DSA (FIPS 204), and SLH-DSA (FIPS 205).
  • Supports the AES-KWP algorithm via instance methods on the Aes class
  • New method overloads in ISOWeek for DateOnly type
  • New TimeSpan.FromMilliseconds overload with single parameter
  • UTF-8 support for hex-string conversion operations in the Convert class
  • New string normalization APIs to work with span of characters
  • Additional TryAdd and TryGetValue overloads for OrderedDictionary <TKey, TValue>
  • Option to disallow duplicate JSON properties
  • new JsonSerializerOptions.Strict preset
  • PipeReader support for JSON serializer
  • New AOT-safe constructor for ValidationContext
  • Support for telemetry schema URLs in ActivitySource and Meter
  • Out-of-proc trace support for Activity events and links
  • Rate-limit trace-sampling support.

Besides the changes in .NET runtime, libraries, and SDK, .NET 10 also includes lots of new features and improvements in Aspire, ASP.NET Core, C# 14, F#, and other components.

For more, see the official announcement or the what’s new page.

How to Install .NET 10

Microsoft provides the SDK, ASP.NET Core, and .NET Runtime packages which are available to download at the link below:

For Linux, they are non-install portable tarball. Simply download, decompress, and run the executable file to get started, though you may need to manually set environment and path variables.

As a LTS release, Ubuntu is likely to add .NET 10 into system repository. And, you may keep an eye on this page for the process.

At the moment of writing, the official Ubuntu PPA has been building .NET 10 for Ubuntu 25.10 and next Ubuntu 26.04.

  •  

Mission Center 1.1.0 added CPU Power Draw & Revamped Services Page

Mission Center, the popular Linux system monitor and task manager app, released new 1.1.0 version today.

The new release of this free open-source app improved CPU monitoring support. It can now display the amount of electrical energy that CPU consumes in watts.

It works by reading /sys/class/powercap/intel-rapl*/energy_uj for CPU power draw. The file is however unreadable by default for security reason. Meaning user needs to grant read access permission by running the command below in terminal:

sudo chmod a+r /sys/class/powercap/intel-rapl*/energy_uj

For AMD, the feature request page does not mention AMD processors, and I don’t have a AMD CPU to try it out.

The app also overhauled the Services page. The services are now grouped into “User Services” and “System Services”. And, it supports filtering services on Running, Failed, Stopped, and/or Disabled status.

As well, it now supports view child processes (if any) for services, and allows to send signal (e.g., Suspend, Continue, Hangup, Interrupt, Terminate, and Kill) by right-clicking on a process.

Besides that, it added new “About System” dialog that can be launched from the hamburger menu, which displays the name and version info of Linux Distribution, package manager, Kernel, and desktop environment.

Other changes in Mission Center 1.1.0 include:

  • Improve Fan backend and configurations.
  • Reduce CPU usage.
  • Fix AMD Radeon RX 6600 GPU shown up.
  • Fix missing Vulkan and OpenGL information in GPU page.
  • Fix missing shared memory usage on the memory graph.
  • Add keyboard shortcut to start service.
  • Update to GNOME 49, and the latest NVTOP.
  • Add donation to Flatpak and Readme.

For more about this version, see the official release note in Gitlab.

Install/Update Mission Center

For Ubuntu (with either AMD/Intel or ARM processor), the app is available to install as Snap package through the App Center for 24.04+ or Ubuntu Software or 22.04 and earlier.

For most Linux Distributions, the app is also available to install as Flatpak packages on either amd64 or arm64 platforms.

Linux Mint and Fedora (with 3rd party repository enabled) may search & install the Flatpak package from either Software Manager or GNOME Software. While others may do the following steps one by one to install it:

  • First, follow the official setup guide to enable Flatpak support. For Debian/Ubuntu, simply open terminal and run command:
    sudo apt install flatpak
  • Then, install the app flatpak package via command:
    flatpak install https://dl.flathub.org/repo/appstream/io.missioncenter.MissionCenter.flatpakref

To update the package, use command:

flatpak update io.missioncenter.MissionCenter

And, you may replace update with run in the last command to launch it from terminal.

Uninstall:

To uninstall the Snap package, use either App Center or Ubuntu Software.

And, to uninstall the Flatpak, run command:

flatpak uninstall --delete-data io.missioncenter.MissionCenter

Optionally, run flatpak uninstall --unused to remove useless runtimes.

  •  

Firefox 145.0 is out! Removed 32-bit Linux Support

After 9 Beta releases, Mozilla Firefox 145.0 is finally available to download.

The new browser version introduced new phase of privacy protections. For Private Browsing or when using Enhanced Tracking Protection set to Strict, the amount of Firefox users track-able by fingerprinters is reduced by half. See this page for more details.

In addition, Enhanced Bounce Tracking Protection stateless mode is now enabled by default in ETP Strict, blocking more advanced tracking techniques based on redirection.

Firefox 145.0 improved PDF editing by adding comment support. By selecting the desired text or area in your PDF content, it will show a small pop-up menu with option to add, remove, or edit comment. And, a comment/message icon is added to tool-bar with ability to view all the comments.

The release also improved tab group support. For the collapsed tab groups, simply hover over a tab group name will show a preview of the tabs inside without opening it.

The built-in password manager now can be accessed from the sidebar. Simply open settings from the side-bar, then enable “Passwords” option under Firefox tools, you can finally access and manage your saved passwords without opening a new tab or window.

Access and manage passwords from sidebar

For most Windows users, a small desktop launcher program is introduced to replace the existing desktop shortcut. If Firefox is installed, the desktop launcher will launch it. If not, it will prompt the user to install Firefox.

In General settings page, a new “Open links from apps next to your active tab” option is added. With it enabled, links from other applications will open next to your active tab in Firefox instead of at the end of the tab strip.

Other changes include:

  • Remove 32-bit Linux support.
  • Extensions button now shows description and link to Firefox Add-ons store, when no extensions are installed.
  • Use Zstandard compression for local translation models.
  • Improved translation experience when translating between languages with different script directions.
  • New brand-inspired wallpapers for new tab.
  • Update default automation preferences to better support Agentic browsing
  • Add support for Atomics.waitAsync proposal.
  • Support the new Integrity-Policy header for enforcing sub-resource integrity for scripts.
  • Improve Matroska support for the most commonly used codecs: AVC, HEVC, VP8, VP9, AV1, AAC, Opus, and Vorbis.
  • Add the text-autospace property support.
  • Add the WebGPU DOM API for macOS 26 (Tahoe) on Apple Silicon.

Get Firefox 145.0

The official release note for Firefox 145.0 as well as the download link will be available soon in the link below:

At the moment, you may go to this ftp.mozilla.org page to download it.

  •  

Manage Gnome Shell Extensions from Command Line

This tutorial shows how to install, remove, enable or disable Gnome Shell extensions and configure extensions’ preferences in Ubuntu, Fedora, etc Linux distributions with Gnome Desktop.

We usually install/uninstall Gnome Shell extension by either visiting extensions.gnome.org in web browser or using Extension Manager app, then manage them through either GNOME Extensions or Extension Manager.

Gnome Extension Manager App

For choice, Gnome has a built-in command line tool that can help sometimes without using a graphical user interface.

Why using Command Line

The command line tool gnome-extensions is useful for advanced users and developers for scripting purpose.

It’s also a good choice for installing extensions from local packages (e.g., ZIP archive) without internet connection. And, in some cases you may use gsettings command to configure extension preferences.

Install an Extension from Command Line

Besides using web browser or Extension Manager, user may manually install an extension by putting the source folder (usually [email protected]) to .local/share/gnome-shell/extensions directory.

Say you downloaded an extension package from extensions.gnome.org, by choosing Gnome Shell version and Extension version.

Download an extension from extensions.gnome.org

You may then install it by running command:

gnome-extensions install /path/to/extension.zip

The command do the job decompressing the ZIP archive (.tar.xz, .tar.gz etc also supported) and moving the source to the user’s extension directory mentioned above.

This method however need a log out and back in, before being able to enable the new installed extension.

List Installed Extensions from Command Line

To list all the installed extensions, simply use command:

gnome-extensions list

For choice, you may list user installed extensions via --user option, or system extensions via --system.

gnome-extensions list --user

And, use --enabled option for enabled extensions, --disabled for disabled extensions, and --details for more about extensions, including name, description, source URL, version, and state.

gnome-extensions list --user --enabled

Enable/Disable Extensions

Once you got the extension IDs via the command above, you may get more about it by running command:

gnome-extensions info [email protected]

Here replace the ID [email protected] with yours.

Then, enable or disable an extension by running command:

gnome-extensions enable [email protected]

or:

gnome-extensions disable [email protected]

Also replace the extension ID [email protected], and optionally add --quiet flag to ignore error messages (if any).

Configure Extension Preferences from Command Line

NOTE: if you just want to launch the graphical configuration dialog from command line, then use command (replace extension ID):

gnome-extensions prefs [email protected]

To configure extension preferences from command line, use gsettings command.

For system extensions, first run command below to list all the available keys and the values:

gsettings list-recursively org.gnome.shell.extensions.dash-to-dock

Here replace dash-to-dock (Ubuntu Dock) to the extension name you’re going to configure. Or, press Tab twice before typing its name to print available choices.

After that, run similar command below to configure an extension key value:

gsettings set org.gnome.shell.extensions.dash-to-dock always-center-icons false

Also replace extension name dash-to-dock, key-name always-center-icons, and key-value false according to the last command output.

Or, run command to reset an extension’s key value to default.

gsettings reset org.gnome.shell.extensions.dash-to-dock always-center-icons

For user extensions, run gnome-extensions list --user to find the ID, then do following steps instead:

  • First, print the extension info, Just Perfection for example, and find out the PATH.
    gnome-extensions info just-perfection-desktop@just-perfection
  • Then, print the extension metadata according to its PATH, and find out the settings schema:
    cat /home/ji/.local/share/gnome-shell/extensions/just-perfection-desktop@just-perfection/metadata.json

  • After found out the extension PATH and settings schema, set the following constants.
    SCHEMADIR=/home/ji/.local/share/gnome-shell/extensions/just-perfection-desktop@just-perfection/schemas
    
    SCHEMA=org.gnome.shell.extensions.just-perfection

    So that I can use $SCHEMADIR and $SCHEMA in next commands without typing full PATH and settings schema.

  • Next, run command to list all the available keys and their values:
    gsettings --schemadir $SCHEMADIR list-recursively $SCHEMA

  • Finally, according to last command output, run commands below to set or reset something:
    gsettings --schemadir $SCHEMADIR set $SCHEMA top-panel-position 1
    gsettings --schemadir $SCHEMADIR reset $SCHEMA top-panel-position

    Also replace the key and value accordingly.

For more, see the Ubuntu gsettings and gnome-extensions man-pages

  •  

Linux Mint 22.3 adding New Application Menu, System Admin/Info Apps

Linux Mint, the popular Ubuntu and Debian based Linux Distribution, is going to add new system administration, information tools, and redesigned application menu in next release.

As you may know, Linux Mint has an official blog that updates monthly with news about the development process. In recent updates, it introduced some exciting new features that will include in next Linux Mint 22.3.

First, the Cinnamon menu is redesigned. As you see in the screenshot above, it features a left sidebar that displays user avatar, places (user folders), and favorite apps. While, user has the choice to disable any of them, and even disable the whole side-bar.

In addition, the search bar can be moved to either top or bottom of application menu. While, the system buttons (e.g., lock, log-out, power-off) can be placed to either follow the search bar or in the bottom of left sidebar.

The System Report tool is re-named to new “System Information”. It merged the old system info and system reports into single app window. And, it shows all the USB devices including their IDs, connection speeds, and power.

It as well shows you GPU info including the driver and hardware acceleration status, PCI devices, motherboard and BIOS info, and the previous system reports and crash reports.

A new tool “System Administration” is also added, which so far only supports configuring the boot menu. Though, there’s already popular third-party Grub Customizer tool can do the job.

With it, user may configure to either show or hide the boot menu, and set how long it will be displayed until a user action. And, it can add boot parameters which is useful for loading Kernel modules, debugging, recovering, or other purpose.

Other changes include:

  • Support both traditional layouts and IBus input methods in keyboard settings and applet.
  • Wayland support for both traditional layouts and IBus input methods.
  • IM support and layout switch in on-screen keyboard.
  • Add new XApp Symbolic Icons to replace the Adwaita symbolic icons

For more, see the official blog posts in Linux Mint website.

Linux Mint 22.3

Linux Mint 22.3 is NOT available at the moment. According to the release history, the third point release were mostly released on January or December. Meaning that Linux Mint 22.3 will be probably released in Jan. 2026 or Dec. 2025.

The Linux Mint source codes are available in this Github page. And, you may keep an eye on this page for the ISO image status.

  •  

Run Custom Actions Automatically When Switch to Light or Dark

Want to do some actions automatically when you switch desktop theme to light or dark style? Here’s a new application can do the job for GNOME Desktop.

It’s switchcraft, a free open-source Vala written application that provides a modern simple interface, allowing to add custom commands to run automatically when the theme changes.

The app monitors the org.gnome.desktop.interface color-scheme key value and executes commands instantly when it’s changed to “prefer-dark” or “prefer-light”.

It can be useful for doing the following things automatically when switching desktop between light and dark style:

  • Change the legacy GTK3 theme, though Ubuntu already does it automatically.
  • Change Qt app theme.
  • Enable/Disable extensions, or configure extensions’ preferences.
  • Change Gnome Shell theme.
  • Or do whatever that you want.

Simply add your desired commands in the “Light” and “Dark” tabs, and turn on “Enable Monitor” option in Preferences.

Then, it will auto-run the switchcraft-monitor.sh script under .local/bin folder in next login, monitoring your desktop color scheme and running the commands automatically.

Besides that, it supports adding reusable constants for common variables in commands. And, it support exporting all the commands and importing to other systems.

Install switchcraft

Switchcraft provides official installer packages which are available to download in the link below:

They include .rpm package for Fedora/RHEL and .deb package for Debian/Ubuntu, which can be installed by system software app (e.g., Gnome Software and App Center).

For other Linux, it also provides non-install AppImage package that can be run directly to launch to the app, though you need to add executable permission from file properties dialog.

NOTE: switchcraft requires GNOME 40+, GLib >= 2.66, and jq command-line JSON processor.

Example Commands:

For those who are new to Linux, here are some example commands that may help.

1. change legacy GTK3/Icon theme

NOTE: The commands are written for Debian, Fedora, etc Linux Distributions, as Ubuntu automatically set Yaru and its variants as legacy GTK3 theme.

gsettings set org.gnome.desktop.interface gtk-theme 'adw-gtk3-dark'

This command changes the GTK3 theme to adw-gtk3 dark mode. You need to replace adw-gtk3-dark depends on which theme you want to set.

gsettings set org.gnome.desktop.interface icon-theme 'MacTahoe-light'

This will change the icon theme to MacTahoe-light. Also you need to change the theme name accordingly.

Go to gnome-look.org for more themes, and use “Gnome Tweaks -> Appearance” to see all available choices.

2. Enable/Disable Extensions

First, run command to list all the installed extensions.

gnome-extensions list

Then, disable an extension by command:

gnome-extensions disable [email protected]

Here replace disable with enable if you want to enable an extension. And, replace extension ID [email protected] accordingly.

3. Configure Extension

For system default extensions, use similar command below to configure:

gsettings set org.gnome.shell.extensions.dash-to-dock background-color "#ffffff"

You may install and use the graphical “Dconf Editor” tool to get available extension names, keys, and key values.

For user installed extensions, you may first run command to list them:

gnome-extensions list --user --enabled

Then, print metadata of an extension (User Themes for example), to get the setting schema:

cat $HOME/.local/share/gnome-shell/extensions/user-theme\@gnome-shell-extensions.gcampax.github.com/metadata.json

Next, set constants:

THEME_SCHAMA=org.gnome.shell.extensions.user-theme
THEME_SCHAMADIR=$HOME/.local/share/gnome-shell/extensions/user-theme\@gnome-shell-extensions.gcampax.github.com/metadata.json/schemas

Finally, run command to configure the “name” (get the key from ‘gschema.xml’ file in extension folder) for the extension.

gsettings --schemadir $THEME_SCHEMADIR set $THEME_SCHEMA name "ChromeOS-dark-compact-shell"

Feel free to leave command below if you want more commands.

  •  

LXQt 2.3.0 Released with Enhanced Wayland Support

LXQt, the lightweight Qt based desktop environment, released new version 2.3.0 few days ago.

The new release of this free open-source Linux desktop continued improving Wayland support. The Desktop Switcher panel applet now works on Labwc, niri, and Wayfire Wayland compositors that support ext-workspaces-v1 protocol.

ScreenGrab, the screenshot tool, can now take screenshot under Wayland compositors that support “wlr screencopy protocol”, such as Hyprland and Sway. It now has a better border color for selection rectangle on X11, and features a new command-line option for saving screenshot and exiting without showing window.

The lxqt-wayland-session has been updated with new lxqt-qdbus making various qdbus commands easier to use with all Wayland compositors. And a new PIC based backend has been added for Wayfire.

And, the Power Management Settings now has a new section for Wayland to turn off monitor, using KWin, niri or Hyprland command.

Besides Wayland improvements, LXQt 2.3.0 also improved the PCManFM-Qt file manager by adding new “Safely Remove” option to the side-pane context menu when possible, as well as an option to disable file tooltips on desktop.

And the Custom Command applet is now more flexible in both Wayland and X11 by supporting structured output and being updated every time it receives output.

Other changes in LXQt 2.3.0 include:

  • The Show Desktop plugin is activated on drag-and-drop.
  • Scroll on backlight plugin button to adjust backlight.
  • Locale-aware sorting in Fancy Menu and Main Menu.
  • Add emoji flags and “Toggle Bookmarks” view context menu option to QTerminal.
  • LZ4 support in LXQt Archiver.
  • Add multi-page TIFF and animated webp images support for lximage-qt image viewer.
  • Add -q|--quiet parameter for lxqt-sudo.
  • Use --extract-here for “Extract Here” with lxqt-archiver.
  • New wiki at lxqt-project.org/wiki.
  • For more, see the official release note.

Get LXQt 2.3.0

The source codes for all LXQt components are available in Github via the link below:

Besides building from source, as far as I know only openSUSE Tumbleweed made LXQt 2.3.0 into official repositories at the moment of writing. While, there’s a copr repository for Fedora rawhide.

And for Debian/Ubuntu, it’s expected to be available in next Forky and 26.04 LTS.

  •  

NVIDIA 580.105.08 added New Env to Disable GPU Boost for CUDA apps

NVIDIA 580.105.08, a new point release for the latest production branch driver for Linux, was released yesterday.

This is the 5th release in the NVIDIA 580 series. It introduced a new environment variable and fixed various bugs.

In the passt 4 NVIDIA 580 releases, it added fifo-v1 protocol support for Vulkan apps running on Wayland session, reducing visual inconsistencies and potential stuttering.

It as well enabled RMIntrLockingMode feature by default, which can help reduce stutter especially when using virtual reality (VR), and, added Smooth Motion frame generation support for GeForce RTX 40 Series GPUs.

NVIDIA 580 supports Smooth Motion for RTX 40 Series GPUs

In the new 580.105.08 driver, it added new CUDA_DISABLE_PERF_BOOST environment variable, allowing to disable boosting the GPU to a higher power state when running CUDA applications.

This is useful for saving power and prevent overheating, when your GPU is powerful enough handling the job when running at base clock speed.

To enable this feature, you may set it per app basis:

  • run command export CUDA_DISABLE_PERF_BOOST=1 in terminal, and start apps from that terminal window.
  • set env CUDA_DISABLE_PERF_BOOST=1 /path/to/executable EXEC value in your app’s desktop entry (.desktop file).

Or, write export CUDA_DISABLE_PERF_BOOST=1 to .profiles or .bashrc file so it works for all CUDA applications.

Besides that, the new driver also fixed various bugs. They include crashes for Metro Exodus EE and Rage2 video games, as well as:

  • HDMI display blank issue and HDMI FRL not working issue after unplug and re-plug in.
  • vfio-pci module soft lockup after powering off a VM with passed-through NVIDIA GPUs.
  • VRR blank screen issue.
  • large resolution or high refresh rate modes (e.g., 7680x2160p@240hz) not available when using HDMI FRL or DisplayPort.

And, here are more features in NVIDIA 580 driver series:

  • add support YCbCr 4:2:2 display modes, which is designed for brandwidth reduction and efficient video and image compression.
  • Update nvidia-settings, NVML, and nvidia-smi to show clocks before thermal and idle slowdowns.
  • Bigscreen Beyond Head Mounted Displays compatibility.
  • new “OutputBitsPerComponent” MetaMode attribute to control the number of bits per color component transmitted via a display connector.

For more details, see the releases for NVIDIA 580.65.06, 580.76.05, 580.82.07, 580.95.05, and 580.105.08.

Install NVIDIA 580.105.08 in Ubuntu:

Ubuntu has made NVIDIA 580 driver packages into system repository (restricted) for current Ubuntu 22.04, 24.04, 25.04 and 25.10.

So far, it’s NVIDIA 580.95.05. While, the latest 580.105.08 as usual will be available in next few weeks if everything goes well.

If you can’t wait, then try adding the popular “Graphics Drivers” team PPA which usually updates the driver packages timely.

After that, use either ubuntu-drivers install nvidia:580 command, or “Additional Drivers” utility to install the driver package.

  •  

KeePass 2.60 Released with Firefox CSV Import Support (Ubuntu PPA)

KeePass Password Safe released new 2.60 version few days ago. Here are the new features and PPA update for Ubuntu users.

The new release of this free open-source password manager application added support importing .csv passwords exported from Mozilla Firefox web browser.

KeePass 2.60 support importing Firefox Password CSV

It as well improved Bitwarden JSON support. Now, if the value of a totp field consists only of Base32 characters, it is now treated as a shared secret for time-based one-time password generation.

The release also improved the app user interface. The quick search box now search for group paths, while a toggle option is available in Tools -> Options -> Interface (1) to turn on/off the feature.

The drop-down box for quick search box, which can be opened by Alt + Down now supports keyboard navigation and selection. However, due to bug, the auto-completion of the quick search box is disabled.

For users who have many groups, the release now supports displaying ‘Group Path’ and ‘Group Name’ list columns in the main entry. Though, the feature is not enabled by default. User may enable them by going to ‘View’ → ‘Configure Columns’.

KeePass 2.60 also improved the app user experience for keyboard users. It now supports pressing Ctrl+A to select all items in the list views, and Delete to delete selected items in list views that have a corresponding ‘Delete’ button.

And, for those who use Ctrl+Alt+A for the global auto-type hot key, while French Standard AZERTY keyboard layout is active, it shows a warning dialog telling the conflict along with a ‘More information’ link.

Other changes in the release include:

  • Add empty state messages for list views.
  • Support generating native ARM64 images (NGen) on ARM64 systems for ShInstUtil.
  • Save configuration immediately when shutting down the system.
  • The value of a ‘File/URL’ or ‘Key file’ field of a trigger event/condition/action may now optionally be enclosed in double quotation marks.
  • Various other improvements. See the release note for details.

Install KeePass 2.60

The official installer and portable zip archive for Windows are available to download in its website along with KeePass 1.x and source tarball.

For choice, you may go directly to this sourceforge page download page.

For Ubuntu user, there’s no official package for the new release so far. Besides building from source, I’ve uploaded the package into this unofficial PPA for Ubuntu 20.04, Ubuntu 22.04, Ubuntu 24.04, 25.04 and 25.10.

You may press Ctrl+Alt+T on keyboard to open terminal, then run the commands below one by one to add PPA & install the password manager:

sudo add-apt-repository ppa:ubuntuhandbook1/keepass2
sudo apt update
sudo apt install keepass2

Uninstall:

To uninstall the PPA package, run command:

sudo apt remove keepass2

And, remove the PPA either by running the command below in terminal:

sudo add-apt-repository --remove ppa:ubuntuhandbook1/keepass2

Or, launch “Software & Updates” and remove the source line under Other Software tab.

  •  

The Release Schedule for Ubuntu 26.04 LTS is Out

Ubuntu team announced the release schedule for next Ubuntu 26.04 LTS few days ago!

Ubuntu 26.04, code-name Resolute Raccoon, is the next Long Term Support (LTS) release that will have 5-year standard support until 2031 and another 5 year Expanded Security Maintenance (ESM) support via Ubuntu Pro.

image by Alexas_Fotos from pixabay.com

If everything goes well, 26.04 will feature GNOME 50 and perhaps Kernel 6.20 (if not switch to version 7.x) according to the Linux Kernel release history.

Besides Kernel and default Desktop environment, the next LTS will probably use Python 3.14 as default, and include Golang 1.25, binutils 2.46, and GCC 16 and other toolkit updates.

And the official Ubuntu 26.04 release note in Ubuntu Discourse has been created. Where you may keep an eye for the latest changes.

Ubuntu 26.04 Release Schedule:

Ubuntu 26.04 is planned to be released on April 23, 2026. From now on, there will be following events according to the release schedule.

February 19, 2026 Feature Freeze,  Debian Import Freeze
March 12, 2026 User Interface Freeze
March 19, 2026 Kernel Feature Freeze, Documentation String Freeze
March 23, 2026 Beta Freeze, Hardware Enablement Freeze
March 26, 2026 Beta (mandatory)
April 09, 2026 Kernel Freeze
April 16, 2026 Final Freeze, Release Candidate
April 23, 2026 Final Release

As you may know, Ubuntu introduced monthly Snapshot releases when 25.10 was in development. It’s somehow NOT included in this release schedule.

NOTE: Ubuntu MAY change the schedule as time goes on. See this page for the official one.

GNOME, the default desktop environment, is developed by another team. It’s also has a release schedule for the next 50 version. See the table below:

January 03, 2026 Gnome 50 Alpha
January 31, 2026 Gnome 50 Beta
February 28, 2026 Gnome 50 RC
March 14, 2026 Gnome 50.0
April 11, 2026 Gnome 50.1

Also, the schedule may change as time goes on. See this page for the official calendar.

  •  

Shotcut 25.10 added Text to Speech & Image/Video from HTML Support

After 2 months of development, the Shotcut video editor released new 25.10 version yesterday.

The new release of this free open-source Qt and MLT based video editor introduced new option to generate image or video from HTML, Text to Speech, and some other exciting new features.

Under File -> New or New Generator menu, there’s a new Image/Video from HTML option, that can generate image or video through custom HTML code, with transparent background by default, though the video is limited to 15 frame-per-second for performance reasons.

The feature depends on Google Chrome or Chromium web browser. You need to specify path to the executable of either browser first time you launch the option.

It offers some presets that also demonstrate a template with up to 3 lines of text. And, it automatically opens the generated image or video in the Source viewer so that you can preview and revise it if need. However, there’s neither preprocessors nor WebGL or embedded video support.

In addition, the release added New -> Screen Snapshot and Screen Recording options to generate image or video from your screen. And, the recording so far can be only ended by selecting “Stop This Job” from context menu of the job.

Shotcut 25.10 also added Text to Speech support to Notes and Subtitles. The quality with subtitles is heavily dependent upon the timing and duration of each item. And, it requires installing a docker image which takes 13.2 GB space in my case in Ubuntu.

Text to Speech needs installing a docker image as plugin

The release also introduced new Text: Typewriter video filter, that can insert text to your video clip and display them line by line, word by word, or character by character with typing cursor animation.

Other changes in the release include:

  • Add Typewriter option to “New Generator -> Text” dialog.
  • Add “Open with” and “Reload” buttons to properties.
  • Upgrade to FFmpeg 8.0.
  • Raise minimum glibc requirement to version 2.35 (Ubuntu 22.04 and higher).

Get Shotcut 25.10

The official release note and installer packages for Linux, Windows, macOS are available to download in Github releases page. Along with the source tarball they are available via the link below:

For Linux, either download the AppImage (for Intel/AMD). Then add executable permission from its Properties dialog, and click Run the package to launch the video editor.

NOTE: Ubuntu since 22.04 does NOT support AppImage out-of-the-box. Press Ctrl+Alt+T to open terminal and run command to install the required library first:

sudo apt install libfuse2

Or, download the Linux tarball “shotcut-linux-x86_64-25.10.31.txz“, extract and run the executable file to launch the video editor, though you need to manually set the run-time libraries environment variable.

For choice, there are also official Flatpak package in flathub.org, which also support ARM64 platform, and snap package in App Center (or Ubuntu Software), though both run in sandbox environment!

  •  

Ubuntu Announced the 25.04 to 25.10 Upgrade Channel

After 3 weeks of the release date, Ubuntu finally opened the channel for upgrading from Ubuntu 25.04 to Ubuntu 25.10.

Ubuntu 25.10, code-name Questing Quokka, is the latest version that was released on October 9th. It features 9 month support until July 2026, Linux Kernel 6.17, GNOME Desktop 49, new Rust-based core utilities, new Ptyxis terminal emulator, and Loupe image viewer.

It as well removed the classic Xorg session and dropped “Startup Applications” tool. See Ubuntu 25.10 release note for more details.

Just one day ago, Ubuntu finally announced the upgrade channel for 25.04, while Ubuntu 24.04 may also upgrade to 25.04, then to 25.10.

We’re happy to announce that the upgrades to Ubuntu 25.10 (Questing Quokka) are now live!

This cycle also marks the arrival of amd64v3 as an architecture variant — shiny, fast, and ready for testing. If you haven’t already, I’d encourage reading the Discourse post for the full story:

https://discourse.ubuntu.com/t/introducing-architecture-variants-amd64v3-now-available-in-ubuntu-25-10/71312

Happy upgrading, and may your Quokka quest be bug-free!

Before getting started

Ubuntu 25.04 support will end in January 2026. If you decide to upgrade to Ubuntu 25.10, then it’s better to do following steps before getting started:

  • Backup, backup, backup! Backup your important data before upgrading to 25.10, as the process might fail due to unknown bugs or potential interruption.
  • Backup the data of Xorg only applications, as 25.10 dropped Gnome on Xorg, unless you use other desktop environments (e.g., XFCE4, MATE) or switch to XUbuntu, Ubuntu MATE, etc flavors.
  • (optional) Uninstall unused apps, which can speed up the upgrade process by downloading less packages.
  • For laptops, connect to power supply in case of running out of battery.

Upgrade from 25.04 to 25.10

Ubuntu 25.04 now should automatically pop-up a dialog saying that Ubuntu 25.10 upgrade is available, with buttons to accept or refuse.

If you miss that dialog, then do following steps to manually start the upgrading process.

1. First launch Software & Updates, under “Updates” tab, make sure you set notify for any new Ubuntu version.

For Ubuntu server, edit /etc/update-manager/release-upgrades instead and set Prompt=normal

2. Next, launch Software Updater and install all the available updates. And, restart your computer if it asks.

For server with GUI, run the command below instead:

sudo apt update && sudo apt full-upgrade

3. Finally, either launch Software Updater again and click the “Upgrade” button.

Or, run the command below to start the upgrade process from terminal:

do-release-upgrade

then follow the wizard or terminal output to upgrade your Ubuntu.

NOTE: Don’t go far away from your computer. It will ask few questions during the upgrade process, e.g., whether to keep obsolete packages or not. And, when everything’s done well, it will ask you restart computer to complete.

  •  

MATE 1.28 Finally Coming to Ubuntu 26.04 & Debian Forky

For MATE users, Debian and Ubuntu are finally migrating this desktop environment to version 1.28 for Debian Testing (Forky) and Ubuntu 26.04 LTS.

MATE, the continuation of GNOME 2, is a popular lightweight desktop environment for Linux. The latest version is MATE 1.28 which was released more than a year and a half ago in February 2024.

MATE 1.28 in Ubuntu MATE 26.04

What’s New in MATE 1.28

In case you don’t know or forget about the release, MATE 1.28 introduced experimental Wayland session using Wayfire.

It updated several core components, such as file manager, mate-applets, and control center, to work seamlessly with Wayland. And, it updated the codebase to ensure compatibility with the latest GTK versions.

Other changes include:

  • Support reading epub via Atril document viewer.
  • Use unar instead of cpio for CPIO archives, and support unrar-free for the archive manager.
  • Add new Quickhighlight plugin for pluma text editor.
  • Add new plugin to view the exact properties of media files in file manager.
  • Mouse middle-click support for mate-indicator-applet.
  • Double click to set mate-terminal tab title.
  • Add OSC 8 hyperlinks support for mate terminal.

For more about MATE 1.28, see the official release note.

Why MATE 1.28 is NOT available in current Ubuntu & Debian 13 Trixie

The MATE desktop packages for Debian and Ubuntu in the past 10 years are mostly maintained by Mike Gabriel.

However, due to lack of time and two problems he said in the MATE 1.28, the migration delayed:

The problem is indeed an ENOTIME (haven’t had time for it) early enough before the trixie freeze.

I started packaging stuff, but noticed two problems:

* mate-desktop (libmate-desktop-…) removed symbols without an SOVERSION_MAJOR bump. I started bringing back the removed symbols but that was not a trivial task and I ended up discouraged as this is a major upstream flaw of the 1.28 version of libmate-desktop and it needs to be fixed there.
* mate-settings-daemon’s behaviour on DBus is broken, breaking e.g. arctica-greeter

So, Trixie will come with MATE 1.26 and I will put some effort into bumping it to 1.28 after the trixie release.

Unless someone else steps up and pushes MATE 1.28 in (but please resolve the above issues sanely). If it needs more feedback and details, I can provide them.

Thankfully, Jeremy Bícha took up the task in last week and submitted MATE desktop 1.28 into Debian unstable. Then, it’s migrated to Debian Forky and backported for Ubuntu 26.04 LTS (so far available as pre-release updates) few days ago.

NOTE: So far only few of MATE 1.28 components are migrated. As 26.04 is in very early stage, things may change! See this page to track the mate-desktop package for Debian, and see the package for Ubuntu.

  •  

Task Manager App Resources 1.9.0 Added Intel Xe Driver Support

Resources, the modern task manager and system monitor app for Linux desktop, released new 1.9.0 version few days ago.

The new release of this free open-source application added more languages support, more display options, bug-fixes and improvements.

Resources is a GNOME application allowing to monitor and control running processes and apps, and check the utilization of your system resources.

Like Windows’ task manager app, it provides a modern interface to monitor the memory, CPU, and GPU usage for each running app/process, along with option to kill or halt the selected task.

It as well has a “Show App/Process Information” option in bottom, to display more, such as swap, drive read/write, video memory/encoder/decoder usage, as well as app ID, running time, etc properties.

In the new 1.9.0 release, the process view page supports “Commandline” column to display command for each process, though you need to enable the feature in Preference dialog.

For Intel users, the release also added the Intel xe driver support. It’s the modern replacement for the older i915 driver, that was introduced since Linux Kernel 6.8, and may be enabled by default for the newest hardware with Kernel 6.17.

With the new xe driver, the app supports reading the GPU frequency, power and temperature for Intel GPUs.

For Wi-Fi devices, the release now displays the Link information about the connected network, Wi-Fi 5 or Wi-Fi 6, 5 GHz or 2.4 GHz, as well as the maximum send/receive speed.

To display Link information, the app needs “network access” permission for Flatpak package, though it does not connect to the Internet in any way. And, if you don’t need this information, just disable “network access”.

Other changes in the release include:

  • Add Bulgarian, Finnish, Hebrew and Slovenian translations.
  • Halt graphical updates when it is not in view to save on power.
  • Show uptime in CPU view..
  • Add PCIe 7.0 and PCIe 8.0 (though not released) devices support.
  • And more, see official release note for details.

How to Install Resources system monitor and task manager

Resources is available to install in most Linux on amd64 and arm64 platforms through Flatpak package which runs in sandbox environment.

Linux Mint and Fedora Workstation may simply search & install the package from either Software Manager or GNOME Software.

While Debian, Ubuntu, and other Linux can install the package by following the steps below one by one:

  • First, press Ctrl+Alt+T to open terminal. When it opens, run command to install Flatpak daemon:
    sudo apt install flatpak

    For other Linux, see the official setup guide to enable Flatpak support.

  • Then, run command to install Resources flatpak package:
    flatpak install https://dl.flathub.org/repo/appstream/net.nokyan.Resources.flatpakref

After installed the package, either search for and launch from GNOME Overview (log out and back in of app icon not visible), or run the command below to start from terminal:

flatpak run net.nokyan.Resources

And, you may replace run in last command with update to check & install updates.

Uninstall Resources

To uninstall the system monitor app, use command:

flatpak uninstall --delete-data net.nokyan.Resources

Also run flatpak uninstall --unused to remove useless Flatpak run-time libraries to free up some disk space.

  •  

Ubuntu Announced How to Fix for 25.10 Automatic Updates

For users of Ubuntu 25.10 Questing Quokka, Ubuntu team announced how to fix the issue that automatically check of updates not working in desktop, server, cloud, and container.

As you may know, Ubuntu replaced GNU Core Utilities with Rust in 25.10. Most core command line tools, such as chroot, dd, du, echo, ls, mkdir, pwd, sudo, who, and more, are now the “memory safe” Rust-based utilities, though for end users, they can be used just like before.

Ubuntu 25.10 switched to Rust based core-utils

This Rust rewritten coreutils so far has many issues that break things in Ubuntu 25.10. And, Ubuntu and upstream developer team keep working to fix them.

As far as I know, Grub bootloader did not (fixed now) find and load dual- or multi-boot operating systems, who command does not show who is logged in, stty command seems to return invalid or non-standard argument format that breaks interactive terminal applications.

Ubuntu by default checks and installs security updates automatically, which is useful to keep your system (especially for public server) safe.

Ubuntu by default automatically check & install security updates

However, due to bug in date command, some Ubuntu 25.10 systems may be unable to automatically check for available. It’s announced few days ago:

Due to a now-resolved bug in the date command, some Ubuntu 25.10 systems have been unable to automatically check for available software updates. Affected machines include cloud deployments, container images, Ubuntu Desktop and Ubuntu Server installs.

As mentioned in the announcement, the issue may affect users who have rust-coreutils <=0.2.2-0ubuntu2. And, it can be easily fixed by installing/updating to rust-coreutils 0.2.2-0ubuntu2.1 or later.

  • For Ubuntu Desktop, simply launch “Software Updater“, then install all the available updates.
  • If you’re OK with Linux commands, then run the command below to refresh cache and update the package:
    sudo apt install --update rust-coreutils

If you found other issues about core utils, then you may either report to this Ubuntu page or the upstream Github page.

And, this discourse thread provides the choice to revert back the old GNU based core-utils for those who need it.

  •  

BleachBit 5.0.2 added Pacman and Disabled Snap Support

BleachBit, the CCleaner alternative system cleaner app, released new 5.0.2 in last week with support for cleaning more app caches.

BleachBit is a free open-source application for Linux and Windows that can free up disk space by deleting cookies, cleaning internet history, discarding junks and removing logs.

It support cleaning thousands of applications, such as Firefox, Chrome/Chromium, Opera, and more, removing apt, bash, and system caches, shredding files to prevent recovery, wiping free disk space, and vacuuming Firefox to improve speed without removing any data.

The last major 5.0.0 version, which was released in May, added cleaning more apps support, including Librewolf and Microsoft Edge for Linux, beta and snap versions of Discard.

In the new 5.0.2 version, it now supports cleaning caches for pacman, the default package manager for Arch and Manjaro etc Linux Distributions.

For Ubuntu and other Linux have apps installed as snap packages, the release also added support removing snap packages that have been disabled. It will trigger native snap remove command running silently in background to remove all disabled snaps, though it was not working good in my case as it stuck at Sl sleeping status waiting for something.

Besides that, the new version also updated its UI. Like web browser, it now supports Ctrl+Scroll or Ctrl + +/- keyboard shortcuts to change text font size, and F11 to toggle full-screen mode.

Other changes are mostly bug-fixes and translation updates. They include:

  • Fix Firefox vacuuming error for version 140 and later.
  • Improve KDE stability by skipping KDE files when leaning system cache.
  • Improve compatibility in headless and restricted environments such as crontab.
  • Add description for Exaile music player, and update description for Audacious.
  • Add new Gaeilge and සිංහල translations, and update 68 languages.
  • Add packages for AlmaLinux, Debian 13, Linux Mint Zara, and openSUSE Leap 15.6 and 16.0.

In addition, the release uses a newly renewed digital certificate that may cause temporary security warnings from antivirus software in Windows. For more, see the official release note.

Get BleachBit 5.0.2

BleachBit provides official packages for Windows and Linux which are available to download via the link below:

For Linux, they are .rpm packages for Fedora, openSUSE, etc distributions, and .deb for Debian and Ubuntu based systems. And most desktop software app now support installing them.

  •  
❌