Normal view

Received — 22 September 2025 Linux News & Update

Zorin OS 18 Beta is Available to Download, based on Ubuntu 24.04

By:Ji m
21 September 2025 at 00:09

Zorin OS, the popular beginner friendly Linux Distribution, announced the Beta release of version 18 yesterday!

Zorin OS is a Linux distribution designed for newcomers switching from Windows and macOS. It features Ubuntu package base, and customized GNOME desktop experience, while a lite version is available for choice with XFCE4 desktop.

Zorin OS 18 is based on Ubuntu 24.04 LTS. Thanks to the upstream, the new release upgraded from Kernel 6.8 to Kernel 6.14 with tons of new drivers, new and improved hardware support. See what’s new in Kernel 6.14 (replace 6.14 in URL link, e.g., 6.13, for changes other Kernel versions).

Thanks to GNOME upstream changes, it features GNOME 46 (customized) desktop with a “dot and pill” icon to trigger overview, and indicate which workspace you’re working in. There are as well new camera app, remote login with RDP protocol, and OneDrive support in online accounts.

Besides the upstream changes, Zorin OS 18 refined the default desktop appearance with floating panel and rounded corners. While, user may easily change the layout with a single mouse click by using the built-in Zorin Appearance utility.

Like Ubuntu 24.04, the release also introduced a tiling window extension. Simply drag a window to screen top, it will show you a list of tiling layout, allowing to easily move and resize window automatically into selected screen edge.

By going to Zorin Appearance -> Windows -> Advanced Window Tiling, you may enable the indicator icon for the extension, and configure more about it.

For users who need Office/365, Teams, Adobe Photoshop, etc apps, the release also introduced a WebApp Manager allowing to easily turn your favorite websites into apps, by using either the default Brave web-browser or any other browser (if installed) as you want.

Other changes in the release include:

  • Update built-in database to suggest alternatives to more Windows apps.
  • New Yellow and Brown theme colors.
  • 3 new panel layouts: Compact, Linux Mint like, and elementary OS like layouts (for Pro, paid version only).
  • Use Pipewire instead of PulseAudio as default sound server.
  • Improve Zorin Menu with multi-monitors support.
  • Center new windows at launch.
  • Global search in Files, and more!

Get Zorin OS 18 Beta

The official release note as well as the .iso image are available in its website via the link below:

NOTE that Zorin OS 18 is so far available for Beta testing, it’s not recommended to install it on production machine at the moment.

The minimum hardware requirements include 2 GB RAM, 15 GB disk space, and 1024 × 768 resolution display.

Received — 20 September 2025 Linux News & Update

Linux Mint Released LMDE 7 Beta, based on Debian 13

By:Ji m
19 September 2025 at 23:40

For Linux Mint users who prefer Debian package base, LMDE 7 code-name “Gigi”, is available for beta testing!

LMDE stands for Linux Mint Debian Edition. As the name says, it’s a Linux Mint edition based on Debian, aims to continue to deliver the same user experience if Ubuntu was ever to disappear.

LMDE 7 is the next major release of this Linux Mint edition based on Debian 13 trixie, which was released a month ago. It features Kernel 6.12, Cinnamon desktop 6.4.12, and Debian 13 package base.

In my experience, Debian is more stable and reliable than Ubuntu. It’s perfect for server and advanced user use. And, LMDE makes it friendly for beginners.

However, it lacks major kernel version updates and most recent drivers (e.g., NVIDIA proprietary driver), unless upgrading the entire system to a new version (e.g., from LMDE 6 to LMDE7). If they are not big deal for you, then it’s a great choice!

Besides the difference between Kernel version and systems they’re based on, LMDE and normal Linux Mint edition deliver almost the same user experiences!

And, LMDE 7 Beta so far features Cinnamon only desktop, with following changes in Linux Mint 22.2:

  • New XApp Fingwit provides graphical interface to manage user fingerprints.
  • Improved Sticky Notes app with rounder corners and Wayland support.
  • Add “Theater Mode” and “Borderless Mode” mode for Hypnotix IPTV player.
  • Display user avatar in the login screen.
  • Add blur effect to the panel and user selection dialog box in login screen for better appearance.
  • Patch LibAdwaita with theme support, including Mint-Y, Mint-X and Mint-L themes.
  • Add accent colors support for LibAdwaita Flatpak apps.
  • New xapp-aiff-thumbnailer thumbnailer for cover art in .aiff audio files
  • Add iOS app for Warpinator file sharing utility.
  • Configurable EDID-based color correction (disabled by default) in XViewer.
  • Support editing description field in WebApp Manager.
  • Support leading zeros when renaming multiple files and using enumerations
  • Add description in Software Manager to tell the difference between Flatpak and system packages.

Download LMDE 7 Beta

The official announcement as well as the download link for LMDE 7 Beta is available in Linux Mint website via the link below:

For choice, you may download it from a mirror from this page. Though, as Beta it’s usually available in “testing” directory.

Hardware Requirements include: 2 GB RAM (though 4 GB recommended for smoother experience), 20 GB disk space, and 1024×768 resolution display.

Ubuntu 25.10 Beta Release is Available to Download

By:Ji m
19 September 2025 at 17:03

Ubuntu 25.10, code-name Questing Quokka, is now available for Beta testing!

The developer team announced the release last night for Ubuntu Desktop, Server, WSL, Cloud products, and official flavors.


Ubuntu 25.10 is a new short-term release with 9-month support until July 2026. It features GNOME 49, Kernel 6.17, and various other toolkit and packages updates.

The new Kernel is still in RC release stage at the moment. Compare to Kernel 6.14 in current 24.04 and 25.10, it features many new and improved hardware support, drivers, and performance improvements. For detailed changes, go HERE and HERE.

The Ubuntu Desktop so far has GNOME 49 RC, though the stable release of this desktop environment was just released 2 days ago, which features:

  • New Showtime video player (not pre-installed in Ubuntu with default mode, though available in App Center).
  • New Papers document viewer.
  • Remove ‘GNOME on Xorg’ (Ubuntu on Xorg) session, meaning Wayland only.
  • Music playback control from lock screen.
  • Improve remote desktop with multi-touch, relative mouse input, and additional virtual desktop.
  • Add configuration for pointing stick (aka TrackPoint).
  • Support relative dials on tablet pads.
  • Brightness in the Quick Settings when HDR is enabled, with external monitors support.
  • And more. See the official release note.

As you know, Ubuntu features a customized GNOME desktop experience. The 25.10 release replaced the default terminal with Ptyxis, which features first-class container integration.

And, it finally added Loupe as default image viewer, which was introduced in GNOME since v45. The image viewer features sandboxed image loading by using Glycin library, which also handles the background image loading in Gnome 49.

New default Ptyxis terminal emulator

Other changes in the Beta include screen reader support in new desktop installer, TPM-backed Full Disk Encryption recovery key management, and tryboot’s A/B booting support on Raspberry Pi.

There are as well toolkit updates, including systemd 257, gcc 15.2, binutils 2.45, glic 2.42, python 3.13.7, LLVM 20, Rust 1.85, Golang 1.24, openJDK 25, Mysql 8.4, Ruby 3.3, and more.

The final release of Ubuntu 25.10 is planned for October 9. For more about it, see the official release note.

Get Ubuntu 25.10 Beta

NOTE: Ubuntu 25.10 so far has a bug that prevents it from loading other dual-/multi-boot OSes. Configure apparmor didn’t work in my case, and I end up disabling Apparmor to get back Ubuntu 24.04.

For Ubuntu 25.04, it’s now able to upgrade to this 25.10 Beta, by firstly installing all available updates, then launch “Update Manager” via the command below:

update-manager -d

And if everything goes well, you’ll be able to upgrade from Beta to 25.10 final by installing updates regularly through “Software Updater”.

NOTE: It’s IMPORTANT to backup your data before upgrading, as it may have bug that breaks your system.

For choice, the iso images of the Beta are available to download at the link below:

Don’t know why, but it misses amd64 iso image at the moment of writing. To workaround the issue, you may choose a download mirror instead to get the ISO.

And for non-GNOME users, there are also 10 official flavors features different desktop environments, which can be download from either their websites or this page.

Received — 18 September 2025 Linux News & Update

GNOME 49 Officially Released with New Video Player & Document Viewer

By:Ji m
18 September 2025 at 17:30

GNOME developer team finally announced the 49 release of this popular Linux Desktop environment!

If everything goes well, GNOME 49 will be the default desktop for Ubuntu 25.10, Fedora Workstation 43, and optional for Arch, Manjaro, etc Linux distributions.

The new desktop release introduced Showtime to replace Totem as the default video player, and Papers to replace Evince as the default document viewer.

Both use the GTK4 plus LibAdwaita libraries for the modern user interfaces with native look and touch friendly experience in today’s GNOME desktop.

Showtime video player

Gnome on Xorg (or Ubuntu on Xorg) is finally removed in the release, meaning there’s no longer Xorg/X11 session but only Wayland for GNOME. Though, the GDM login screen still can load other Xorg sessions, e.g., XFCE and Cinnamon.

It as well features new accessibility menu in login screen, with Quick Settings style buttons to toggle access to screen keyboard, screen reader, etc tools.

And, user can now control music playback and power-off/restart (though not enabled by default) from the lock screen.

GNOME 49 also improved Remote Desktop support, by adding multi-touch input support for client device with touch-screen, relative mouse input for better 3D app or gaming experience, and ability to have additional virtual monitors even when there aren’t additional displays physically present.

The image loading and the background wallpaper now are handled by the Glycin library, which is sandboxed to help prevent security exploits.

And, the release now supports changing the display brightness in the Quick Settings when HDR is enabled. While, these new HDR brightness controls support external displays, and allow multiple displays to be adjusted at the same time.

There are also many improvements to the Gnome Weather, Gnome Maps, Gnome Calendar apps, as well as following changes:

  • Move “Do Not Distrub” to Quick Settings.
  • Indicate when Preserve Battery Health enabled.
  • New wallpapers for HDR displays.
  • Improved Flatpak app data parsing for GNOME Software.
  • New option to disable “Super” shortcut key.
  • Support relative dials on tablet pads.
  • Hardware accelerated video encoding for Camera app.
  • Add ‘Donate’ button in About page.
  • Add configuration for pointing stick (aka TrackPoint)

For more about GNOME 49, see the official release note.

Get GNOME 49

As mentioned above, GNOME 49 will be available in Ubuntu 25.10, Fedora Workstation 43, etc Linux Distributions. And, Arch has already made the new release into GNOME Unstable repository.

For choice, there’s GNOME OS Nightly available for trying it out in either virtual machine (only support Gnome Boxes) or real hardware.

Dolphin Emulator 2509 now Emulates Cars 2 & Disney Infinity Smoothly

By:Ji m
18 September 2025 at 01:15

Dolphin, the free open-source GameCube and Wii game emulator, released new 2509 version today after another 3 months of development.

The new release of this game emulator revamped the settings UI, added some new features, and, it can finally emulate Toy Story 3, Cars 2, and Disney Infinity on powerful hardware at full speed.

It seems that Avalanche Software, the team behind the 3 games, don’t like Dolphin Emulator.

However, we’re going to go out on a limb and say that Avalanche Software, the team behind the Trio of Destruction™, weren’t so fond of us. Not only did they leave crude messages hidden in game data for “hackers” to find, but we also suspect that someone on their team was actively monitoring us.

While Toy Story 3 took a few years to get working, the writing was on the wall for quite some time that eventually it would be solved. So, for Avalanche’s next two games, we believe that they left a trap specifically designed to defeat Dolphin: the dcache suicide pill.

As the announcement said, the team added a trap in the games designed to stop Dolphin from running them in PC or mobile phone. But with the 2509 release, it finally fixed the issue by adding a patch allowing to run the Trio of Destruction™ fluidly on powerful hardware.

Besides that, the release revamped the settings UI, and introduced new “Map and Calibrate” button, allows to simply map and calibrate joystick at the same time.

It also added “Correct Time Drift” option under Advanced setting page. It pursues accurate overall elapsed time by running fast after stutters, which is useful for internet play.

Dolphin-emu 2509 also improved the general performance for Bluetooth Passthrough. It added the ability to load Realtek firmware, when trying to use a Realtek adapter with the feature for the first time.

Meaning now the Bluetooth Passthrough now supports modern Bluetooth adapters, such as TP-Link Bluetooth 5.3 Nano and Asus USB-BT500.

Other changes include:

  • Disable Dual Code mode by default for desktop, as it’s unstable and modern desktop PCs are overpowered for Dolphin. Though, there’s an option to turn it back.
  • Fix DSP-LLE Recompiler exception that could cause games not booting.
  • Add resource manager, which tracks the requests per frame for better performance loading textures, and tracks memory usage to prevent out of memory.
  • Load custom texture multi-threaded.

In addition, the Nintendo Switch 2 NSO GameCube Controller is not supported yet in the release, as it’s not fully implemented by the upstream SDL (Simple DirectMedia Layer).

Install Dolphin Emulater 2509

The software website provides official installer packages for Windows, macOS, Linux, and Android, which are available to download via the link below:

For Linux, it’s Flatpak package that runs in sandbox environment. Download either X86_64 for Intel/AMD or aarch64 for ARM64 platform, then install via command:

flatpak install /path/to/flatpak-file

NOTE: Ubuntu does NOT support Flatpak out-of-the-box, run the command below to install the daemon first:

sudo apt install flatpak

For Ubuntu users who prefer the native .deb package, I’ve made the packages into this unofficial PPA for Ubuntu 22.04, Ubuntu 24.04, and Ubuntu 25.04 on amd64 (Intel/AMD) and arm64 (e.g., Raspi, Snapdragon processors) platforms.

Simply open terminal (Ctrl+Alt+T) and run 3 commands below one by one to add PPA, refresh cache, and install the emulator:

sudo add-apt-repository ppa:ubuntuhandbook1/dolphin-emu
sudo apt update
sudo apt install dolphin-emu
Received — 17 September 2025 Linux News & Update

VLC 3.0.22 Adds Qt6 & AMD AI Frame Interpolation Support [Ubuntu PPA]

By:Ji m
16 September 2025 at 19:27

VLC, the popular free open-source media player, rolled out the new 3.0.22 version few days ago.

This is the twenty-third release of VLC 3.0 branch, code-name “Vetinari”, with the work of more than a year of development.

VLC qt dark interface

For Windows user, the release added official ARM64 build (for e.g., snapdragon processors), though it needs at least Windows 10 RS5 17763 / 1809.

It fixed the support for Windows XP SP3, though restricted the SystemParametersInfo calls. And, now it allows to rename, move, or delete the playing files on Windows.

The UI now can be build with Qt6, while Qt5 is still supported. And, it introduced a dark palette for the Qt interface.

For user with AMD graphics card, VLC 3.0.22 added AMD Fluid Motion Frames (AFMF) support. It’s a video enhancement technology that use AI to generate and interpolate frames between existing frames in a video, resulting more fluid and high frame rate video.

It also added dav1d-all-layers option for the dav1d decoder, to control whether or not to display all spatial layers. The feature is disabled by default, but you may enable it to make the decoder output every available spatial layer in the video higher-quality playback experience.

Other changes include A_ATRAC/AT1 (Sony ATRAC1 Codec) support in matroska, handle pictures in FLAC, as well as:

  • Assume subpictures are in SDR by default
  • Fix Opus channel mapping
  • Fix hardware decoding with VideoToolbox of XVID MPEG-4 video
  • Fix DVD CEA-608 captions parsing
  • Fix ProRes 4:4:4:4
  • Disable decoding using libdca, libmpeg2 and liba52 by default in favor of libavcodec
  • Handle mkv-use-chapter-codec option
  • Prevent FLAC seeking logic get stuck
  • Fix VOB/AOB LPCM/MLP detection failing occasionally
  • Cut QNap title on first invalid character
  • Fix display of certain JPEG files
  • Fix playback of very short ASF files (duration less than 1s)
  • Fix crashes in multiple demuxers
  • Fix SFTP seeking for large files on 32-bit OS
  • UPnP: remove SAT>IP channel list fallback
  • Use a better stretch mode in wingdi
  • Fetch missing device information when running in UWP

Install VLC 3.0.22

VLC 3.0.22 is not officially announced yet, though the source code now is available to download via the link below:

For Debian, the Deb Multimedia repository has made the package for Debian Unstable. And I’ve uploaded the new release package into this unofficial PPA for Ubuntu 22.04, Ubuntu 24.04 and 25.04.

To add the PPA and install VLC 3.0.22 in Ubuntu, open terminal (Ctrl+Alt+T) and run commands below one by one:

sudo add-apt-repository ppa:ubuntuhandbook1/vlc
sudo apt update
sudo apt install vlc -t "o=LP-PPA-ubuntuhandbook1-vlc"

Firefox 143.0 is out with Microsoft Copilot AI Integration

By:Ji m
16 September 2025 at 16:18

Firefox 143.0, the new monthly release of the popular free open-source web browser, is available to download.

The new release of Mozilla’s web browser added support installing websites as web apps for Windows user.

For running website, there’s a new “Add tab to taskbar” icon in the right corner of address bar. By clicking on it, will install the website as web app, and pin it into task bar.

The web app uses the website’s favicon as app icon. It runs in a separate header-less browser window without losing access to your installed add-ons. The features so far is only available for Windows, but not for Firefox installed from Microsoft Store.

For AI users, the new Firefox release added Microsoft Copilot support. It so far supports “Quick response” and “Smart (GPT-5)” chat mode in my case, with ability to generate text, image, and code, and analyze image. It’s free without login required, though a pad version is available for choice that needs an account.

Also for Windows, the browser release added support Windows UI Automation, which improves support for accessibility tools such as Windows Voice Access, Text Cursor Indicator and Narrator. Though, it’s a progressive roll-out feature that may be not ready for you.

When downloading a file in the Private mode, Firefox now asks whether to keep or delete it after that session ends. You have the choice to disable this behavior, by navigating to “Files and Applications” in Settings page.

Other changes in Firefox 143.0 include:

  • Pin a tab by dragging to the start of the tab strip.
  • Preview camera inside the permission dialog.
  • Display events and dates in address bar, for users in United States, United Kingdom, Germany, France, and Italy regions.
  • xHE-AAC audio playback on Windows 11 22H2+, macOS, and Android 9+
  • Expand Fingerprinting Protection by reporting constant values for several more attributes.
  • Various security fixes.

As well there are some change for developers, including:

  • updated grid sizing algorithm
  • <input type=color> now recognizes the CSS <color> format in addition to the color hex format
  • Uncheck the Group Similar Messages now prevents successive similar messages from being grouped.
  • Remove restrictions that prevent setting the display property on <details> elements, added a ::details-content pseudo-element to style the expandable/collapsible contents of those elements.”,

Get Firefox 143.0

The official release note and download link are available in Firefox website via the link below:

The link is not ready at the moment of writing, and this tutorial is written according to the Github release note.

For Ubuntu, user may either choose download the official package, or install it via Snap, Flatpak or Ubuntu PPA.

Received — 16 September 2025 Linux News & Update

VirtualBox 7.2.2 Fixed TPM 2.0 Emulation & KVM Conflict

By:Ji m
15 September 2025 at 22:12

Oracle VirtualBox, announced the first maintenance update for the 7.2 release series few days ago.

VirtualBox 7.2.2 fixed various crash issues and regressions in the major 7.2.0, it as well added some minor new features.

First, it fixed the issue that TPM 2.0 emulation does not work with certain guests, brings back secure boot, TPM based disk encryption, Windows Hello, etc features for your virtual machines.

For Linux hosts who use KVM (Kernel-based Virtual Machine), VirtualBox will shows “Guru Meditaion” critical error when trying to start a VM, due to conflict.

It fixed the conflict by using KVM APIs for acquiring/releasing VT-x, which however needs Kernel 6.16.0 or higher. For earlier Kernel releases, host needs to disable the KVM kernel module for being able to start VBox VMs properly.

VBox 7.2.2 also improved Windows 11 support by adding legacy light/dark themes from Windows 10. It added a new experimental type of e1000 adapter (82583V), though requires the ICH9 chipset. And, the virtual USB webcam is now part of the open source base package.

Others are primarily bug-fixes, including fixes for various crashes, such as VM startup crash on Arm host, VBox Manager crashes when VM has a lot of snapshots, when attempting to show error notifications too early, while removing all VMs from VM list, and when trying to add a VM on Linux host.

There are as well following issues that have been fixed in VirtualBox 7.2.2. They include:

  • virtual machine not able to start on Windows Arm host.
  • error notifications could not be displayed on snapshot deletion.
  • invisible menus on Linux host.
  • NAT network does not work.
  • USB/IP backend not work.
  • high CPU usage on Arm host when VM is idle.
  • Linux guest additions reporting unable to load shared libraries on start.
  • guest additions installation fail on Windows XP SP2 64-bit.

For more, see the official ChangeLog page.

Download & Install VirtualBox 7.2.2

The official installer packages and extension package are available to download in its website via the link below:

For Ubuntu, simply select download the DEB package for your system version from this page. Then click open with either Ubuntu Software or App Center and install.

Received — 15 September 2025 Linux News & Update

Dash to Panel updated with GNOME 49 (Ubuntu 25.10) Support

By:Ji m
15 September 2025 at 00:07

Dash to Panel, the popular Gnome Shell extension, updated few days ago with support for GNOME desktop 49.

Meaning you can now install it on Ubuntu 25.10, Fedora Workstation 43, and Arch etc Linux distributions to combine the top-bar and dash into single highly customizable task-bar.

GNOME 49 with Dash to Panel, plus ArcMenu

As you can see via the screenshot above, the extension provides a Windows 7+ and KDE Plasma look-like panel layout by moving the dash (the dock launcher) into the main panel and moving them to bottom (though you can then move the panel to any other screen edge).

Along with ArcMenu, an application menu extension, you can configure the Gnome desktop to be user friendly for those who’re switching from Windows.

The extension provides many configure options, allowing to customize the panel position, length and width, background color and opacity, and, change panel item position, visibility, icon size, font, and margin.

It as well support intelli-hide, configuring click action, scroll action, keyboard shortcuts, as well as other panel behaviors.

As GNOME updates its GJS API for every releases, the developers mostly need to port their extensions whenever a new release is out.

Now, Dash to panel has been updated to version 70 for GNOME 49 desktop, which will be released in next few days. And, it also introduced options to configure panel border color and thickness, and improved auto-hide with following changes:

  • Option to set time delay before revealing the panel.
  • Hide panel from window on same monitor.
  • And disable moving mouse cursor to edge to reveal panel.

New intellihide and border configure options

Dash to panel is sponsored and originally developed by Zorin OS. The new release of Dash to Panel added this sponsorship and provenance note in its About page.

Install Dash to Panel

To install Dash-to-Panel, either search & install Extension Manager (from either App Center or GNOME Software), then use the tool to search & install this extension.

Or, visit the extension web page in GNOME website via the link below, then use the ON/OFF switch in that page to install/uninstall the extension.

NOTE: you need to install the gnome-browser-connector package via either command below depends on your Linux Distribution:

sudo apt install chrome-gnome-shell
sudo dnf install gnome-browser-connector
sudo pacman -S gnome-browser-connector

Then install browser extension (click the link in that web page) and refresh before being able to install a GNOME Shell extension from web.

After installed and enabled the extension, it automatically disables the top-bar and dash (also Ubuntu Dock) and shows you the new panel, which can be configured by right-clicking on panel (blank area) and choose “Dash to Panel Settings”.

For the ArcMenu application menu, either get it via Extension Manager or use the ON/OFF switch on this page. Though, it does NOT support GNOME 49 at the moment of writing (I built it from source).

Received — 14 September 2025 Linux News & Update

VS Code 1.104 Added Auto Model Selection & Sign in with Google Account

By:Ji m
13 September 2025 at 23:59

Visual Studio Code 1.104, the August release of Microsoft’s code editor, was released few days ago.

The new release introduced Auto AI model selection support (Preview feature), allowing to automatically choose between Claude Sonnet 4, GPT-5, GPT-5 mini, and GPT-4.1 models, to get the optimal performance and reduce rate limits.

And, user can view the selected model and the model multiplier by hovering over the response in the Chat view.

In agent mode, the agent now explicitly asks for user confirmation before making edits to certain files. And you can configure file patterns to indicate which files require confirmation with chat.tools.edits.autoApprove setting.

The release also improved GitHub coding agent integration with chat editor actions, seamless transitions, better session rendering, and performance boosts. And, it enhanced chat sessions view with status bar tracking, multi-session support, rich descriptions, and expanded context menus.

The #codebase tool has been updated to use a new embeddings model for semantic searching for code in workspace, providing better results, while using less storage space (only 6% compare to previous model).

Other AI changes in VS Code 1.104 include:

  • Support for AGENTS.md files (Experimental).
  • Use custom chat mode in prompt file.
  • Support changing font family and font size of chat messages.
  • Sign in or sign up to GitHub Copilot with Google account is GA.
  • Add warning first time to enable global auto approve.
  • New setting for disabling and hiding GitHub Copilot AI features.
  • Add more terminal tools to core.
  • Math rendering in chat responses is GA and enabled by default.
  • Enhance terminal auto-approve usability and security.
  • Enable or disable each tool individually.

Besides AI changes, the release also added support configuring the color of window borders in Windows. User can choose to respect color theme settings, Windows settings, disable border colors, and a specific color in Hex, RGB, RGBA, HSL, HSLA format.

It added Accounts: Manage Extension Account Preferences command to the Command Palette, new setting to show tab index, ability to toggle editor tab bar scoll-bar visibility, as well as new “Ceate on GitHub” and “Preview on Github” buttons in built-in issue reporter.

The code editor can now reads and includes MCP server instructions in base prompt. It includes new setting options to allow all MCP servers or disable MCP entirely. And, it now disables MCP auto discovery by default.

As well, it improved NES suggestion by adding new setting to allow the language model to access the entire notebook, thus it will generate more accurate and higher-quality next edit suggestions.

Other changes include:

  • add Focus Chat Confirmation action.
  • new setting to configure how quickly inline suggesstions appear after you type.
  • add “Compare with Workspace” context menu option for worktree file, and Migrate Worktree Changes… command
  • remove the built-in bower.json IntelliSense
  • add Python Environments extension support for Pipenv
  • new experimental AI hover summaries for Python with latest Pylance.
  • Pylance IntelliSense enabled in all Python documents
  • finalized Language Model Chat Provider API
  • And much more!

Get VS Code 1.104

The official release note, and download links for Windows, MacOS, and Linux are available via the link below:

Ubuntu users may either search & install the Snap package from App Center (or Ubuntu Software for 22.04), or download the deb package from the link above.

While, a community maintained flatpak available is available for choice. See this guide for how to install them.

Received — 13 September 2025 Linux News & Update

Ubuntu Added NVIDIA 580 Driver Support for 24.04, 22.04 & 25.04

By:Ji m
12 September 2025 at 20:29

For user with NVIDIA graphics card, Ubuntu finally added official NVIDIA 580 driver packages for all current Ubuntu releases.

As you may know, NVIDIA 580 is so far the latest driver series for Linux, that was initially released one month ago. It’s a production branch driver qualified for enterprise and data center GPU use.

The 580 driver features Wayland fifo-v1 protocol support for apps/games running via Vulkan API, reducing visual inconsistencies and potential stuttering.

It enabled RMIntrLockingMode feature by default, which can help reduce stutter especially when using virtual reality (VR). As well, it implemented a feature to reduce time spent in the interrupt top half for low latency display interrupts by deferring the work until later. See HERE for more.

With NVIDIA 580.82.07, it also supports NVIDIA Smooth Motion on GeForce RTX 40 Series GPUs!

Install NVIDIA 580 driver in Ubuntu

Ubuntu made NVIDIA 580 driver (so far 580.65.06) package into the proposed repository for testing few weeks ago. Now, it finally goes official. And, you may install it by following steps.

1. Enable Restricted and Multi-verse repository

The proprietary driver is available through the restricted and multiverse repositories. They are usually enabled by default in Ubuntu desktop.

Just in case, you may launch “Software & Updates” utility to ensure:

Or, run the command below for Ubuntu Server to enable them:

sudo add-apt-repository restricted multiverse

You need to install software-properties-common package if the command does not work.

2. Update your system.

Before installing the driver, it’s better to install all available system updates, especially kernel updates (usually minor version updates), to prevent potential failure.

To do so, either use Software Updater or run the commands below in terminal (Ctrl+Alt+T):

sudo apt update

sudo apt upgrade

If there’s a kernel updates, restart computer to boot the new kernel.

3. Install NVIDIA 580 driver

NOTE: The driver version so far is nvidia 580.65.06. If you can’t wait to get 580.82.07 for NVIDIA Smooth Motion support on RTX 40 series GPUs, or you’re on old Ubuntu 20.04|18.04, then run command below to add the popular “Graphics Drivers” team PPA, which however is not officially supported.

sudo add-apt-repository ppa:graphics-drivers/ppa

For Ubuntu Desktop, you may now launch “Additional Drivers” utility, then select either driver below:

  • nvidia-driver-580 for general desktop and gaming purpose.
  • nvidia-driver-580-server for Ubuntu Server or computing purpose.

Then, click “Apply Changes” and  restart computer when installation done!

For server without GUI, simply run the commands below one by one to install the driver.

  • First, list all available drivers via command:
    sudo ubuntu-drivers list

    Skip the  “udevadm hwdb is deprecated. Use systemd-hwdb instead.” output. It’s a warning that does not matter.

  • Then, either install the desktop  or gaming use driver via command:
    sudo ubuntu-drivers install nvidia:580

    Or, install the server or computing purpose driver:

    sudo ubuntu-drivers install --gpgpu nvidia:580-server

Finally, restart computer and enjoy!

In addition, for Ubuntu with default GNOME Desktop, it by default fall back to Xorg session, you need to manually switch back Wayland session (if need) from login screen.

For NVIDIA Optimus laptop, it by default runs in hybrid mode. You can right-click on an application or game icon and choose “Launching using Discrete Graphics Card” to start it via NVIDIA GPU while leaving all others handled by integrated GPU.

Or, run command below in terminal to set environment variable, so all apps start from that terminal will be rendering via NVIDIA GPU:

export __NV_PRIME_RENDER_OFFLOAD=1 __GLX_VENDOR_LIBRARY_NAME=nvidia

If you want to run Ubuntu desktop with NVIDIA only mode, then launch “NVIDIA Settings” and navigate to PRIME Profiles page to make a switch.

For bugs and other issues, please report to HERE or HERE.

Received — 12 September 2025 Linux News & Update

Stop Wallpaper Moving when Switching Workspace in Ubuntu 24.04

By:Ji m
12 September 2025 at 00:00

For GNOME users who don’t like the default workspace switch animation, here’s an extension that can help!

When switching workspace (virtual desktop), the transition acts like sliding the desktop wallpaper along with the apps. This is “Sliding Panel” effect that’s also (seems to be) default in Windows and macOS.

If you like, it’s easy to use Android/iOS style swipe left or right switching home screen pages animation. In the case, the wallpaper is static during transitions, it works like only switching the app windows on your desktop.


This can be implemented by an extension called Static Workspace Background. And, here’s how to install it in Ubuntu 24.04, 25.04 and 25.10.

NOTE: This extension only works in Ubuntu and other Linux with GNOME Desktop!

Option 1: Install the Extension in Ubuntu 25.04 / 25.10

The extension so far supports GNOME 48 and 49, though it’s working good in my case in GNOME 46.

For Ubuntu 25.04 and 25.10, first launch App Center then search & install Extension Manager (filter by Debian package).

Next, use Extension Manager to search & install the “Static Workspace Background” extension under Browse tab and done!

Install via Extension Manager

Option 2: Install it in Ubuntu 24.04

The extension (version 49.0) so far works good in my case in Ubuntu 24.04 with GNOME 46, though it’s not officially supported.

1. First, go to the extension page in extensions.gnome.org (EGO):

In the “Download” section of the page, choose a Gnome version (e.g., v48) and select extension version 49.0 to download it.

2. Once you downloaded the extension package (usually .zip archive), press Ctrl+Alt+T to open terminal and run commands below one by one to install.

  • First, run command to make sure your GNOME is configured to allow users to install extensions in their home folder, though it’s usually enabled by default.
    gsettings set org.gnome.shell allow-extension-installation true
  • Next, disable the validation of extension version compatibility by running command:
    gsettings set org.gnome.shell disable-extension-version-validation true
  • Finally, install the extension (.zip archive you just downloaded) via command:
    gnome-extensions install /path/to/zip-archive

    Here replace /path/to/zip-archive by drag’n’dropping it from file manager into terminal!

3. (Optional) After that, you have the extension installed to ./local/share/gnome-shell/extensions directory.

In case you want to re-enable the validation of extension version afterwards, run the command below to edit the metadata of that extension:

gnome-text-editor ~/.local/share/gnome-shell/extensions/static-workspace-background\@CleoMenezesJr.github.io/metadata.json

When file opens, either add “46” in “shell-version” section or simply replace any GNOME version (e.g., 49) to 46.

Then save the file, and re-enable the extension version compatibility validation if you want:

gsettings reset org.gnome.shell disable-extension-version-validation

4. Finally, log out and back in. Launch either “Extension Manager” or “Gnome Extensions” app (both available in App Center) to enable the extension.

Warzone 2100 Released 4.6.0 with Spectator Host Mode

By:Ji m
11 September 2025 at 19:50

Warzone 2100, the free open-source 3D real-time strategy game, released new major 4.6.0 version few days ago.

This is a big release that features revamped options menu. The options menu now has a clean design with reorganized options, which as well introduced many new toggle options, such as show FPS / Unit Counts, Group Reporting, Radar Zoom, default AI and more.

For multi-player mode, the release added option to start hosting in Spectator Host mode, in which case the host is a spectator in the game.

When start hosting in this mode, it also allows to set blind lobby mode to hide players’ true identities until the game starts, or blind game to hide players’ true identities until the game ends, while the host (as a spectator) can see them in both modes.

The 4.6.0 release also massively improved high-quality water effects, improved the performance for loading, path-finding, target selection, networking, and high-object-count situations.

It revamped Lobby game browser with new design, more filtering options, more room information, and increased responsiveness. And, it now automatically attempts multiple graphics backends on first-run, and defaults to Vulkan in more cases, when possible.

For Windows, it now provides single .exe installer (instead of three) to install the game on all the X86, X86_64, and ARM64 computers, along with option to choose install for either all users or current user only.

Warzone 2100 also introduced many additional tweak options for the Original Campaign. They include:

  • Infinite Time – missions have no timer when possible.
  • Victory Hints – displays a console message every few minutes showing victory related information.
  • Finale Fun – activate Final Gamma mission bonus content.
  • Insane Spawns – enable additional enemy spawns and behavior for Insane difficulty.
  • Non-Insane Spawns – toggle Insane Spawns for Hard difficulty and below.
  • Fast EXP gain – 2x unit experience point gain.
  • TowerWars – player gets significantly stronger structures.

There are as well many in game changes, including:

  • Bump repair spread area from 6 to 10 tiles.
  • Update Fractured Kingdom to v1.4.
  • Give ACs some basic splash damage.
  • Specify missing research names so research appears in the Stats objects.
  • Add “Defending Your Base” guide topic.
  • Add Particle Gun Laser weapon.
  • Adjust Emplacement-PlasmaCannon cost 200 -> 350, buildPoints 400 -> 500.
  • Increase spinAngle for Tracks in MP 45->65 to allow better unit packing.

For more, see the official release note.

Download & Install Warzone 2100 4.6.0

The official installers for Linux, macOS, ans Windows are available to download at the link below (under Assets section):

For Ubuntu 22.04 and Ubuntu 24.04 on modern Intel/AMD platform, select download the .deb package then click open & install via either Ubuntu Software or App Center.

Warzone 2100 DEB package

For all Ubuntu editions on Intel/AMD and ARM64, user may also choose install the Snap package (runs in sandbox) from App Center or Ubuntu Software.

warzone 2100 Snap package

While, there’s also Flatpak package (also runs in sandbox) available to install in most Linux desktops.

Received — 10 September 2025 Linux News & Update

SuperTuxKart 1.5 RC2 added GUI option to Choose Vulkan or DirectX 9

By:Ji m
9 September 2025 at 23:12

SuperTuxKart, the 3D kart racing game, announced the second release candidate for the next 1.5 release few days ago.

Due to inner team disagreement, the release of version 1.5 was delayed. And, it explained the reason by announcing SuperTuxKart Evolution (the name of the next major release) few days ago.

Now the problem has been fixed. And, SuperTuxKart 1.5-rc2 is available as the first update afterwards.

The new release candidate introduced a graphical option in “Graphics” settings page, allowing to easily switch rendering driver to Vulkan or DirectX9 (Windows only), without having to edit the configuration file. While the default is still OpenGL.

In addition, the release migrated the online services to a new, more powerful server, which fixed occasional server disconnect issue due to sporadic overloads and improved server list loading performance.

As well, a new forum is introduced for sharing your tips, artistic creations, and discussing about the game’s development. For more, see the official announcement.

Download SuperTuxKart 1.5 RC2

The official packages for Windows, Linux, macOS, Switch, and Android, are available to download via the link below:

For Linux, select download the .tar.gz tarball depends on your CPU. They include x86_64 for modern Intel/AMD, x86 for old 32-bit CPU, arm64 for 64-bit ARM (e.g., Snapdragon processors), 32-bit armv7, and RISC-V processors.

If you don’t even know your CPU processor architecture type, open terminal and run uname -m command to tell.

After downloaded the tarball, decompress, then run the run_game.sh file to launch the game and enjoy!

Received — 9 September 2025 Linux News & Update

Euphonica MPD Client added official Flatpak package for Linux

By:Ji m
8 September 2025 at 18:03

Euphonica, the modern GTK4 based MPD client, finally added official package for Linux. Here’s how to install it in Ubuntu desktop.

For those who never heard of Euphonica, it’s a client app for Music Player Daemon (MPD) that provides a modern user interface for managing large local music collection (tens of thousands of songs).

It uses GTK4 + LibAdwaita for a modern UI designed for GNOME (though also works in other desktops), and support basic MPD features, such as playback control, queue reordering, ReplayGain, crossfade and MixRamp configuration.

It can automatically fetch album arts, artist avatars from Last.fm and Music Brainz, and use the current album art for the app window background.

There are also synced song lyrics support through either the 2 external sources alongwith LRCLIB or local files, as well as MPRIS integration, allowing to control you MPD instance via keyboard shortcuts and shell applets without having to keep the app window open.

As you see in the screenshot, the client also has a built-in visualiser, which can read from either FIFO output (not work for Flatpak so far due to sandboxing) or PipeWire output. And, it provides few basic options to switch between and configure them.

Other features include:

  • Playlist browser and editor.
  • Album, artist, and folder view.
  • Asynchronous search for large collections.
  • Volume knob with dBFS readout support.
  • Laze init for smoother performance.
  • Manage MPD sound output.

As a young application, it’ll keep updating with new features and improvements. See it in Github page for more details.

See more screenshots about Euphonica:

Install Euphonica via the new Flatpak package

The app added official Flatpak package, a few days ago, for running the MPD client in sandbox on most Linux (amd64 and arm64).

Linux Mint 21+ and Fedora Workstation (with third party repository enabled) may search & install it from either Software Manager or GNOME Software.

Euphonica in Mint software manager

Tips: the Flatpak package is NOT verified at the moment, though officially maintained by software developers, so you may need to configure your Software Manager first before being able to install it.

For Debian, Ubuntu, and other Linux, do the steps below one by one to install the package:

  • First, run command in terminal (Ctrl+Alt+T) to install the Flatpak daemon package:
    sudo apt install flatpak

    Other Linux may follow the official setup guide for Flatpak support

  • Next, use the command to install the Flatpak app package:
    flatpak install https://dl.flathub.org/repo/appstream/io.github.htkhiem.Euphonica.flatpakref
  • For future updates, run the command to check & install:
    flatpak update io.github.htkhiem.Euphonica

NOTE: After enabled Flatpak support, you need a log out and back in to apply environment variable changes, or you won’t see the app icon from menu.

And for beginners, you need to install & setup MPD daemon before being able to play & manage your local music collection.

Uninstall:

To uninstall Euphonica MPD client, use command:

flatpak uninstall --delete-data io.github.htkhiem.Euphonica

Here skip --delete-data if you want to keep local app data, and run flatpak uninstall --unused to remove useless run-times (e.g., Gnome platform which was also installed in sandbox).

Received — 6 September 2025 Linux News & Update

GNOME 49 RC Released! Re-enable X11 Support in GDM

By:Ji m
5 September 2025 at 21:17

The release candidate (RC) of GNOME Desktop 49 is out for testing purpose!

This is the final development release for GNOME 49, while the stable release is planned for September 17th. It added some new features, various bug-fixes, and improvements.

As you may know, GNOME 49 removed the ‘Gnome on Xorg’ session since the alpha release, which as well disabled X11 sessions in GDM.

In this RC release, it re-enabled X11 by default in GDM, meaning there’s NO “Gnome on Xorg”, but it still can load other X11 based desktop sessions, e.g., XFCE, MATE, and Cinnamon, from the login screen.

GDM 49 re-enabled ability to load other X11 desktop sessions.

Glycin, the image loading library, now has experimental JPEG 2000 loading support, though it’s disabled by default. And, since this RC, the GNOME background images are now loading by this library.

For GNOME Remote Desktop, the release added support for relative mouse motion events, which is commonly used in 3D apps, e.g., video games or design software, to control a virtual camera or object orientation.

The gnome-remote-desktop also added support for extending the desktop with a virtual monitor. I’m not sure how it differs to the virtual monitor functionality introduced since GNOME 42, but it should make mouse movement with embedded cursors more performant. See the merge request for details.

Other changes include:

  • Add button in Accessibility to launch Orca preferences
  • Disable the org.freedesktop.ScreenSaver proxy service on the login screen
  • Indicate “Battery Health” (battery charge limit) status.
  • F5 and Ctrl+R keyboard shortcuts to refresh Gnome Weather.
  • Insert ~/ instead of ~ in Nautilus path-bar when pressing ~.
  • Add Advertise Broadcast RGB support, and more.

And, below are the big changes introduced in last Beta & Alpha releases:

  • Added Showtime video player and Papers document viewer
  • Use glycin as backend for decoding and saving images for gdk-pixbuf and image viewer.
  • Move “Do Not Distrub” to top-right Quick Settings menu.
  • Added configuration for pointing stick (aka TrackPoint)
  • Support relative dials on tablet pads.
  • Option to disable “Super” (Windows key) shortcut key.
  • Add music playback control in lock screen.
  • Option to show “Restart” and “Power-Off” menu options to the lock screen.
  • Per-monitor brightness control in Quick Settings.
  • Hardware accelerated video encoding for Camera app.
  • Add ‘Donate’ button in About page.

How to Get GNOME 49 RC

GNOME provides an installer image for testing and porting extensions. Along with the announcement, they are available via the link below:

For Ubuntu, GNOME 49 RC has been added for Ubuntu 25.10 Deb build, just launch “Software Updater” and install all available updates to get it. For Arch Linux, it has been added into the GNOME Unstable repository.

Received — 5 September 2025 Linux News & Update

Linux Mint 22.2 Released with New Fingerprint Manager App

By:Ji m
4 September 2025 at 19:15

Linux Mint, the popular Ubuntu LTS based Linux Distro, announced new 22.2 point release today.

Linux Mint 22.2, code-name “Zara”, is the second update for the 22 release series that’s based on Ubuntu 24.04 with support until 2029.

The release introduced new XApp called Fingwit, which provides a graphical interface to record and manage your fingerprints, and configure to enable fingerprint authentication for login screen (screensaver), sudo commands, and admin apps.

The app uses system default libfprint daemon to detect if your computer has a supported fingerprint reader. Meaning it won’t work (e.g., ThinkPad T480s in my case) for those using third-party libraries.

Besides new XApp, there are many improvements to other apps. The Sticky app now has rounded corners (top 2 corners), supports running in Wayland session, and a new d-bus method has been added to reload the notes.

The Hypnotix IPTV player app now has 2 new “Theater Mode” and “Borderless Mode”, allowing to toggle the app window to hide all the controls and menus, and even window borders. And, it’s now faster on startup and searching with large playlists.

Linux Mint 22.2 also improved its login screen (handled by LightDM display manager). It now displays user avatars, and applies blur effect to the panel and user selection dialog box for better appearance.

image from linuxmint.com

Linux Mint supports Flatpak out-of-the-box. As so many great applications use LibAdwaita for their modern user interface, the release patched LibAdwaita with theme support, and added it support for Mint-Y, Mint-X and Mint-L themes.

Some apps, e.g., gnome-calendar, baobab (Disk Usage Analyzer), and simple-scan (Document Scanner), have been updated with the new LibAwaita library, so they follow the themes mentioned above.

Other changes in the release include:

  • Add accent colors support for LibAdwaita Flatpak apps.
  • Fork LibAdwaita with libadapta with theme and extra features support.
  • New xapp-aiff-thumbnailer thumbnailer for cover art in .aiff audio files
  • Add iOS app for Warpinator file sharing utility.
  • Configurable EDID-based color correction (disabled by default) in XViewer.
  • Description field is now editable in WebApp Manager.
  • Add possibility to use leading zeros when renaming multiple files and using enumerations
  • Add description in Software Manager to tell the difference between Flatpak and system packages.
  • Improve search accuracy in MATE application menu.

For more, see the official release note.

Download or Upgrade to Linux Mint 22.2

The official Mint 22.2 .iso images for Cinnamon, MATE, and XFCE desktops, are available to download via the link below:

For Linux Mint 22.1, simply launch Update Manager, refresh and install new version of mintupdate or mint-upgrade-info. Finally, go to Edit -> Upgrade to “Linux Mint 22.2 Zara” to start the upgrading process.

Received — 4 September 2025 Linux News & Update

GIMP 3.1.4 Released! Link Layers, Vector Layers & MyPaint Brushes 2

By:Ji m
4 September 2025 at 00:08

GIMP 3.1.4, the second development release for next major 3.2, was released few days ago!

The new release of this popular image editor introduced some exciting new features, including link layers, vector layers, MyPaint brushes version 2, and more.

First, by using File -> Open as Link Layer... or press Ctrl+Alt+Shift+O on keyboard, user can now open an image as link layer.

In the case, you may make changes to the image file via any other image editors (e.g., Krita, Inkscape), and see it instantly updated inside GIMP!

You can also non-destructively scale and rotate the link layer without impacting the quality of the original image. And, use “Discard Link Information” context menu option to convert it to a normal raster layer.

GIMP 3.1.4 also implemented the vector layer feature. After drawing a path (via Paths tool), user can now click “Create New Vector Layer” button to generate a vector layer associated with that path, then set the fill and stroke colors and other properties.

You can continue to edit the path, as the vector layer will automatically update. It as well has a “Discard Vector Information” context menu option to convert it to a regular raster layer.

The release also updated MyPaint Brushes to version 2, along with 20 new brushes from the Dieterle set. They include the long requested arrow brush and Posterizer brush.

For Ubuntu users, GIMP is going to make official SNAP package, which can be installed directly from Ubuntu Software or App Center, and also be installed in other Linux.

The current GIMP Snap package is maintained by the snapcrafters developers. The GIMP developers are talking to them to pass over the ownership, so they can maintain it as official package.

GIMP Snap package in APP Center. GIMP to take over this community maintained package

Other changes in GIMP 3.1.4 include:

  • New GEGL Filter Browser.
  • New Gain slider in MyPaint Brush tool, to adjust strength of input pressure.
  • Add boldd, italicize, underline keyboard shortcuts for Text tool.
  • Live preview outline color for text tool.
  • Add import support for HRZ, signed JPEG 2000, non-DXT PAA textures, Seattle Filmworks (SFW93A, SFW94A).
  • Support loading TIFF layer visibility, blending modes, and color tags
  • Support System Colors theme for macOS.
  • New API to change the paintbrush fade length and repeat settings.
  • New public API for creating vector layers.
  • Add ARM64 build of nightly Flatpak pacakge.

Compare to current GIMP 3.0 stable, there are as well many changes introduced since 3.1.2:

  • Add system color scheme support for Linux (Flatpak package) and Windows.
  • New brush preview toggle.
  • New overwrite paint mode.
  • New Outline Direction option for text tool
  • Import support for Photoshop RGB and grayscale patterns, APNG animations, multi-layer OpenEXR images, Over-the-Air Bitmap format, Jeff’s Image Format (.jif).
  • Export Krita .kpl, PSB Photoshop Large format, JPEG 2000, HEJ2.
  • Support Photoshop .acv and .alv presets in GIMP Curves and Levels filters.

For more about GIMP 3.1.4, see the official release note.

How to Install GIMP 3.1.4

The official GIMP packages for Windows, Linux, and macOS are available to download at the link below:

Linux user may choose the non-install AppImage package, which can be run directly to launch the image editor, after adding executable permission.

NOTE: Ubuntu since 22.04 needs to run command in terminal (Ctrl+Alt+T) to install required library first:

sudo apt install libfuse2

Or, run the command below to install the Flatpak package instead which runs in sandbox environment.

flatpak install https://flathub.org/beta-repo/appstream/org.gimp.GIMP.flatpakref

If you already have GIMP 3.1.2 installed as Flatpak, then try the command below to update it:

flatpak update org.gimp.GIMP//beta

If you have both the Devel and Stable versions of GIMP installed as Flatpak, and don’t know which icon to use, then use the command below to start the GIMP 3.1.4 from terminal:

flatpak run org.gimp.GIMP//beta

NVIDIA 580.82.07 Added Smooth Motion for RTX 40 Series GPUs

By:Ji m
3 September 2025 at 19:48

For NVIDIA users with GeForce RTX 40 Series GPUs (e.g., 4060, 4090), it finally supports Smooth Motion frame generation for better gaming performance in Linux.

NVIDIA Smooth Motion is a feature designed for games without native DLSS support. It uses AI to generate additional frames between two rendered frames for overall smoothness of game-play.

The feature was initially added for Linux via NVIDIA 575 driver series, but only for RTX 50 series GPUs. Now with NVIDIA 580.82.07, the feature also works for RTX 40 GPUs. While, Windows users will probably get it in 590 driver series.

As the latest production branch driver, NVIDIA 580 also added fifo-v1 protocol support to reduce visual inconsistencies and potential stuttering for apps/games running in Wayland with Vulkan backend.

It as well enabled RMIntrLockingMode feature by default, which can help reduce stutter especially when using virtual reality (VR).

There are as well new “OutputBitsPerComponent” MetaMode attribute, allowing to control the number of bits per color component transmitted via a display connector in Xorg with multiple displays.

Other changes in NVIDIA 580 so far include:

  • Feature to reduce time spent in the interrupt top half for low latency display interrupts by deferring the work until later.
  • Update GPU clock value reporting in nvidia-settings, NVML, and nvidia-smi to show clocks before thermal and idle slowdowns.
  • Fix Bigscreen Beyond Head Mounted Displays compatibility.
  • And various bug-fixes.

How to Install NVIDIA 580.82.07

The official package and release note for NVIDIA 580.82.07 is available at the link below:

For Ubuntu, it’s HIGHLY recommended to wait the Ubuntu’s official package, though it’s still in proposed testing stage at the moment.

Or, use either the popular “Graphics Drivers” team PPA which now contains NVIDIA 580.82.07 for Ubuntu from 18.04 to 25.04, or “Canonical Kernel Team” team PPA for 22.04 and higher.

To add the Canonical Kernel Team PPA, open terminal (Ctrl+Alt+T) and run command:

sudo add-apt-repository ppa:canonical-kernel-team/nvidia-graphics2

Then, you may either use “Additional Drivers” (graphical tool) to install nvidia-580 for desktop, or nvidia-580-server for server computing use.

Or run one of the commands below instead in terminal to install the driver:

sudo ubuntu-drivers install nvidia:580
sudo ubuntu-drivers install --gpgpu nvidia:580-server
Received — 3 September 2025 Linux News & Update

Compile FFmpeg 8.0 in Ubuntu with NVIDIA GPU Acceleration

By:Ji m
2 September 2025 at 21:44

This is a step by step guide shows how to manually compile & install FFmpeg 8.0 from source with NVIDIA GPU acceleration support through cuda-nvcc and enable-libnpp in Ubuntu 24.04 & 22.04.

FFmpeg 8.0 so far is the latest version of this popular multi-media library, that features APV and ProRes RAW decoders, hardware accelerated VP9 and VVC encoding, and new Vulkan compute-based codecs support for FFv1 (encoding and decoding).

This tutorial is tested in Ubuntu 24.04 & 22.04, though it should also works in Debian, Linux Mint

Before Getting Started

FFmpeg now supports hardware accelerated NVENC encoding (AV1, H.264, HEVC) and NVDEC decoding (H.264, HEVC, MJPEG, MPEG-1/2/4, VP8/VP9, VC-1, AV1) through ffncodec, and scale_cuda filters to replace scale_npp.

They are usually enabled by default in FFmpeg packages from Ubuntu system repository or PPAs (e.g., my PPA and Rob Savoury’s PPA).

Meaning, you don’t need to build FFmpeg by yourself, just install it from one the previous sources, then you have the basic NVIDIA GPU acceleration support.

FFmpeg in Ubuntu & PPA repositories has nvenc & nvdec out-of-the-box

You ONLY need to follow this tutorial, when you need specific or more advanced CUDA-dependent features and/or scale_npp only filters.

And, you need:

  • a NVIDIA GPU that support NVENC/NVDEC (see the support list).
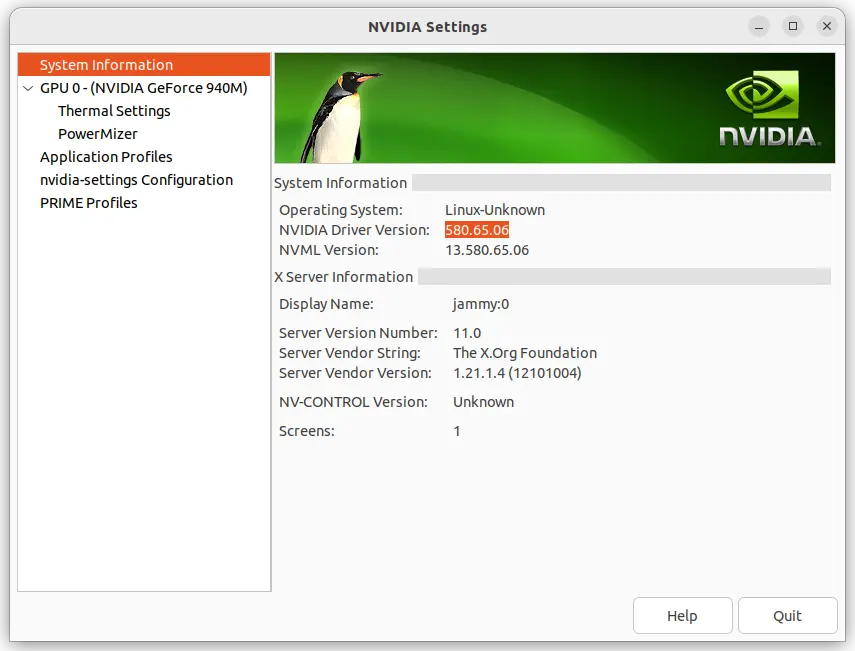
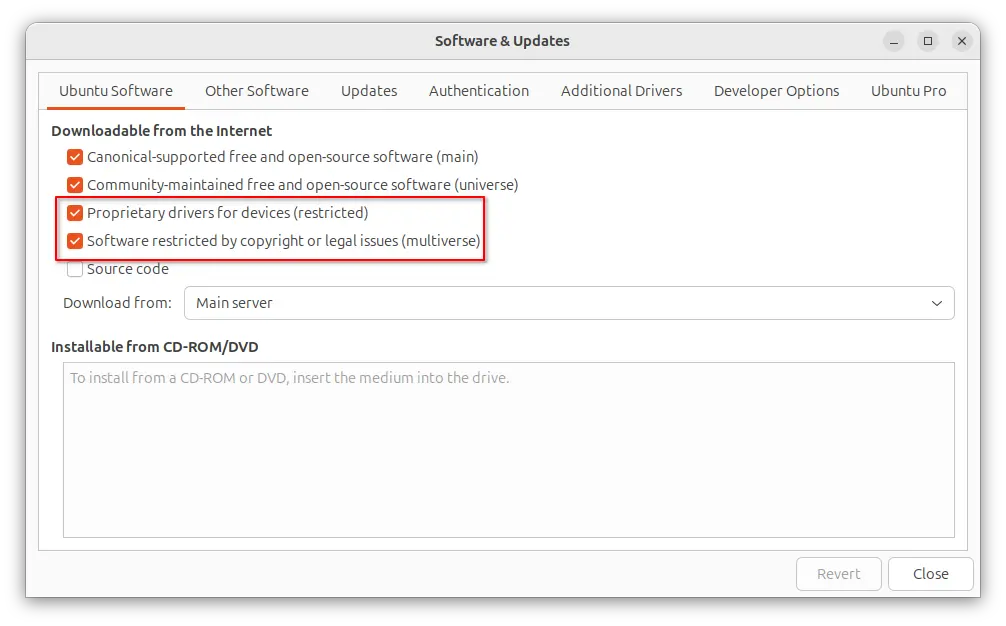
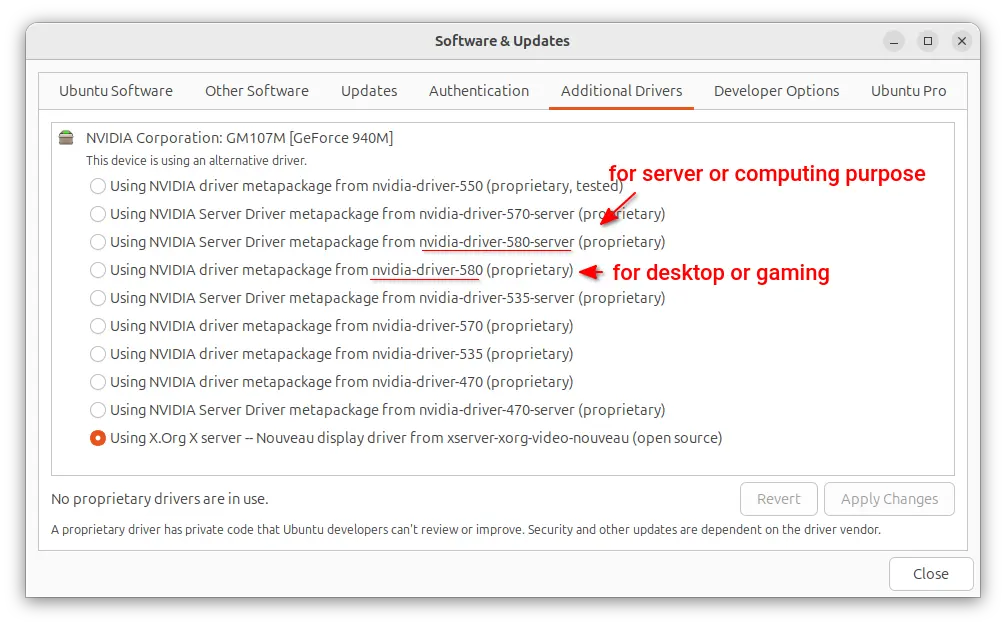
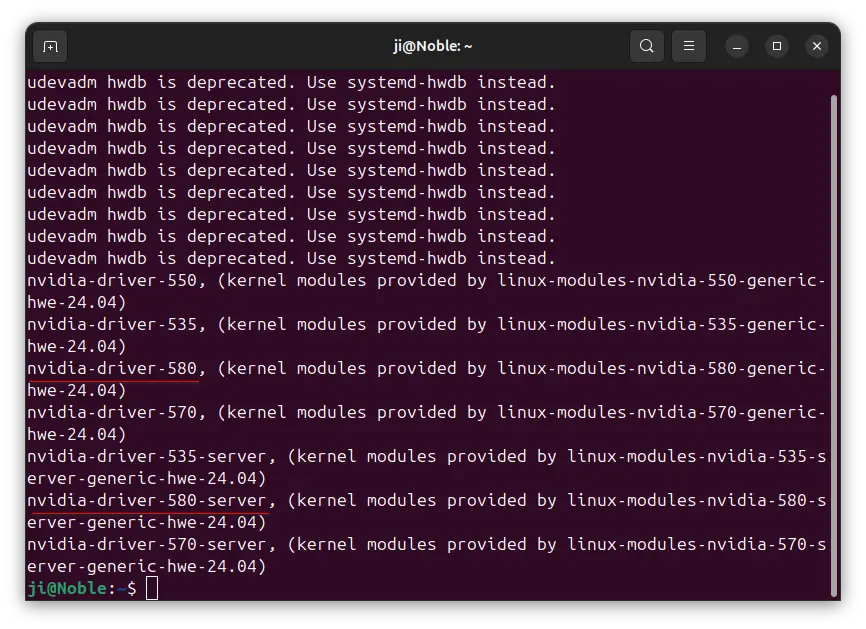
  • Install NVIDIA proprietary driver, though either Additional Drivers utility or ubuntu-drivers CLI tool. See the official guide.

Step 1: Install Nvidia Codec SDK headers

nv-codec-headers, the FFmpeg version of Nvidia Codec SDK headers, is available in Ubuntu repositories, but a bit old.

For the most recent version, press Ctrl+Alt+T on keyboard to clone the source code:

git clone https://git.videolan.org/git/ffmpeg/nv-codec-headers.git

Run sudo apt install git to install git first, if you don’t have it.

Then, run the command below to navigate to the source folder, and install it:

cd nv-codec-headers && sudo make install

Step 2: Install Build Dependencies

To build the source, we need some dependency libraries.

First, run command in terminal (Ctrl+Alt+T) to install the essential dependency packages:

sudo apt install build-essential nasm cmake libtool libc6 libc6-dev unzip wget libnuma1 libnuma-dev nvidia-cuda-toolkit pkg-config

For choice, you may install more via sudo apt install package-name (replace package-name) for more features, e.g.,

  • libvulkan-dev, for Vulkan compute-based hardware acceleration (the package in 22.04 is outdated).
  • libjxl-dev, for JPEG-XL support (the package is not available in 22.04).
  • libgme-dev, for Game Music Emu.
  • libvpx-dev, for VP8, VP9 decoding and encoding.

And, below are the packages I use for building FFmpeg into PPA:

libmp3lame-dev zlib1g-dev libvorbis-dev libsdl2-dev libxvidcore-dev liblzo2-dev texinfo libgcrypt-dev libx264-dev libtheora-dev libgsm1-dev libsnappy-dev libdc1394-dev libbs2b-dev libspeex-dev libopencore-amrwb-dev libfreetype-dev libopenmpt-dev nasm libopenjp2-7-dev libharfbuzz-dev libvdpau-dev libtesseract-dev libopencore-amrnb-dev libxfixes-dev libgl-dev libbz2-dev libssl-dev libass-dev libasound2-dev libva-dev libjack-jackd2-dev libvpx-dev frei0r-plugins-dev libvo-amrwbenc-dev libsctp-dev libopus-dev gnutls-dev frei0r-plugins-dev libsoxr-dev linux-libc-dev ladspa-sdk libaom-dev libfontconfig-dev libfdk-aac-dev libpulse-dev libzvbi-dev libiec61883-dev libavc1394-dev libleptonica-dev liblzma-dev libx265-dev libxext-dev libcaca-dev libopenh264-dev librubberband-dev libwebp-dev libgme-dev glslang-dev opencl-c-headers libshine-dev libfribidi-dev libxcb1-dev libxcb-shm0-dev libxcb-xfixes0-dev libcdio-paranoia-dev libcodec2-dev ocl-icd-opencl-dev libzimg-dev libmysofa-dev libbluray-dev libzmq3-dev libaribb24-dev liblensfun-dev liblilv-dev flite1-dev librsvg2-dev libtwolame-dev libopenal-dev librabbitmq-dev libvulkan-dev libxavs2-dev libsrt-gnutls-dev libdavs2-dev libomxil-bellagio-dev libxml2-utils libsmbclient-dev libchromaprint-dev libunwind-dev libdvdnav-dev libdvdread-dev

Step 3: Compile & install FFmpeg 8.0

1. Download & extract the source

Now download FFmpeg 8.0 source tarball from its website, decompress, then right-click on extracted folder and choose “Open in Terminal” to open terminal with source folder as working directory.

open FFmpeg source folder in terminal

For Ubuntu server without GUI, run the command below to download the source:

wget https://ffmpeg.org/releases/ffmpeg-8.0.tar.xz

Then, decompress and navigate to the source folder:

tar -Jxf ffmpeg-8.0.tar.xz && cd ffmpeg-8.0

2. Configure the source

Now, configure the source by running command:

./configure --enable-nonfree --enable-cuda-nvcc --enable-libnpp --extra-cflags=-I/usr/local/cuda/include --extra-ldflags=-L/usr/local/cuda/lib64 --disable-static --enable-shared

Here, you may add more configure options, e.g.,:

  • --enable-libvpx, need ‘libvpx-dev’ to be installed.
  • --enable-vulkan, need ‘libvulkan-dev’ to be installed.
  • --enable-libjxl, need ‘libjxl-dev’ to be installed.

And even more. See either configure file, or run ./configure --help to list more choices.

Configure the source

3. build & install FFmpeg

If configure is done without error, you may then run the command below to build it:

make -j4

Here j4 means to start 4 threads in parallel. You may replace it with j8, or even j16 depends on your CPU, or use -j$(nproc) to use all CPU cores.

build with ‘make’ command

If everything goes well, finally install FFmpeg by running command:

sudo make install

install ffmpeg via ‘make install’

Step 4: Verify

After installed FFmpeg, run the command below to print its version and configuration.

ffmpeg

If it said error while loading shared libraries, then run command to add /usr/local/lib as LD_LIBRARY_PATH environment variable, which works for current terminal session.

export LD_LIBRARY_PATH="/usr/local/lib:$LD_LIBRARY_PATH"

Or, write the command into end of .profile or .bashrc file in user home to make it permanent for current user.

Finally, try to transcode with GPU acceleration via command (replace input.mp4 with path to an existing media file):

ffmpeg -hwaccel cuda -i input.mp4 -vf scale_npp=-1:720 -c:v h264_nvenc -preset slow output.mkv

Uninstall:

To uninstall, open the source folder again in terminal and run command:

sudo make uninstall

If you’ve already deleted that folder, then manually remove the executable files from /usr/local/bin and libraries from /usr/local/lib:

❌